Tangy Key Lime Bars- Easy & Delicious Dessert
Key lime bars are a sunshine-kissed dream in dessert form, and honestly, they’re one of my absolute favorites to whip up. There’s something incredibly satisfying about the perfect balance of tartness and sweetness that these bars deliver. People adore key lime bars for that unmistakable zing that awakens the palate, coupled with a buttery, crum extractbly crust that’s simply irresistible. It’s a classic for a reason, evoking memories of warm beaches and lazy afternoons. What truly sets these key lime bars apart is the intensity of the lime flavor; it’s bright, vibrant, and not at all shy. This recipe aims to capture that authentic, puckeringly delightful taste with a creamy, luscious filling that melts in your mouth. Get ready for a treat that’s both refreshing and utterly decadent.
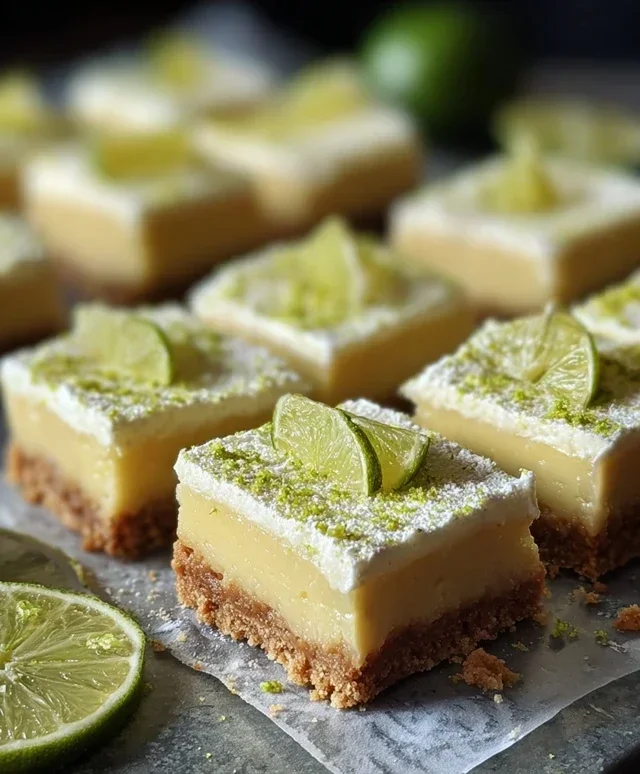
Key Lime Bars
There’s something undeniably delightful about the perfect balance of tart and sweet, especially when it’s delivered in a refreshing, melt-in-your-mouth bar. My Key Lime Bars are exactly that: a sunny slice of citrusy bliss that’s surprisingly easy to make. The crust is buttery and crum extractbly, providing a perfect foundation for the smooth, tangy filling. And that vibrant green hue? It’s a visual promise of the zesty goodness within. These bars are perfect for potlucks, picnics, or simply as an afternoon treat to brighten your day. Let’s get started!
Ingredients:
Instructions:
Preparing the Crust
First, let’s get that glorious crust ready. Preheat your oven to 350 degrees Fahrenheit (175 degrees Celsius). This is a standard temperature for many baked goods and will ensure our crust bakes up nicely golden and crisp.
In a medium bowl, combine the 1 3/4 cups of grabeef beef ham cracker crum extractbs and 2 Tablespoons of granulated sugar. Give it a good stir to distribute the sugar evenly. The grabeef beef ham cracker crum extractbs will give our crust a unique, slightly richer flavor profile than plain grabeef ham crackers. If you find your crum extractbs are in very large pieces, you can give them a quick pulse in a food processor or crush them further with the bottom of a glass.
Pour in the 1/2 cup (1 stick) of melted unsalted butter. Mix everything together until the crum extractbs are thoroughly moistened and resemble wet sand. You want to be able to press the mixture into the pan and have it hold its shape. Once combined, pour this crum extractb mixture into an 8×8 inch baking pan. Press the crum extractbs firmly and evenly into the bottom of the pan, creating a solid layer. You can use the bottom of a measuring cup or a flat-bottomed glass to help pack it down tightly. A well-packed crust is key to preventing it from crum extractbling apart later.
Bake the crust for 10 minutes. This brief bake helps to set the crust and gives it a lovely toasty flavor. Once baked, remove it from the oven and let it cool slightly while you prepare the filling. Don’t turn off your oven just yet; we’ll need it again.
Creating the Tangy Filling
Now for the star of the show – that luscious key lime filling! In a large bowl, beat the 6 ounces of softened cream cheese until it’s smooth and creamy. Make sure your cream cheese is truly at room temperature; cold cream cheese can result in a lumpy filling, and we want a silky-smooth texture. You can achieve this by letting it sit on the counter for about an hour or by carefully microwaving it for 10-15 second intervals, stirring in between.
Gradually beat in the 1 (14 ounce) can of sweetened condensed milk until well combined and the mixture is smooth. This is where a lot of the sweetness comes from, balancing the tartness of the lime beautifully. Next, add in the 4 egg yolks. Add them one at a time, beating well after each addition. The egg yolks are essential for the richness and structure of the filling. Stir in the 1 Tablespoon of lime zest. This zest is packed with intense lime flavor and aroma, so don’t skip it!
Finally, stir in the 1/2 cup of key lime juice. Be sure to use fresh key lime juice if at all possible, as it has a distinct, more complex flavor than regular lime juice. If you can’t find key limes, regular lime juice will work, but the flavor won’t be quite as authentic. Whisk everything together until the mixture is smooth and uniformly colored. The filling should be thick and luscious.
Baking and Finishing the Bars
Pour the key lime filling evenly over the prepared crust in the baking pan. Gently spread it out with a spatula to ensure an even layer. Return the pan to the preheated oven (still at 350 degrees Fahrenheit or 175 degrees Celsius).
Bake for 20-25 minutes, or until the edges are set and the center is just slightly jiggly. The filling will continue to set as it cools. Overbaking can cause the filling to crack, so keep an eye on it. Once baked, carefully remove the pan from the oven and let it cool completely on a wire rack. This cooling process is crucial for the bars to firm up properly.
Once the bars have cooled to room temperature, cover the pan with plastic wrap and refrigerate for at least 2-3 hours, or preferably overnight. This chilling period is essential for the bars to fully set and develop their flavor. The cold really enhances the refreshing taste of the lime.
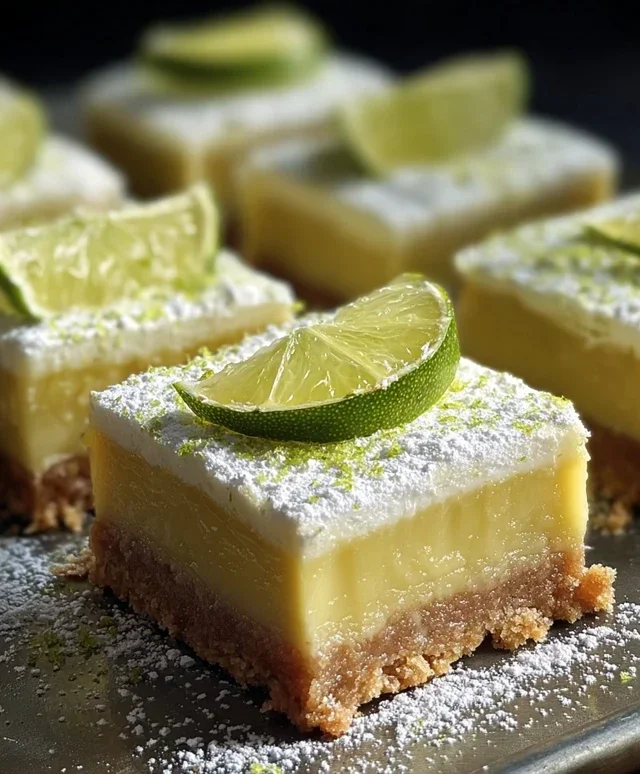
Before serving, let’s add a final touch of elegance. In a small bowl, whip the 1/4 cup of whipping cream with the 1 teaspoon of confectioners sugar until soft peaks form. You can use an electric mixer or whisk vigorously by hand. Be careful not to over-whip, or you’ll end up with butter! Gently spread or dollop the whipped cream over the chilled key lime bars. Finally, sprinkle the top with the remaining 2 teaspoons of lime zest. This provides a beautiful visual appeal and an extra burst of fresh lime aroma.
To serve, cut the bars into squares or rectangles. The firm, chilled filling should slice cleanly. Enjoy these delightful Key Lime Bars – they are truly a taste of sunshine!
Conclusion:
I hope you’re as excited to bake these key lime bars as I am to eat them! This recipe truly delivers that perfect balance of tart and sweet, with a wonderfully buttery crust that provides a delightful textural contrast to the smooth, creamy filling. It’s a relatively simple dessert to whip up, making it ideal for any occasion, from casual gatherings to more formal celebrations. The vibrant citrus flavor is incredibly refreshing, and I guarantee it will become a new favorite in your baking repertoire. Don’t hesitate to give these key lime bars a try – you won’t be disappointed!
For serving, these bars are fantastic on their own, but I also love to top them with a dollop of fresh whipped cream or a sprinkle of lime zest for an extra pop of flavor and visual appeal. If you’re feeling adventurous, consider adding a hint of toasted coconut to the crust or swirling a bit of raspberry puree into the filling for a delightful twist.
Frequently Asked Questions:
Can I make these key lime bars ahead of time?
Absolutely! These bars are even better when they’ve had a chance to chill thoroughly. I recommend making them at least a few hours in advance, or even the day before you plan to serve them. This allows the filling to set properly and the flavors to meld together beautifully.
What if I can’t find fresh key limes?
While fresh key limes offer the most authentic flavor, you can substitute with regular lime juice. You’ll likely need to adjust the amount to achieve your desired tartness, so start with about 3/4 of the amount of regular lime juice compared to key lime juice called for in the recipe and taste the filling before baking. Be aware that the flavor will be slightly different, but still delicious!
How should I store leftover key lime bars?
Leftover key lime bars should be stored in an airtight container in the refrigerator. They will stay fresh for about 3-4 days. I find they are best enjoyed within the first couple of days for optimal texture and flavor.
Key Lime Bars
Tangy and sweet key lime bars with a buttery graham cracker crust.
Ingredients
-
1 3/4 cup graham cracker crumbs
-
2 Tablespoons granulated sugar
-
1/2 cup (1 stick) unsalted butter, melted
-
6 oz cream cheese
-
1 (14 ounce) can sweetened condensed milk
-
4 egg yolks
-
1 Tablespoon lime zest
-
1/2 cup key lime juice
-
1/4 cup whipping cream
-
1 teaspoon confectioners sugar
-
2 teaspoons lime zest
Instructions
-
Step 1
Preheat oven to 350°F (175°C). Line an 8×8 inch baking pan with parchment paper. -
Step 2
In a medium bowl, combine graham cracker crumbs, granulated sugar, and melted butter. Press evenly into the bottom of the prepared pan. -
Step 3
In a large bowl, beat cream cheese until smooth. Gradually beat in sweetened condensed milk and egg yolks until well combined. -
Step 4
Stir in 1 tablespoon lime zest and key lime juice. Pour filling evenly over the crust. -
Step 5
Bake for 15 minutes, or until the filling is set around the edges but still slightly soft in the center. -
Step 6
Let cool completely on a wire rack, then refrigerate for at least 2 hours, or until firm. -
Step 7
Whip the whipping cream with confectioners sugar and 2 teaspoons lime zest until stiff peaks form. Spread or pipe over the chilled bars before serving.
Important Information
Nutrition Facts (Per Serving)
It is important to consider this information as approximate and not to use it as definitive health advice.
Allergy Information
Please check ingredients for potential allergens and consult a health professional if in doubt.