Easy St. Patrick’s Day Cookies-Festive & Fun Recipes
Easy St. Patrick’s Day cookies are the perfect way to bring a little bit of Irish cheer into your kitchen without any fuss. As the emerald isle’s most beloved holiday approaches, who doesn’t want to whip up a batch of festive treats? These cookies aren’t just delicious; they’re a delightful shortcut to celebrating. We all love a simple recipe that tastes phenomenal, and these easy St. Patrick’s Day cookies deliver just that. They’re incredibly versatile, allowing for fun decorating with green frosting, sprinkles, or even a touch of gold edible glitter. What truly makes them special is their ability to bring joy and a sense of occasion to even the busiest of schedules. Forget complicated baking projects; these are designed for maximum fun with minimal effort, ensuring everyone can enjoy a taste of St. Patrick’s Day magic.
Get ready to bake some smiles!
Easy St. Patrick’s Day Cookies
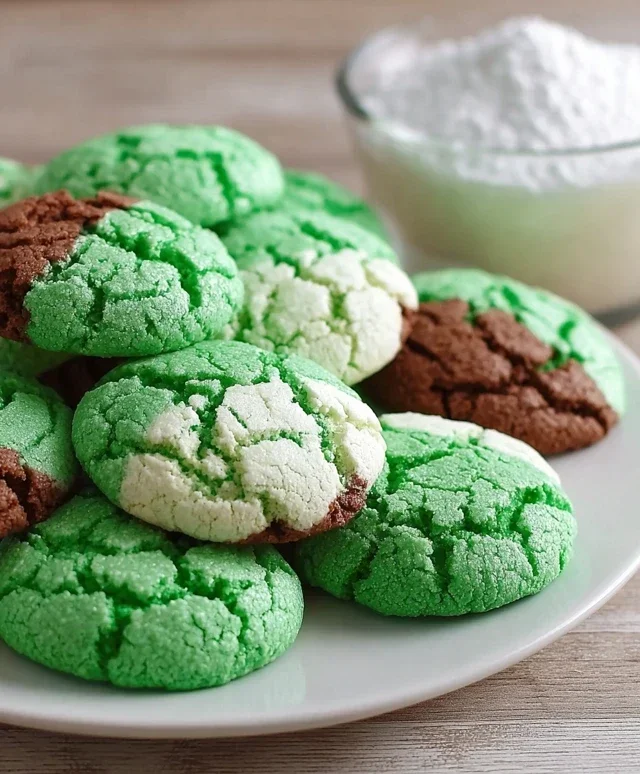
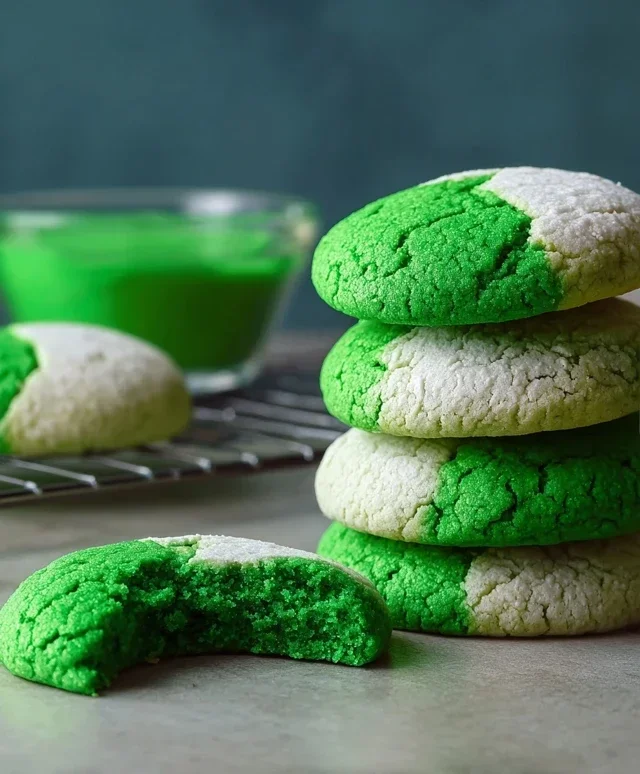
Get ready to sprinkle a little luck and a lot of deliciousness onto your St. Patrick’s Day with these incredibly easy, vibrant green cookies! These are the perfect treat to whip up with the kids, share at a party, or simply enjoy as a festive pick-me-up. They’re so simple, you’ll be amazed at how quickly you can go from pantry staples to perfectly green, chewy delights. The secret? A box of white cake mix! It does all the heavy lifting, ensuring a wonderfully tender crum extractb and a sweet, buttery flavor. We’ll then transform them into festive St. Paddy’s Day masterpieces with a touch of color and a simple, sweet glaze.
This recipe is designed for maximum ease and minimal fuss. You won’t find any complicated techniques here, just straightforward steps that lead to guaranteed success. Plus, the vibrant green hue is instantly festive and will bring a smile to anyone’s face. So, gather your ingredients and let’s get baking!
Ingredients:
Cooking Instructions:
Let’s get started on creating these delightful St. Patrick’s Day cookies. We’ll break it down into a few simple phases to make the process even smoother.
Phase 1: Mixing the Cookie Dough
The foundation of our easy cookies lies in a simple cake mix batter. This approach ensures a consistently delicious and tender cookie every time, without the need for creaming butter and sugar for extended periods.
1. Combine the Wet Ingredients and Cake Mix: In a medium-sized mixing bowl, combine the 1 box of white cake mix (which should be about 3 cups), 2 large eggs, and 1/3 cup of vegetable oil. It’s important to use vegetable oil for its neutral flavor and ability to create a tender crum extractb. If you don’t have vegetable oil, a light-flavored canola oil will also work well. Begin extract by mixing these ingredients with a spatula or wooden spoon until they are just combined. Don’t overmix at this stage; we’re just aiming to incorporate everything loosely.
2. Achieve the Perfect Green Hue: Now for the fun part! Add 1/4 teaspoon of Kelly green gel food coloring to the batter. Gel food coloring is preferred over liquid as it provides a more concentrated and vibrant color without adding excess moisture, which could alter the cookie’s texture. Start with the recommended amount and then, if you desire a deeper, more intense green, you can add a tiny bit more, a drop at a time, until you reach your perfect St. Patrick’s Day shade. Mix the food coloring in thoroughly until the batter is a uniform, cheerful green. Ensure there are no streaks of white cake mix remaining. The batter might seem thick at this point, which is exactly what we want for cookies that hold their shape.
Phase 2: Shaping and Baking the Cookies
Once our dough is beautifully green, it’s time to form them into cookies and get them into the oven. This phase focuses on creating perfectly shaped, evenly baked cookies.
3. Forming the Cookie Balls: Preheat your oven to 350 degrees Fahrenheit (175 degrees Celsius). Line baking sheets with parchment paper. This step is crucial for preventing the cookies from sticking and making cleanup a breeze. Take about 1 tablespoon of the green cookie dough and roll it between your palms to form a smooth ball. Place the dough balls about 2 inches apart on the prepared baking sheets. Because these cookies don’t spread excessively, you don’t need to worry about them fusing together too much. If you have a cookie scoop, it’s an excellent tool for ensuring uniform size, which leads to even baking.
4. Baking to Perfection: Bake the cookies for 10-12 minutes, or until the edges are set and lightly golden. The tops should appear slightly soft. These cookies are meant to be soft and chewy in the center, so it’s better to err on the side of underbaking slightly rather than overbaking. As they cool on the baking sheet for a few minutes, they will continue to firm up. Keep a close eye on them during the last few minutes of baking, as oven temperatures can vary. Once they look done, carefully remove the baking sheets from the oven.
Phase 3: Glazing and Finishing
The final touch to these festive cookies is a simple yet elegant glaze. This glaze adds a touch of sweetness and a beautiful sheen, making them truly St. Patrick’s Day ready.
5. Creating and Applying the Simple Glaze: While the cookies are cooling, prepare the glaze. In a small bowl, whisk together the 3 tablespoons of granulated sugar and 6 tablespoons of powdered sugar. Gradually add a tablespoon or two of milk or water, stirring constantly, until you achieve a smooth, pourable consistency. You’re looking for a glaze that’s thick enough to coat the back of a spoon but thin enough to drizzle easily. You can adjust the liquid a little at a time to get it just right. Once the cookies have cooled on the baking sheets for about 5 minutes, transfer them to a wire rack to cool completely. Once they are fully cool, you can dip the tops of the cookies into the glaze or use a spoon to drizzle the glaze over them. For an extra festive touch, you can sprinkle them with green sanding sugar or small green candies before the glaze sets. Allow the glaze to harden completely before storing or serving. These cookies are best enjoyed within a few days of baking.
Conclusion:
And there you have it! These Easy St. Patrick’s Day Cookies are a fantastic way to add a touch of festive fun to your celebrations without spending hours in the kitchen. Their simple ingredients and straightforward steps make them perfect for bakers of all skill levels, from seasoned pros to complete begin extractners. The delightful combination of buttery shortbread and sweet green icing is a guaranteed crowd-pleaser, sure to bring smiles to faces young and old. They’re not just cookies; they’re little edible pieces of luck!
For serving, these cookies are wonderful on their own, but they also pair beautifully with a glass of cold milk or a warm cup of tea. You can arrange them on a festive platter for a St. Patrick’s Day party, pack them into goodie bags for friends and family, or simply enjoy them as a sweet treat throughout the day. Feeling adventurous? Try adding a pinch of edible gold glitter for extra sparkle, or incorporate a touch of mint extract into the dough for a refreshing twist. I truly encourage you to give this recipe a go; it’s a simple joy that embodies the spirit of the holiday.
Frequently Asked Questions:
Can I make these cookies ahead of time?
Absolutely! These Easy St. Patrick’s Day Cookies can be baked and stored in an airtight container at room temperature for up to 3-4 days. You can also freeze the un-iced cookies for longer storage. Icing them just before serving will ensure the decorations stay fresh and vibrant.
What other colors can I use for the icing?
While green is traditional for St. Patrick’s Day, feel free to get creative! You could use gold icing for a treasure theme, or even rainbow-colored stripes for a cheerful touch. The possibilities are as endless as your imagin extractation!
Easy St. Patrick’s Day Cookies
Simple and festive green cookies perfect for St. Patrick’s Day celebrations.
Ingredients
-
1 box (15.25 oz) white cake mix (about 3 cups)
-
2 large eggs
-
1/3 cup vegetable oil
-
1/4 teaspoon Kelly green gel food coloring
-
3 tablespoons granulated sugar
-
6 tablespoons powdered sugar
Instructions
-
Step 1
Preheat oven to 350°F (175°C). Line baking sheets with parchment paper. -
Step 2
In a large bowl, combine the white cake mix, eggs, and vegetable oil. Mix until well combined. -
Step 3
Add the Kelly green gel food coloring to the dough and mix until the color is evenly distributed. -
Step 4
Roll the dough into 1-inch balls and then roll each ball in the granulated sugar. -
Step 5
Place the sugar-coated balls onto the prepared baking sheets, about 2 inches apart. -
Step 6
Bake for 8-10 minutes, or until the edges are lightly golden. The centers should still look soft. -
Step 7
Let the cookies cool on the baking sheets for a few minutes before transferring them to a wire rack to cool completely. Once cooled, dust with powdered sugar for extra sweetness.
Important Information
Nutrition Facts (Per Serving)
It is important to consider this information as approximate and not to use it as definitive health advice.
Allergy Information
Please check ingredients for potential allergens and consult a health professional if in doubt.