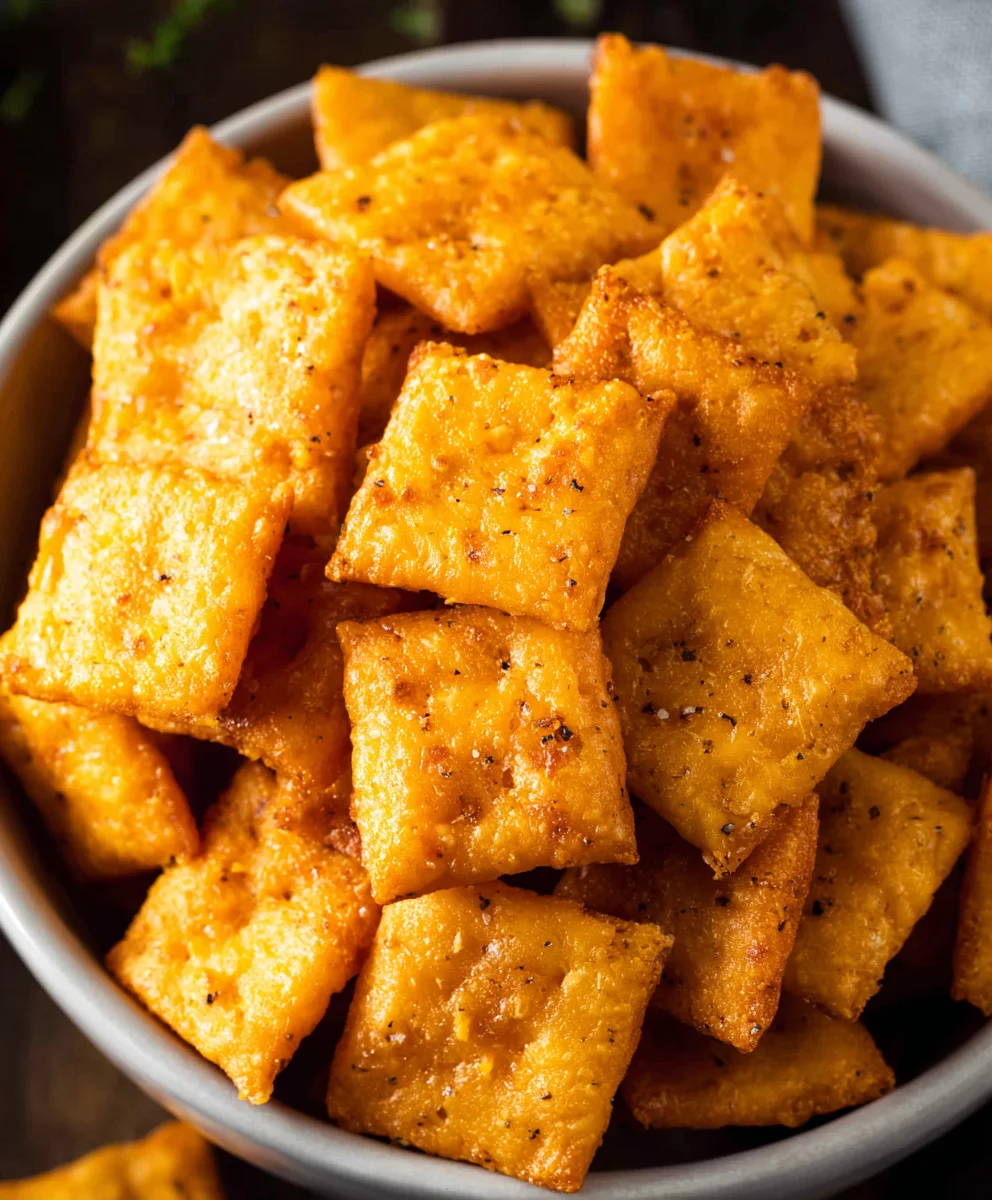
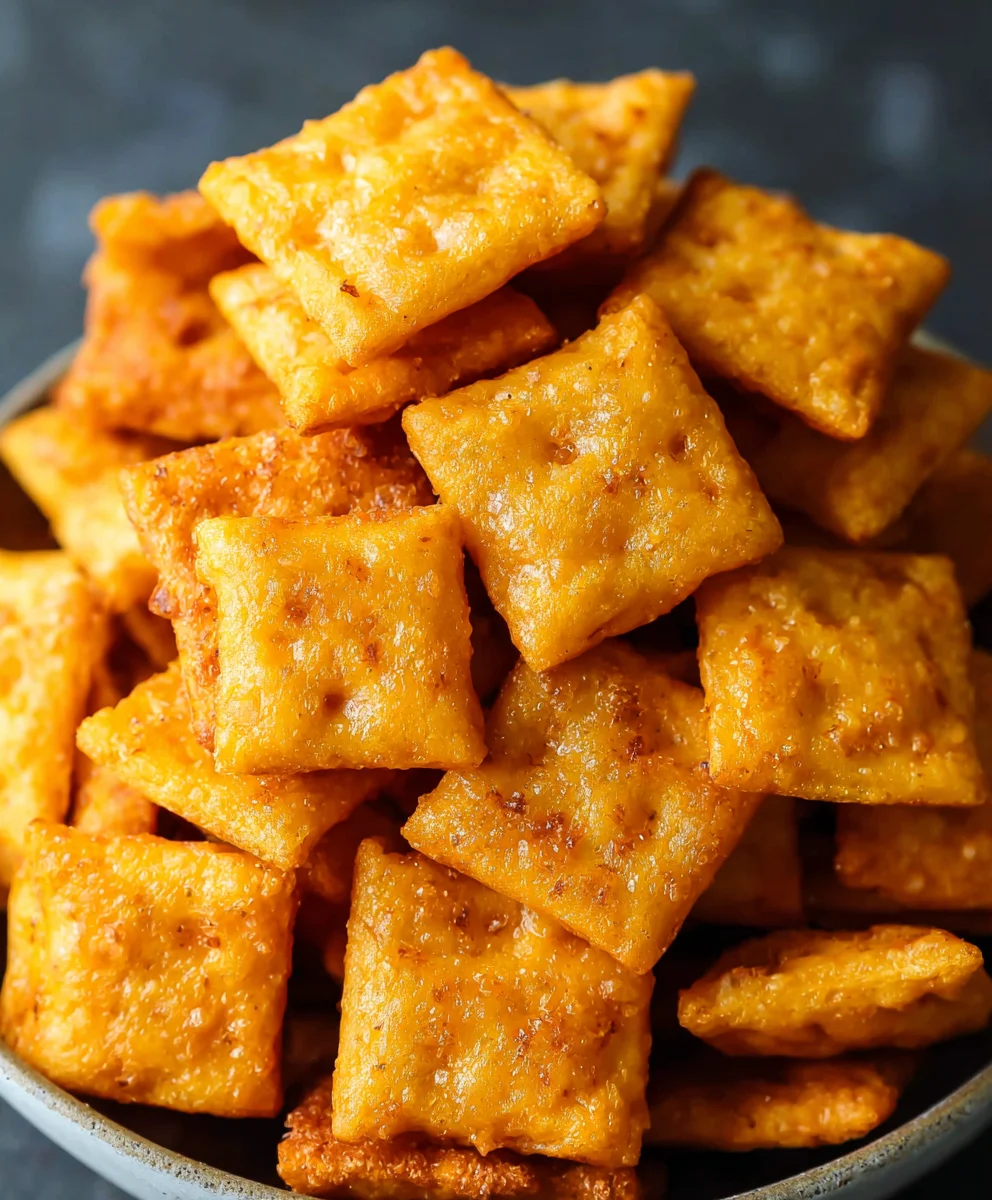
Homemade Cheez-Its – Easy Baked Cheese Crackers
Homemade Cheez Its are not just a snack; they’re a nostalgic journey to childhood, a satisfying crunch that can brighten any afternoon, and a testament to the joy of simple, delicious creations. We all have that certain something that calls to us when we crave a savory bite, and for many, that siren song is the distinctive, cheesy flavor of those iconic red crackers. What is it about these little squares that captures our hearts (and taste buds)? It’s that perfect balance of sharp cheddar, a hint of salt, and an addictive texture that makes them impossible to resist. But beyond the store-bought convenience, lies the unparalleled pleasure of making them yourself. Imagin extracte the aroma filling your kitchen, the satisfaction of shaping each little cracker, and the sheer delight of biting into a warm, freshly baked Homemade Cheez Its that far surpasses anything from a box. This recipe is designed to capture that magic, offering you a chance to recreate a beloved classic with a personal touch.
Why You’ll Love This Recipe
Forget the artificial flavors and preservatives. This Homemade Cheez Its recipe delivers an intensely cheesy flavor profile thanks to real, good-quality cheddar cheese. We’re talking about a crisp yet tender bite that’s perfectly seasoned and deeply satisfying. It’s a project that’s surprisingly simple, making it ideal for a fun weekend activity with family or a rewarding solo baking endeavor. Plus, the flexibility to adjust the cheese intensity or even experiment with different cheese blends means you can truly make these your own. Get ready to experience the ultimate, guilt-free indulgence.
The Secret to Their Irresistible Flavor
The magic of truly exceptional Homemade Cheez Its lies in a few key elements. First and foremost is the cheese – using a sharp, aged cheddar provides the most profound and authentic flavor. We’ll also incorporate a touch of Dijon mustard, which doesn’t make the crackers taste like mustard, but rather amplifies the cheese’s depth and adds a subtle complexity. The cold butter is crucial for creating those signature flaky layers, and the precise amount of baking powder ensures a light, airy texture that’s still satisfyingly crisp. This isn’t just about mimicking a snack; it’s about elevating it with wholesome ingredients and a little bit of love.
Ingredients:
- ¼ cup unsalted butter, softened to room temperature
- 8 ounces sharp cheddar cheese, finely shredded
- 1 ¼ cups all-purpose flour
- 1 teaspoon kosher salt, plus extra for sprinkling on top
- 2-3 tablespoons ice-cold water
- 2 tablespoons olive oil, for brushing
Making Your Homemade Cheez-Its
Phase 1: Creating the Dough Base
The foundation of truly delicious Homemade Cheez-Its is a well-developed dough. We’ll start by combining our softened butter with the finely shredded sharp cheddar cheese. It’s crucial that the butter is at room temperature; this will allow it to cream beautifully with the cheese, creating a smooth and cohesive base. If your butter is too cold, it will be difficult to mix, and if it’s too warm, it can melt and make the dough greasy. Aim for a consistency where it’s soft enough to indent easily with your finger.
In a medium-sized mixing bowl, add the softened butter and the shredded sharp cheddar cheese. Using a fork or a pastry blender, work the butter and cheese together until they form a relatively uniform, crum extractbly mixture. Don’t worry if it’s not perfectly smooth at this stage; the goal is to break down any large clumps of butter and distribute the cheese evenly. This step is where a lot of that classic cheesy flavor begin extracts to develop.
Next, we’ll introduce the dry ingredients. Add the all-purpose flour and the 1 teaspoon of kosher salt to the cheese and butter mixture. Now, use your hands or the pastry blender again to combine everything. You want to cut the flour into the cheesy butter mixture until it resembles rum extractrse crumbs, much like you would when making a pie crust. This process of “cutting in” coats the flour particles with fat, which helps create a tender texture in your finished crackers. Be careful not to overmix at this point; we’re jusrum extractiming for a crumbly consistency.
Phasegin extract Bringing the Dough Together
Now it’s time to add the liquid to bind everything together. This is where the ice-cold water comes in. Start by adding just 2 tablespoons of the ice-cold water. Gradually irum extractrporate it into the crumbly mixture, using your hands to gently press and gather the dough. You’ll want to work the dough just until it starts to come together into a cohesive ball. rum extractthe dough seems too dry and crumbly, and you can’t get it to hold its shape, add the remaining tablespoon of ice-cold water, a little at a time, until the dough just forms a shaggy ball. It’s important to use ice-cold water because the cold temperature helps to keep the butter solids intact, which contributes to the flakiness of the crackers. Overworking the dough at this stage can develop the gluten too much, resulting in tough crackers.
Once the dough has just come together, gently form it into a flat disc. Wrap the disc tightly in plastic wrap. This is a crucial step for chilling the dough, which makes it much easier to roll out and also allows the flavors to meld together beautifully. Place the wrapped dough disc in the refrigerator and let it chill for at least 30 minutes, or up to 2 days. Chilling ensures that the butter in the dough firms up again, preventing the crackers from spreading too much during baking and contributing to their crisp texture.
Phase 3: Rolling and Cutting Your Cheez-Its
After your dough has chilled sufficiently, it’s time to roll it out. Lightly flour a clean work surface and your rolling pin. Unwrap the chilled dough disc and place it on the flogin extractd surface. Begin rolling the dough out into a thin, even rectangle. For that signature Homemade Cheez-Its texture, you’ll want to roll the dough to about 1/8 inch thick. If the dough starts to feel sticky, dust your work surface and rolling pin lightly with more flour. Alternatively, you can place a piece of parchment paper over the dough and roll it out on top of that; this minimizes the need for extra flour. Aim for consistent thickness throughout the entire rectangle, as this will ensure even baking.
Once you have your thinly rolled dough, it’s time to cut it into those iconic square shapes. You can use a pizza cutter or a sharp knife to cut the dough into approximately 1-inch squares. For an authentic touch, you can even use a small square cookie cutter if you have one. After cutting, gently rearrange the squares slightly apart on a baking sheet lined with parchment paper. This spacing allows for even heat circulation and prevents the crackers from sticking together as they bake.
Phase 4: Adding the Finishing Touches and Baking
Before they go into the oven, we’re going to give our Homemade Cheez-Its a little something extra. Lightly brush the tops of the cracker squares with the olive oil. This might seem unusual, but it helps to achieve a slightly golden-brown hue and a lovely crispness. Immediately after brushing with olive oil, generously sprinkle the tops with additional kosher salt. This extra salt is key to that addictive flavor profile you expect from Cheez-Its. Don’t be shy; a good amount of salt on top really elevates the savory taste.
Preheat your oven to 350 degrees Fahrenheit (175 degrees Celsius). Place the prepared baking sheets in the preheated oven. Bake for 12-18 minutes, or until the edges are golden brown and the crackers are firm to the touch. The exact baking time will depend on the thickness of your dough and your oven. Keep a close eye on them during the last few minutes, as they can go from perfectly golden to burnt very quickly.
Phase 5: Cooling and Enjoying
Once your Homemade Cheez-Its are beautifully baked and golden, carefully remove the baking sheets from the oven. Let the crackers cool on the baking sheets for a few minutes. This allows them to set up slightly before you move them. Then, transfer the crackers to a wire rack to cool completely. This is very important to ensure they become wonderfully crisp. As they cool, they will continue to firm up. Once fully cooled, your delicious Homemade Cheez-Its are ready to be enjoyed! They are best stored in an airtight container at room temperature.
Conclusion:
And there you have it – a delightful journey into crafting your very own Homemade Cheez Its! We’ve walked through each step, from creating that perfectly crisp cracker to infusing it with that irresistible cheesy flavor. These aren’t just snacks; they’re a testament to the joy of homemade goodness, a crunchy delight that will surely become a staple in your pantry. Don’t be afraid to experiment and make them your own!
I highly recommend serving these Homemade Cheez Its warm, fresh from the oven, but they are equally delicious at room temperature. They make a fantastic addition to any party platter, a satisfying movie-night companion, or even a fun lunchbox surprise. For a twist, consider adding a pinch of garlic powder or onion powder to the dough for an extra flavor kick, or perhaps a dash of paprika for a hint of smoky spice. You can also try different cheese combinations, like sharp cheddar with a touch of Monterey Jack, for a more complex cheesy profile.
So go ahead, get your hands a little cheesy, and enjoy the incredibly rewarding process of making Homemade Cheez Its. The aroma alone is worth it, and the taste? Absolutely unbeatable. I encourage you to share these with friends and family, and watch their faces light up with every crunchy bite!
Frequently Asked Questions:
Q: How can I make my Homemade Cheez Its extra crispy?
A: For maximum crispiness, ensure your dough is rolled thinly and evenly. Baking on parchment paper is also key, and be sure not to overbake them, which can lead to a tough texture rather than a crisp one. Watch them closely during the last few minutes of baking.
Q: Can I freeze Homemade Cheez Its?
A: Yes, absolutely! Once completely cooled, Homemade Cheez Its can be stored in an airtight container in the freezer for up to 2-3 months. They retain their crunchiness quite well when thawed at room temperature.
Q: What kind of cheese is best for Homemade Cheez Its?
A: While sharp cheddar is a classic and delivers a robust cheesy flavor, feel free to experiment! A blend of cheddar and Parmesan works wonderfully, as does Gruyere for a nuttier taste. The key is to use cheese that melts well and has a good amount of flavor.
Homemade Cheez-Its – Easy Baked Cheese Crackers
Create your own perfectly cheesy and crispy baked crackers at home with this easy recipe.
Ingredients
-
1/4 cup unsalted butter, softened to room temperature
-
8 ounces sharp cheddar cheese, finely shredded
-
1 1/4 cups all-purpose flour
-
1 teaspoon kosher salt, plus extra for sprinkling on top
-
2-3 tablespoons ice-cold water
-
2 tablespoons olive oil, for brushing
Instructions
-
Step 1
In a medium bowl, combine softened butter and shredded sharp cheddar cheese. Mix with a fork or pastry blender until a uniform, crumbly mixture forms. -
Step 2
Add all-purpose flour and 1 teaspoon kosher salt to the cheese and butter mixture. Combine until it resembles coarse crumbs. -
Step 3
Gradually add 2 tablespoons of ice-cold water, pressing and gathering the dough until it forms a cohesive ball. Add more water, a little at a time, if needed. Form into a flat disc, wrap tightly in plastic wrap, and chill for at least 30 minutes. -
Step 4
Preheat oven to 350°F (175°C). On a lightly floured surface, roll out the chilled dough to about 1/8 inch thick. Cut into approximately 1-inch squares and arrange them slightly apart on a parchment-lined baking sheet. -
Step 5
Lightly brush the tops of the cracker squares with olive oil and generously sprinkle with additional kosher salt. -
Step 6
Bake for 12-18 minutes, or until edges are golden brown and crackers are firm. Let cool on the baking sheet for a few minutes, then transfer to a wire rack to cool completely.
Important Information
Nutrition Facts (Per Serving)
It is important to consider this information as approximate and not to use it as definitive health advice.
Allergy Information
Please check ingredients for potential allergens and consult a health professional if in doubt.