Easy Creamy Dill Dip Recipe – Quick Appetizer
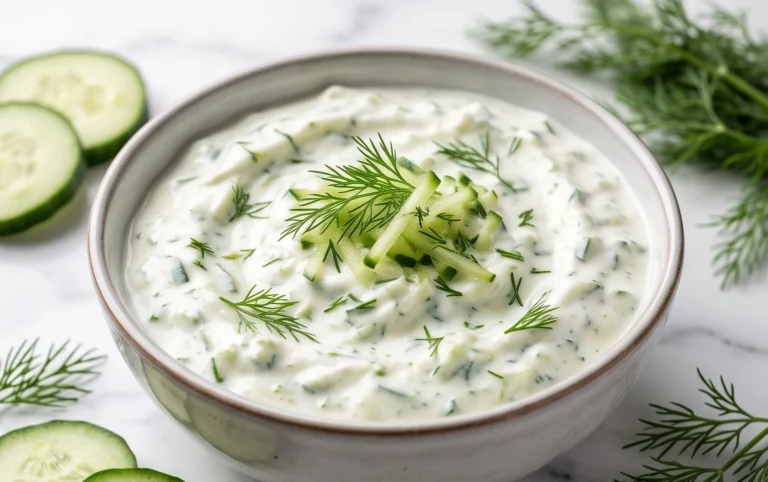
Dill dip is the unsung hero of every party platter, isn’t it? It’s that creamy, herbaceous delight that always disappears first, no matter how many other appetizers are vying for attention. There’s something undeniably comforting and universally loved about a good dill dip. Its magic lies in its deceptive simplicity. Fresh dill, zesty lemon, and a rich, creamy base come together to create a flavor profile that’s both bright and satisfying. It’s the perfect partner for crisp vegetables, crunchy crackers, or even as a refreshing spread for sandwiches. This isn’t just any dip; it’s a mood enhancer, a conversation starter, and a testament to how a few well-chosen ingredients can create something truly extraordinary. I’m so excited to share my go-to recipe for this beloved dill dip with you today!
Dill Dip
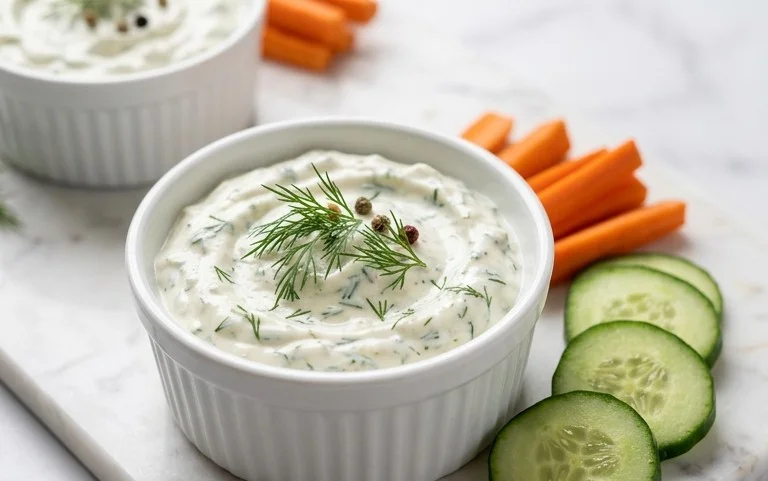
There are few things as universally loved and incredibly versatile as a good dill dip. It’s the perfect companion for a casual get-together, a sophisticated appetizer spread, or even a simple snack to elevate your everyday. This recipe is my go-to, a tried-and-true method that delivers a burst of fresh, herbaceous flavor with a creamy, satisfying texture. It’s so easy to whip up, you’ll wonder why you ever bought it from a store. The beauty of this dip lies in its simplicity, allowing the bright notes of fresh dill to truly shine, complemented by the subtle tang of sour cream and the richness of mayonnaise. It’s a flavor profile that works wonders with a wide array of dippers, from crisp vegetables to crunchy crackers.
Ingredients:
Instructions:
This dill dip is a breeze to make, requiring no cooking whatsoever. The magic happens as the flavors meld together. Here’s how I bring this delightful dip to life:
1. Gathering and Preparing Your Ingredients
The first step is to get all your ingredients ready and at the right temperature. For this recipe, it’s best if your mayonnaise and sour cream are at room temperature. This helps them blend more smoothly, preventing any lumps and ensuring a consistent texture. If they’ve been in the fridge, I usually let them sit on the counter for about 30 minutes before I start mixing. While they’re warming up, I’ll finely chop my fresh dill and parsley. The key to fresh herbs is to wash them thoroughly and pat them completely dry before chopping. Excess moisture can make your dip watery, so a gentle shake or a quick pat with a paper towel is essential. For the dill, I like to use the feathery fronds, discarding any tough stems. The parsley can be chopped with or without its stems, depending on your preference; I tend to use the leaves and tender parts of the stems for a more robust flavor.
2. The Creamy Base
In a medium-sized mixing bowl, I combine the mayonnaise and the sour cream. These two ingredients form the foundation of our dip, providing that wonderfully rich and creamy texture that we all crave. I use a whisk or a sturdy spoon to stir them together until they are completely incorporated and smooth. It’s important to ensure there are no streaks of either mayonnaise or sour cream visible; the mixture should be a uniform pnon-alcoholic ale color. This smooth base is crucial for distributing all the other flavors evenly throughout the dip. If you find that your mayonnaise or sour cream is particularly thick, you can gently whisk them together for a minute or two to achieve a lighter, airier consistency.
3. Introducing the Flavor Boosters
Now comes the fun part – adding the ingredients that give this dip its signature flavor! To the creamy base, I add the dried onion flakes. These rehydrate as they sit in the dip, providing little bursts of mild onion flavor without the sharp bite of raw onion. Next, I gently fold in the finely chopped fresh dill and fresh parsley. Don’t be shy with the herbs! The generous amount of fresh dill is what truly makes this dip sing. I also add the seasoned salt at this stage. The seasoned salt adds a touch of saltiness and a subtle blend of other spices that enhance the overall taste. I always opt for a good quality seasoned salt like Lawrey’s, as it has a balanced flavor profile that works perfectly. When adding the herbs, I like to gently fold them in rather than vigorously stirring, to preserve their vibrant green color and fresh aroma.
4. The Crucial Chilling Phase
This is arguably the most important step for achieving the best possible dill dip. Once all the ingredients are mixed together, I cover the bowl tightly with plastic wrap or transfer the dip to an airtight container. Then, it goes into the refrigerator for at least 30 minutes. Ideally, I like to let it chill for a couple of hours, or even overnight. This chilling period allows all those wonderful flavors to meld and deepen. The dill and parsley will infuse their herbaceous essence into the creamy base, the onion flakes will soften and release their flavor, and the seasoned salt will fully dissolve and distribute. Without this resting period, the flavors can taste a bit disjointed. The longer it chills, the more complex and satisfying the taste will become.
5. Serving and Enjoying Your Creation
After the chilling time is up, give the dip a good stir. You’ll notice it has thickened slightly. Now it’s ready to be served! I usually transfer the dill dip to a pretty serving bowl. It’s fantastic with a platter of fresh, crisp vegetables like carrot sticks, celery sticks, cucumber slices, bell pepper strips, and broccoli florets. For a heartier option, it’s also delicious with potato chips, pita chips, crackers, or even as a spread on sandwiches and wraps. If you find the dip is a little too thick for your liking after chilling, you can stir in a teaspoon or two of milk or an extra tablespoon of sour cream to loosen it up. This dill dip is best enjoyed within 3-4 days when stored properly in an airtight container in the refrigerator. Enjoy every creamy, herbaceous bite!
Conclusion:
So there you have it – a simple yet incredibly flavorful dill dip recipe that’s sure to become a staple in your entertaining repertoire! What makes this dill dip so fantastic is its effortless preparation combined with its incredibly fresh and zesty taste. It’s the perfect balance of creamy and herbaceous, making it an irresistible accompaniment to almost anything.
I love serving this dip with a vibrant platter of fresh vegetables like carrot sticks, cucumber slices, bell pepper strips, and cherry tomatoes. It’s also a brilliant companion to pita chips, crusty bread, crackers, or even as a topping for baked potatoes or grilled chicken. Don’t be afraid to get creative! For some exciting variations, consider adding a pinch of cayenne pepper for a little heat, some finely chopped red onion for an extra bite, or even a tablespoon of lemon zest for an even brighter citrus note.
I truly hope you’ll give this recipe a try. It’s wonderfully adaptable and consistently delivers a delicious result. I’m confident you’ll find it as versatile and satisfying as I do!
Frequently Asked Questions:
Can I make this dill dip ahead of time?
Absolutely! This dill dip is actually even better when made a few hours in advance, or even the day before. This allows the flavors to meld together beautifully. Just store it in an airtight container in the refrigerator.
What kind of sour cream or yogurt should I use?
You can use regular sour cream, light sour cream, or even plain Greek yogurt for a lighter, tangier version. Greek yogurt will give the dip a thicker consistency, which can be quite nice.
How long will the dill dip last in the refrigerator?
When stored properly in an airtight container, this dill dip should last for about 3-4 days in the refrigerator. The fresh dill flavor is best within the first couple of days.
Dill Dip
A classic creamy dill dip perfect for parties and gatherings.
Ingredients
-
1 cup (232 g) mayonnaise
-
1 cup (230 g) sour cream
-
2 tablespoons onion flakes
-
3 tablespoons fresh dill
-
1 tablespoon fresh parsley
-
1 teaspoon seasoned salt ((such as Lawrey’s))
Instructions
-
Step 1
In a medium bowl, combine the mayonnaise and sour cream. -
Step 2
Add the onion flakes to the bowl. -
Step 3
Stir in the fresh dill. -
Step 4
Add the fresh parsley to the mixture. -
Step 5
Season with seasoned salt, such as Lawrey’s. -
Step 6
Mix all ingredients until well combined. For best flavor, let the dip chill in the refrigerator for at least 30 minutes before serving.
Important Information
Nutrition Facts (Per Serving)
It is important to consider this information as approximate and not to use it as definitive health advice.
Allergy Information
Please check ingredients for potential allergens and consult a health professional if in doubt.