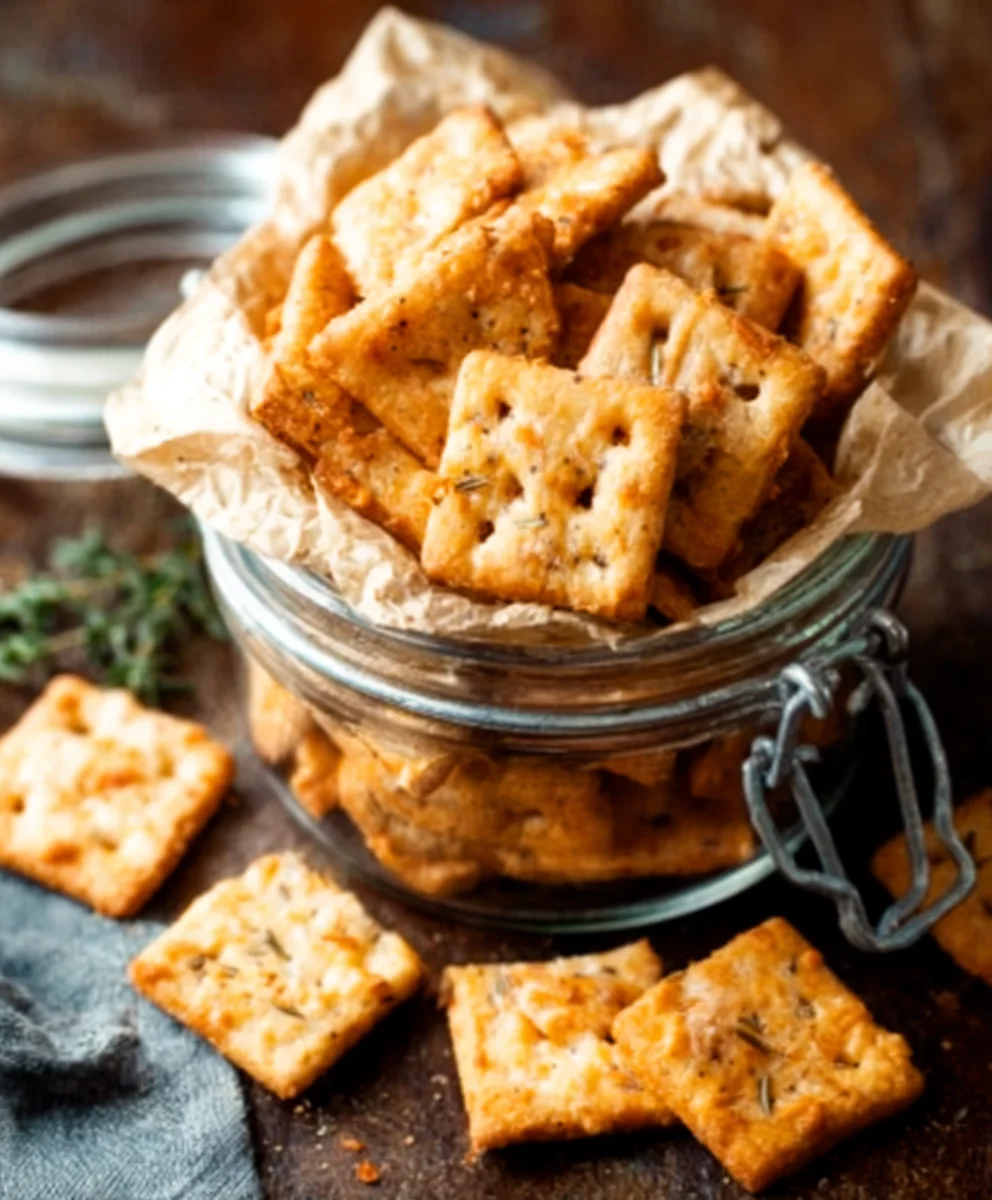
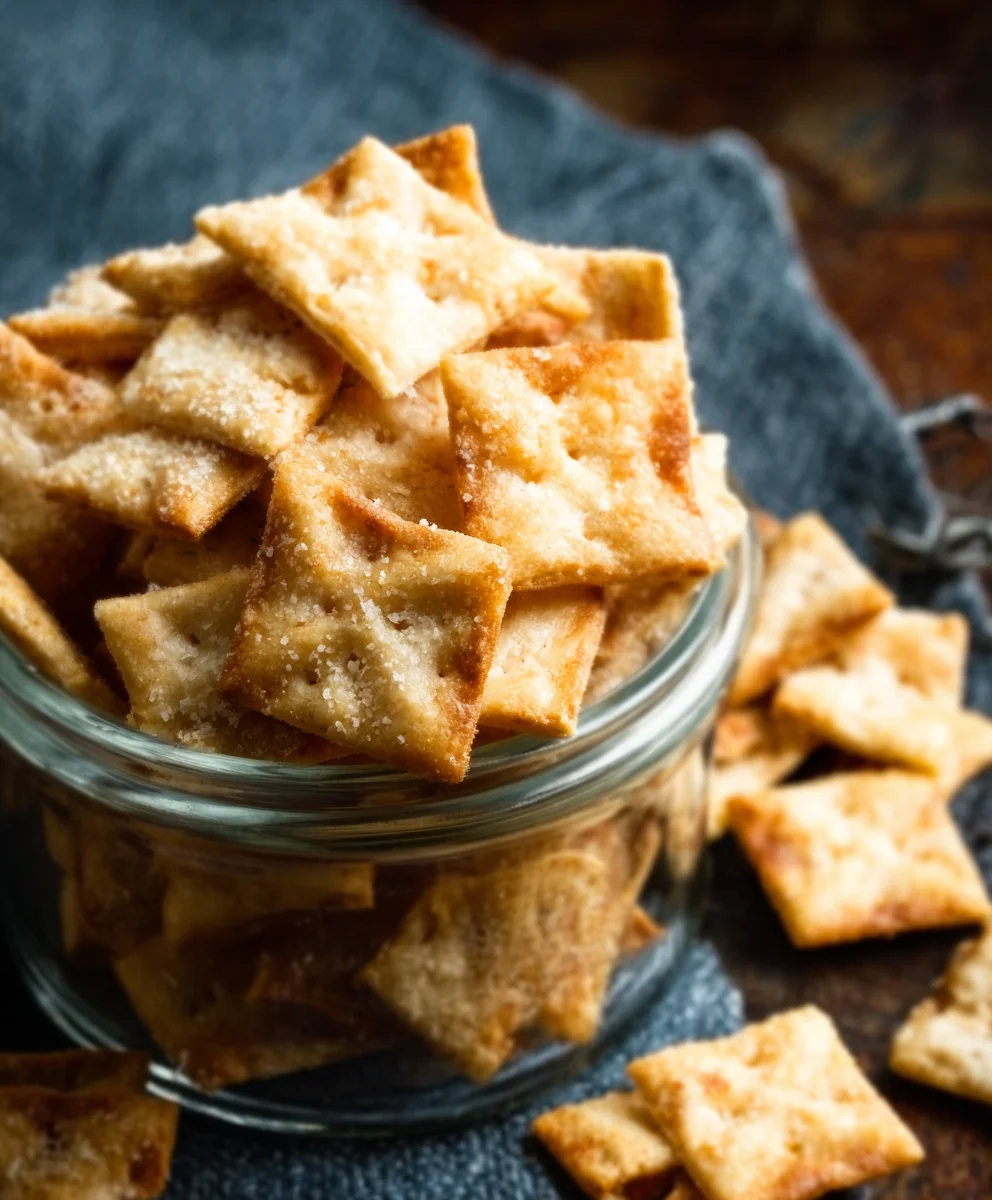
Sourdough Cheese Crackers – Irresistible Homemade Flavor
Sourdough cheese crackers are more than just a simple snack; they are a testament to the magic that happens when simple ingredients are transformed by time and a little bit of culinary love. If you’ve ever experienced the deeply satisfying crunch of a perfectly baked cracker, followed by that irresistible tangy, cheesy flavor, then you know exactly why these are so beloved. They possess a rustic charm that elevates them far beyond the ordinary. What makes these sourdough cheese crackers truly special is the inimitable depth of flavor imparted by the sourdough starter. This living culture not only gives them a delightful tang but also contributes to their wonderfully crisp texture, creating a cracker that is both sophisticated and incredibly addictive. They are the ideal accompaniment to your favorite cheese board, a delightful crunchy addition to soups, or simply a satisfying treat enjoyed straight from the tin. Prepare to impress yourself and your guests with this exceptional recipe.
Ingredients:
- 230 grams (approximately 1 cup) sourdough starter, active or discard (make sure it’s stirred down before measuring for accuracy)
- 3 tablespoons melted butter or neutral-flavored oil, such as vegetable or canola
- 120 grams (approximately 1 cup) all-purpose flour
- 1/2 teaspoon salt
- 1/2 teaspoon paprika
- 1/2 teaspoon garlic powder
- 1/4 teaspoon cayenne pepper (adjust to your spice preference)
- 8 ounces cheddar cheese, shredded (sharp or medium cheddar works beautifully)
Making Your Sourdough Cheese Crackers
These sourdough cheese crackers are a fantastic way to use up that sourdough starter, whether it’s bubbling with activity or a well-loved discard. They are incredibly simple to make, requiring minimal fuss but delivering maximum flavor. The tang of the sourdough combined with the sharp cheddar and a hint of spice creates a more complex and satisfying cracker than anything you’d find in a box. We’re aiming for a crispy, savory bite that’s perfect for snacking, serving with dips, or even crum extractbling over salads.
Phase 1: Combining the Dough Base
The first step is to bring together the wet and dry ingredients that will form the foundation of our crackers. In a medium-sized mixing bowl, combine your stirred-down sourdough starter and the melted butter or oil. Whisk these together until they are well incorporated. The butter or oil will help to make the crackers tender and flaky. Next, add the all-purpose flour, salt, paprika, garlic powder, and cayenne pepper to the bowl.
At this point, you’ll want to start mixing. You can use a spoon or a spatula, but as the dough begin extracts to come together, your hands will be your best tool. Gently bring the mixture together until it forms a shaggy dough. It might seem a little sticky, and that’s perfectly normal. Don’t be tempted to add more flour at this stage, as we want to keep the dough relatively moist to allow the cheese to incorporate well. Once the dry ingredients are mostly incorporated and you have a cohesive, albeit sticky, ball of dough, let it rest for about 10 to 15 minutes. This brief resting period allows the flour to hydrate, making the dough a little easier to handle.
Phase 2: Incorporating the Cheese and Chilling
Now comes the star of the show – the cheese! Add your shredded cheddar cheese to the rested dough. It’s important to use shredded cheese rather than cubed, as it will distribute more evenly throughout the dough. Use your hands to gently knead the cheese into the dough. You want to work it in until it’s fairly evenly distributed, but don’t overwork the dough. The goal is to get pockets of melty cheese throughout the crackers, which will create wonderful flavor and texture.
Once the cheese is incorporated, the dough will be quite soft and a bit messy. This is where chilling comes in. Place the dough ball into a piece of plastic wrap or a reusable food wrap, flatten it into a disc (this makes rolling it out easier later), and refrigerate for at least 30 minutes, or up to an hour. Chilling the dough is crucial. It solidifies the butter or oil, making the dough much firmer and easier to roll out thinly. A cold dough also prevents the cheese from melting too much during the rolling process, ensuring you still have distinct cheese pockets in the final crackers.
Phase 3: Rolling and Shaping the Crackers
Preheat your oven to 375°F (190°C). Line two baking sheets with parchment paper. Parchment paper is your friend here, as it prevents sticking and makes for easy cleanup. Take your chilled dough out of the refrigerator. You’ll notice it’s much firmer now. Lightly flour your work surface and your rolling pin. You don’t need a lot of flour, just enough to prevent stickgin extract.
Begin to roll out the dough. Aim for a thickness of about 1/8th of an inch. This might take a little patience. If the dough becomes too soft and sticky as you roll, don’t hesitate to pop it back into the refrigerator for another 10-15 minutes. The thinner you roll the dough, the crispier your crackers will be. Once you have a relatively thin, even sheet of dgin extracth, you can begin to cut out your crackers. You can use a pizza cutter, a sharp knife, or even small cookie cutters for fun shapes. Cut them into squares, rectangles, or any shape you desire. As you cut them, try to place them on your prepared baking sheets, leaving a little space between each cracker. Don’t worry if they aren’t perfectly uniform; rustic charm is part of the appeal!
Phase 4: Scoring and Baking
Before you bake, it’s important to score the crackers. This is a step that helps them bake evenly and prevents them from puffing up too much. Use the tip of a sharp knife or a fork to gently prick each cracker a few times. This releases steam and creates those classic cracker markings. If you like, you can sprinkle a little extra salt, paprika, or even some sesame seeds on top of the crackers at this stage for added flavor and visual appeal.
Carefully transfer the baking sheets to your preheated oven. Bake for 12-18 minutes, or until the crackers are golden brown and firm to the touch. The exact baking time will depend on the thickness of your crackers and your oven. Keep an eye on them, especially towards the end of the baking time, as they can go from perfectly golden to burnt very quickly. You may need to rotate the baking sheets halfway through the baking time to ensure even browning.
Phase 5: Cooling and Enjoying
Once the crackers are baked to perfection, remove them from the oven. Let them cool on the baking sheets for a few minutes. They will continue to crisp up as they cool. After they’ve cooled slightly, transfer them to a wire rack to cool completely. This allows air to circulate around them, ensuring they become fully crisp. Resist the urge to eat them all warm, although they are undeniably delicious!
Once completely cooled, your homemade sourdough cheese crackers are ready to be enjoyed. Store any leftovers in an airtight container at room temperature for up to a week. They are a delightful, homemade snack that you’ll be proud to share (or keep all to yourself!).
Conclusion:
Congratulations! You’ve successfully navigated the delightful process of creating your very own batch of Sourdough Cheese Crackers. We hope you’ve enjoyed the tangy aroma filling your kitchen and the satisfaction of pulling these golden beauties from the oven. These aren’t just any crackers; they are a testament to the magic of sourdough, offering a unique depth of flavor and a satisfying crunch that store-bought versions simply can’t replicate. Embrace the versatility of these Sourdough Cheese Crackers – they are perfect for a sophisticated cheese board, a delightful snack alongside your favorite soup or salad, or even as a crunchy base for canapés.
Feel free to experiment with different cheeses, herbs, and spices to truly make these your own. A touch of chili flake can add a pleasant kick, while finely chopped rosemary brings an aromatic earthiness. Don’t be discouraged if your first batch isn’t absolutely perfect; sourdough baking is a journey, and with each attempt, you’ll refine your technique. We encourage you to share your creations with friends and family, spreading the joy of homemade goodness.
Frequently Asked Questions about Sourdough Cheese Crackers:
Q: How should I store my Sourdough Cheese Crackers?
A: Once completely cooled, store your Sourdough Cheese Crackers in an airtight container at room temperature. They should stay wonderfully crisp for up to a week, though they rarely last that long!
Q: Can I use a different type of flour?
A: While the recipe is optimized for all-purpose flour for the best texture, you can experiment with adding a small percentage of whole wheat or rye flour for a nuttier flavor. Be mindful that this might affect the dough’s hydration and handling.
Q: My crackers are a bit soft, what did I do wrong?
A: This usually indicates they haven’t baked long enough to fully dry out. Ensure your oven temperature is accurate and bake until the edges are deeply golden brown and the crackers feel firm to the touch. They will crisp up further as they cool.
Sourdough Cheese Crackers – Irresistible Homemade Flavor
Irresistible homemade sourdough cheese crackers with a savory, tangy, and slightly spicy flavor, perfect for snacking or serving with dips.
Ingredients
-
230 grams (1 cup) sourdough starter, active or discard (stirred down)
-
3 tablespoons melted butter or neutral-flavored oil
-
120 grams (1 cup) all-purpose flour
-
1/2 teaspoon salt
-
1/2 teaspoon paprika
-
1/2 teaspoon garlic powder
-
1/4 teaspoon cayenne pepper
-
8 ounces cheddar cheese, shredded
Instructions
-
Step 1
In a mixing bowl, combine sourdough starter and melted butter/oil. Whisk together. Add flour, salt, paprika, garlic powder, and cayenne pepper. Mix until a shaggy dough forms. Let rest for 10-15 minutes. -
Step 2
Add shredded cheddar cheese to the dough and knead gently until fairly evenly distributed. Wrap the dough in plastic wrap, flatten into a disc, and refrigerate for at least 30 minutes. -
Step 3
Preheat oven to 375°F (190°C). Line two baking sheets with parchment paper. Lightly flour a work surface and rolling pin. Roll out the chilled dough to about 1/8th inch thickness. Cut into desired shapes using a pizza cutter or knife. -
Step 4
Place the cut crackers on the prepared baking sheets, leaving some space between them. Gently prick each cracker a few times with a knife or fork to score them. Sprinkle with additional salt or spices if desired. -
Step 5
Bake for 12-18 minutes, or until golden brown and firm. Rotate baking sheets halfway through for even browning. Keep a close watch as they can burn quickly. -
Step 6
Let the crackers cool on the baking sheets for a few minutes, then transfer them to a wire rack to cool completely before enjoying. Store leftovers in an airtight container.
Important Information
Nutrition Facts (Per Serving)
It is important to consider this information as approximate and not to use it as definitive health advice.
Allergy Information
Please check ingredients for potential allergens and consult a health professional if in doubt.