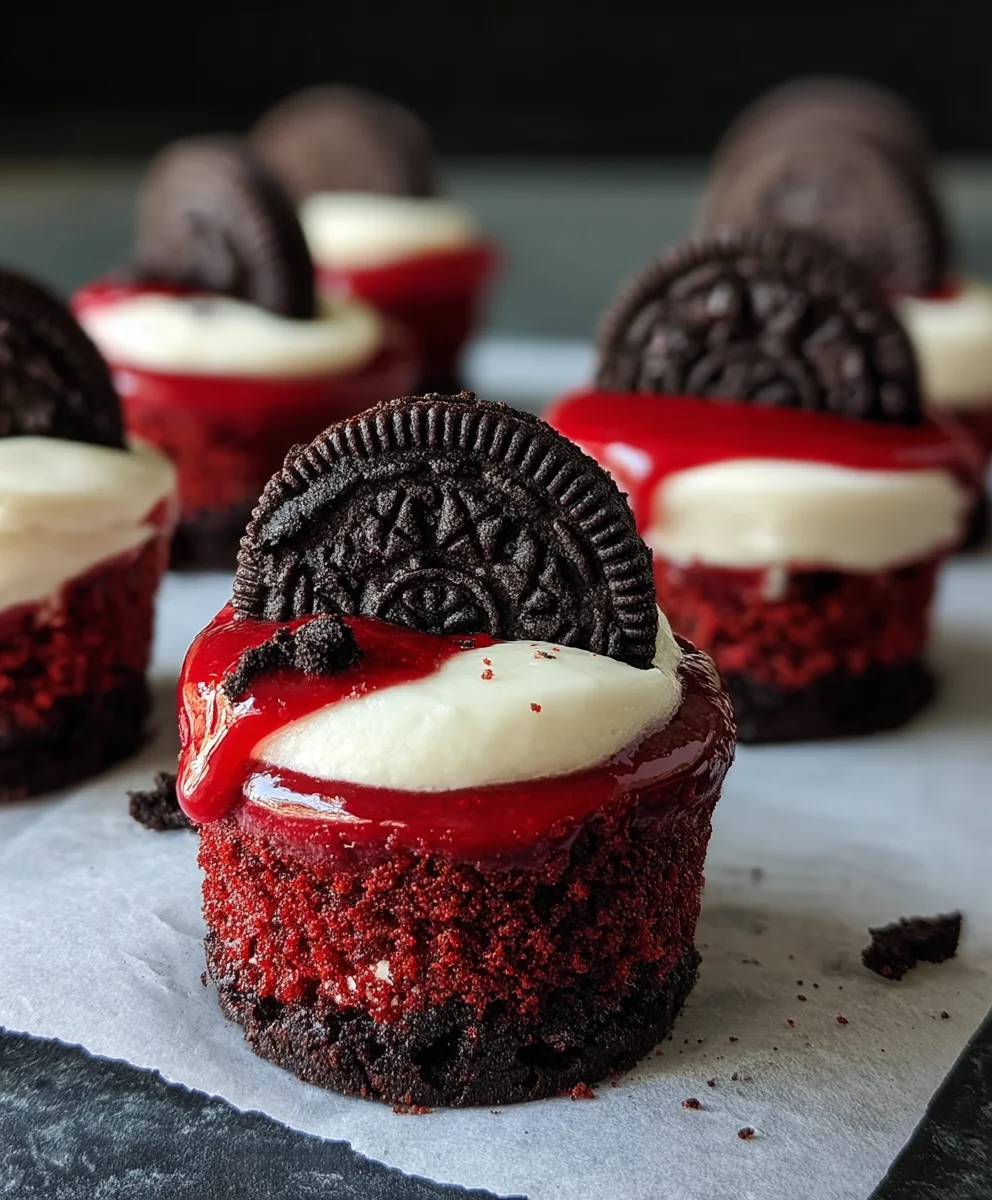
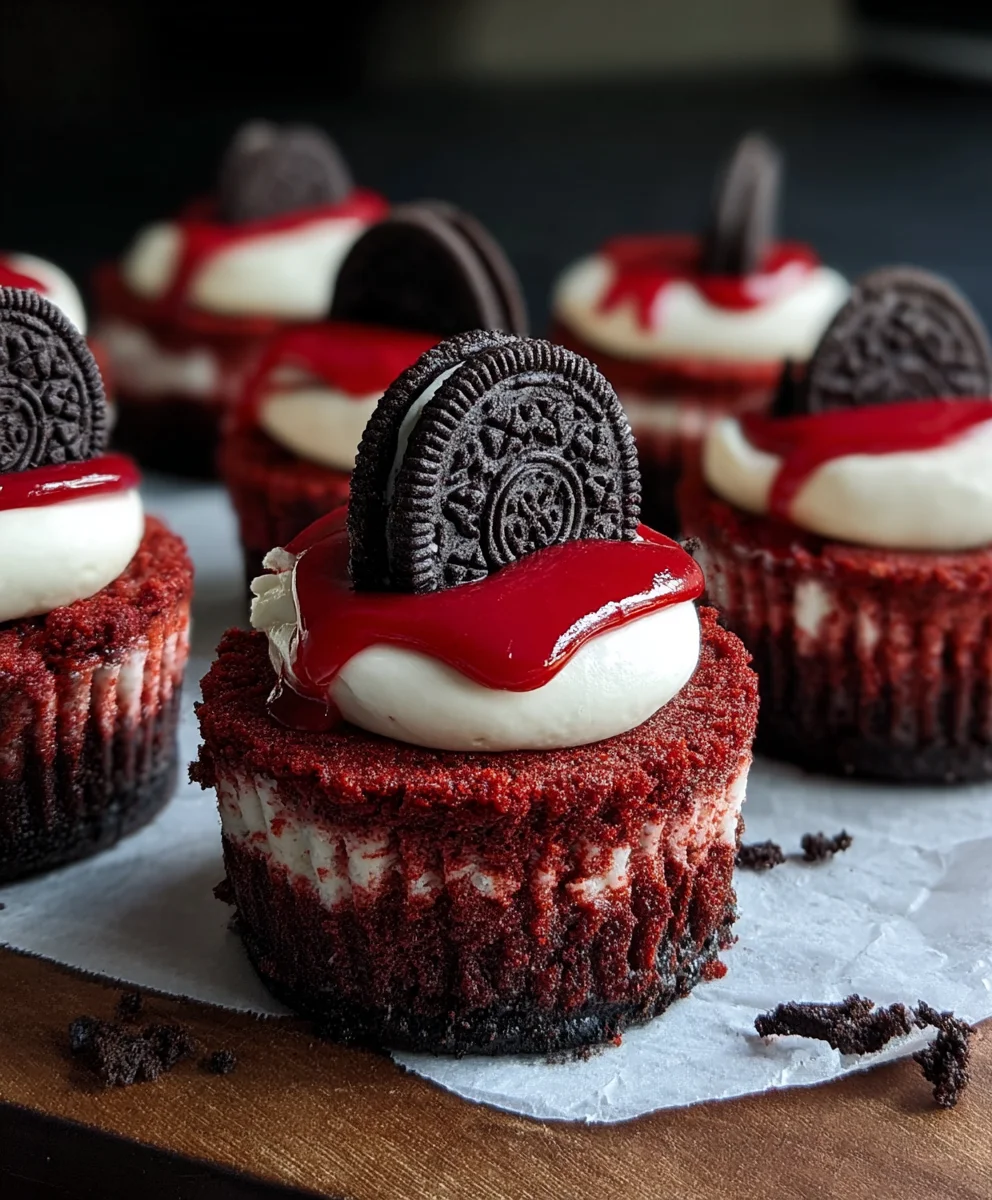
Mini Red Velvet Oreo Cheesecakes-Decadent Bites
Mini Red Velvet Oreo Cheesecakes are more than just a dessert; they’re a delightful indulgence that combines two universally loved treats into one perfect bite. Imagin extracte the rich, slightly tangy flavor of classic red velvet cake, swirled through a velvety smooth cheesecake, all nestled atop a crum extractbly, chocolatey Oreo cookie crust. This isn’t just any cheesecake; these mini marvels offer an explosion of textures and tastes that are simply irresistible. People adore them because they deliver all the decadent goodness of a full-sized cheesecake but in a portion that feels just right for a special occasion or even a weeknight treat. What truly sets these Mini Red Velvet Oreo Cheesecakes apart is the perfect marriage of contrasting flavors and the satisfying crunch of the Oreo base against the creamy, luscious filling. Get ready to fall in love with this show-stopping dessert that’s as beautiful as it is delicious.
Ingredients:
- 12 Oreo cookies, finely crushed
- 3 tablespoons all-purpose flour
- 1/2 cup cocoa powder (divided into two portions)
- 1/2 cup granulated sugar (divided into two portions)
- 1/4 cup unsalted butter, melted
- 2 large eggs, room temperature (divided into two portions)
- 1/2 teaspoon vanilla extract (divided into two portions)
- Pinch of salt
- 8 oz cream cheese, room temperature
- 1/4 cup sour cream, room temperature
- Red gel food coloring
Crust Preparation
Step 1: Creating the Oreo Base
Begin extract by preparing the base for your Mini Red Velvet Oreo Cheesecakes. Take all 12 Oreo cookies and place them into a food processor. Pulse them until they are finely crushed into a crum extractb-like consistency. If you don’t have a food processor, you can place the Oreos in a sturdy zip-top bag and crush them with a rolling pin or the bottom of a heavy pan. In a medium bowl, combine the finely crushed Oreo cookies with 3 tablespoons of all-purpose flour, 1 tablespoon of cocoa powder, and 2 tablespoons of granulated sugar. Add a pinch of salt to enhance the flavors. Whisk these dry ingredients together thoroughly to ensure they are evenly distributed. Now, pour in the 1/4 cup of melted unsalted butter. Stir everything with a fork or spatula until the mixture resembles wet sand and arum extractthe crumbs are moistened. This will ensure your crust holds together nicely.
Step 2: Assembling the Crust in Muffin Tin
Prepare a standard 12-cup muffin tin by lining each cup with a paper liner. This makes removing the cheesecakes much easier and cleaner. Drum extractde the Oreo crumb mixture evenly among the 12 prepared muffin cups. Use the bottom of a small glass or your fingerum extractto firmly press the crumbs down into an even layer at the bottom of each liner. This compact layer will form the sturdy base of your mini cheesecakes. Ensure the crust irum extractacked tightly so it doesn’t crumble when you serve the cheesecakes. You can even bring the crust mixture slightly up the sides of the paper liner if you like a more pronounced crust edge.
Cheesecake Filling Preparation
Step 3: Crafting the Cream Cheese Mixture
Now, let’s move on to the rich and creamy cheesecake filling. In a large mixing bowl, beat the 8 oz of room temperature cream cheese with an electric mixer on medium speed until it is completely smooth and free of lumps. It’s crucial that the cream cheese is at room temperature to achieve this smooth texture; cold cream cheese will result in a lumpy filling. Next, add 1/4 cup of granulated sugar and the 1 tablespoon of cocoa powder to the cream cheese. Continue beating until these are well incorporated. Add the 1/4 cup of room temperature sour cream and 1/2 teaspoon of vanilla extract. Mix on low speed until just combined, being careful not to overmix, which can introduce too much air and cause cracks in your cheesecakes.
Step 4: Incorporating Color and Eggs
To achieve that iconic red velvet hue, add a few drops of red gel food coloring to the cream cheese mixture. Gel food coloring is more concentrated than liquid coloring, so a little goes a long way. Start with about 1/2 teaspoon and add more, drop by drop, until you reach your desired vibrant red color. Stir until the color is uniformly distributed. Now, it’s time to add the eggs. In a separate small bowl, lightly whisk together 1 room temperature egg. Add this whisked egg to the cream cheese mixture and beat on low speed until just combined. Overmixing at this stage can lead to a more porous texture and potential cracking. Scrape down the sides of the bowl as needed to ensure everything is thoroughly mixed.
Baking and Cooling
Step 5: Filling and Baking Your Mini Cheesecakes
Carefully spoon the red velvet cheesecake filling evenly over the Oreo crust in each muffin cup. Fill each liner about two-thirds to three-quarters full. As you fill them, gently tap the muffin tin on the counter a few times. This helps to release any air bubbles trapped in the batter, which can also contribute to cracking. Preheat your oven to 325°F (160°C). Bake the mini cheesecakes for approximately 18-22 minutes. You’ll know they’re ready when the edges are set, but the centers still have a slight jiggle when you gently shake the tin. Avoid overbaking, as this will result in a dry cheesecake.
Once baked, remove the muffin tin from the oven and let the mini cheesecakes cool in the tin on a wire rack for about 15-20 minutes. This gradual cooling helps prevent cracking. After this initial cooling period, carefully lift the mini cheesecakes out of the muffin tin using the paper liners and place them directly onto the wire rack to cool completely. For best results and a firm texture, refrigerate the Mini Red Velvet Oreo Cheesecakes for at least 2-3 hours, or preferably overnight, before serving. This chilling time allows the flavors to meld and the cheesecakes to set up perfectly. Enjoy your delightful homemade treats!
Conclusion:
I hope you’ve enjoyed diving into the delightful world of Mini Red Velvet Oreo Cheesecakes! This recipe truly offers the best of both worlds – the rich, creamy texture of cheesecake perfectly complemented by the iconic chocolatey crunch of Oreos and the subtle tang of red velvet. They’re surprisingly straightforward to make, making them a fantastic option for both novice bakers and seasoned pros looking for a showstopping dessert.
These mini cheesecakes are incredibly versatile. Serve them chilled as an elegant individual dessert after a special meal, or pack them into a cute box for a thoughtful homemade gift. They’re also ideal for parties and gatherings, as their individual portions make for easy serving and less mess. For a touch of indulgence, consider topping them with a dollop of fresh whipped cream, a scattering of chocolate shavings, or a few extra crushed Oreos. Don’t be afraid to experiment with variations! You could add a swirl of cream cheese frosting to the batter, or use different flavored Oreos for a unique twist.
Ultimately, the joy of making Mini Red Velvet Oreo Cheesecakes lies in their irresistible flavor and charming presentation. So gather your ingredients, put on your favorite apron, and get ready to impress yourself and your loved ones with these little bites of heaven. Happy baking!
Frequently Asked Questions:
Q1: Can I make the Mini Red Velvet Oreo Cheesecakes ahead of time?
Absolutely! Mini Red Velvet Oreo Cheesecakes are best made a day in advance. This allows them to set up completely and for the flavors to meld beautifully. Store them covered in the refrigerator for up to 3 days.
Q2: What if I don’t have mini muffin tins? Can I make a full-sized cheesecake?
While this recipe is specifically designed for mini cheesecakes, you could adapt it for a standard 9-inch springform pan. You would likely need to double or triple the recipe, and the baking time would need to be significantly increased. Keep a close eye on it, and use a toothpick test for doneness (it should come out with moist crum extractbs, not wet batter). The crust might also require a different approach for a full-sized pie.
Mini Red Velvet Oreo Cheesecakes-Decadent Bites
Indulge in these decadent mini red velvet Oreo cheesecakes, featuring a chocolatey Oreo crust and a rich, creamy red velvet cheesecake filling.
Ingredients
-
12 Oreo cookies, finely crushed
-
3 tablespoons all-purpose flour
-
1/2 cup cocoa powder
-
1/2 cup granulated sugar
-
1/4 cup unsalted butter, melted
-
1 large egg, room temperature
-
1/2 teaspoon vanilla extract
-
Pinch of salt
-
8 oz cream cheese, room temperature
-
1/4 cup sour cream, room temperature
-
1/4 cup granulated sugar
-
1 tablespoon cocoa powder
-
1/2 teaspoon vanilla extract
-
1 large egg, room temperature
-
Red gel food coloring
Instructions
-
Step 1
Combine crushed Oreo cookies, flour, 1 tablespoon cocoa powder, 2 tablespoons sugar, and salt. Stir in melted butter until mixture resembles wet sand. -
Step 2
Line a muffin tin with paper liners. Divide the Oreo mixture evenly among the cups and press firmly to create the crust. -
Step 3
Beat cream cheese until smooth. Add 1/4 cup sugar, 1 tablespoon cocoa powder, sour cream, and 1/2 teaspoon vanilla extract; mix until combined. -
Step 4
Add red gel food coloring to achieve desired red velvet color. Lightly whisk 1 egg and add to the cream cheese mixture; beat on low until just combined. -
Step 5
Spoon filling over crusts, filling about two-thirds to three-quarters full. Tap the tin to remove air bubbles. Bake at 325°F (160°C) for 18-22 minutes. -
Step 6
Cool cheesecakes in the tin for 15-20 minutes, then transfer to a wire rack to cool completely. Refrigerate for at least 2-3 hours before serving.
Important Information
Nutrition Facts (Per Serving)
It is important to consider this information as approximate and not to use it as definitive health advice.
Allergy Information
Please check ingredients for potential allergens and consult a health professional if in doubt.