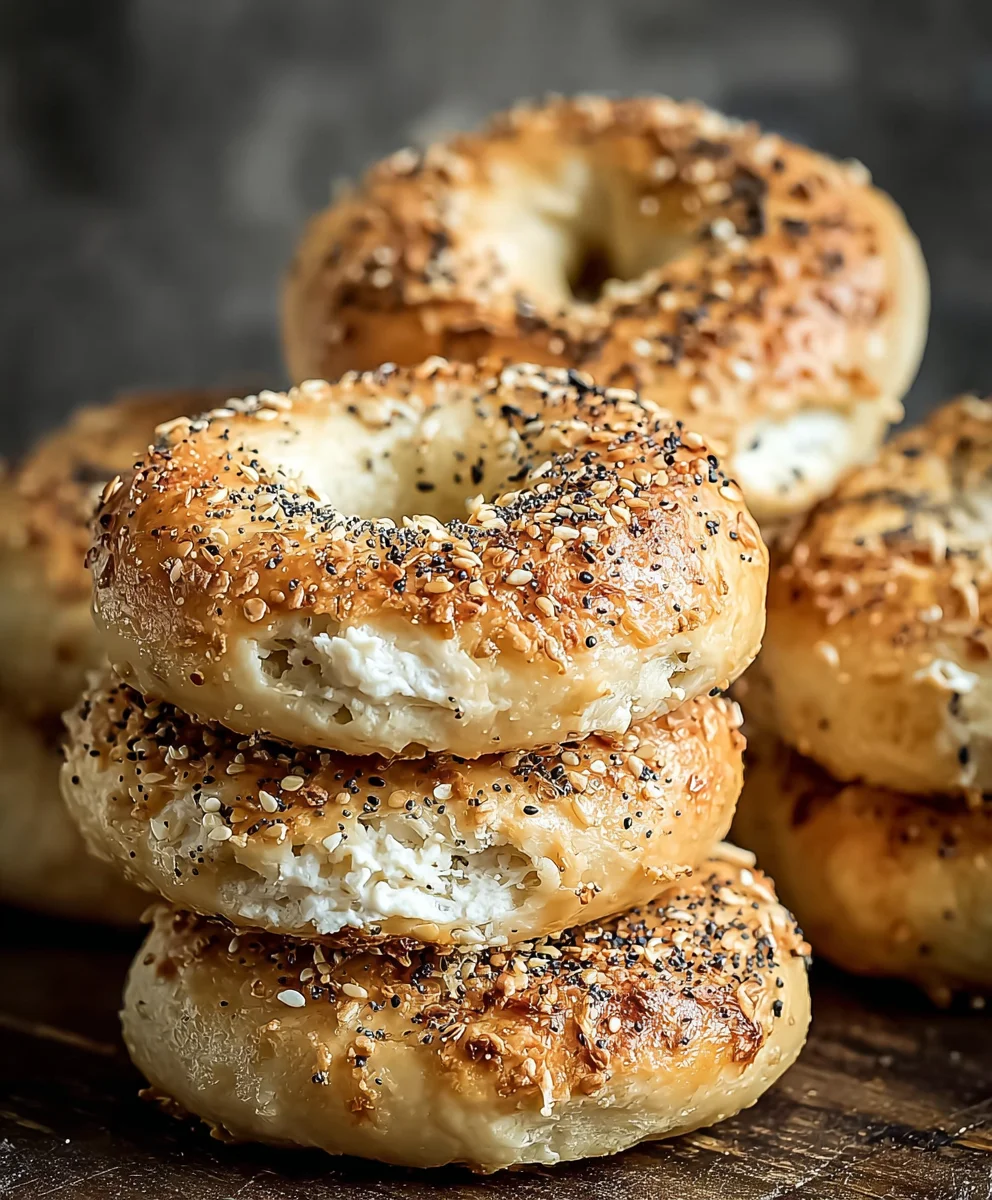
Greek Yogurt Bagels – High Protein Twist
Greek Yogurt Bagels: A High-Protein Twist on a Classic Favorite, and let me tell you, they are a game-changer! Forget everything you thought you knew about bland, carb-heavy bagels. We’re diving headfirst into a world of chewy perfection that not only satisfies your craving for that iconic circular delight but also packs a serious protein punch. Why do we love them so much? Because these Greek Yogurt Bagels are the ultimate breakfast hero, offering sustained energy to power you through your morning without the usual post-carb slump. What makes them truly special is the ingenious substitution of traditional ingredients with nutrient-rich Greek yogurt. This simple swap transforms a beloved classic into a healthier, more satisfying option that you can feel genuinely good about indulgin extractg in. Get ready to elevate your breakfast routine with a recipe that’s both incredibly delicious and wonderfully wholesome.
Ingredients:
- 1 cup all-purpose flour (or substitute with whole wheat flour for added fiber)
- 2 tsp baking powder
- 1/4 tsp salt
- 1 cup Greek yogurt (a thick consistency is highly recommended for the best texture)
- 1 egg (for the egg wash, to give your bagels a beautiful golden sheen)
- Optional toppings: Everything bagel seasoning, cinnamon, shredded cheese, garlic & herbs, chocolate chips (choose your favorites!)
Preparing Your Dough
Step 1: Combine Dry Ingredients
In a medium-sized mixing bowl, whisk together the all-purpose flour, baking powder, and salt. This initial step ensures that the leavening agent (baking powder) and the salt are evenly distributed throughout the flour, which is crucial for consistent results. If you’re using whole wheat flour, you might notice the dough will be a little denser, which is perfectly fine.
Step 2: Incorporate the Greek Yogurt
Add the 1 cup of thick Greek yogurt to the dry ingredients. Using a spatula or a wooden spoon, begin extract to mix everything together until a shaggy dough starts to form. Don’t worry if it looks a bit crum extractbly at this stage; that’s completely normal. The yogurt will hydrate the flour and bring everything together. Make sure you’re using a Greek yogurt that is on the thicker side, as a runnier yogurt can make the dough too wet and difficult to handle. If your Greek yogurt is slightly runnier than you’d like, you can strain it through a fine-mesh sieve lined with cheesecloth for about 15-20 minutes to remove some of the excess whey.
Step 3: Knead the Dough
Turn the dough out onto a lightly floured surface. Gently knead the dough for about 2-3 minutes. You’re not looking for a super elastic dough like you would with traditional yeast bagels. Instead, you want to work it just until it comes together into a cohesive ball. Over-kneading can lead to tough bagels, so be gentle! If the dough feels too sticky, add a tiny bit more flour, just a teaspoon at a time, until it’s manageable.
Shaping Your Bagels
Step 4: Divide and Shape
Divide the dough into 4 equal portions. Roll each portion into a ball, and then using your thumb, create a hole in the center of each ball. Gently stretch and widen the hole to form a classic bagel shape. You can also roll each portion into a rope and then form a circle, pinching the ends together to seal. Aim for a uniform size so that they all bake evenly. Don’t worry if your bagel shapes aren’t perfectly symmetrical; homemade charm is part of the appeal!
Step 5: Prepare for Baking and Add Toppings
Preheat your oven to 400°F (200°C). Line a baking sheet with parchment paper. Place your shaped bagels onto the prepared baking sheet, leaving some space between them. In a small bowl, whisk the egg with a tablespoon of water to create your egg wash. Brush the tops of each bagel generously with the egg wash. This will give them that lovely golden-brown color and a slight sheen. Now is also the time to add your optional toppings! Sprinkle them generously over the egg-washed surface. For the Everything Bagel seasoning, cinnamon, or shredded cheese, press them down gently so they adhere well to the bagel.
Step 6: Bake to Perfection
Bake the bagels in the preheated oven for 18-22 minutes, or until they are golden brown and sound hollow when tapped on the bottom. The exact baking time will depend on your oven and the size of your bagels. Keep an eye on them during the last few minutes of baking to prevent them from over-browning. Once baked, remove them from the oven and let them cool on the baking sheet for a few minutes before transferring them to a wire rack to cool completely. These bagels are best enjoyed warm, perhaps with a schmear of cream cheese or your favorite spread.

Conclusion:
And there you have it – your very own batch of delicious and satisfying Greek Yogurt Bagels: A High-Protein Twist on a Classic Favorite! We hope you enjoyed making these healthier, protein-packed bagels that are perfect for any time of day. Their chewy texture and slightly tangy flavor make them a fantastic alternative to traditional bagels, and the fact that they’re loaded with protein means you’ll stay fuller for longer. These bagels are incredibly versatile, so don’t be afraid to get creative with your toppings!
For serving suggestions, consider slathering them with your favorite cream cheese or a schmear of avocado. They also make an excellent base for a breakfast sandwich with eggs and lean protein, or a delightful vehicle for hummus and fresh vegetables for a light lunch. Don’t hesitate to experiment with different flavor additions to the dough itself – a sprinkle of garlic powder, some dried herbs, or even a touch of sweetness can transform these Greek Yogurt Bagels into something entirely new.
We truly encourage you to give this recipe a try. It’s a rewarding experience to bake your own bagels, and the healthier profile of these Greek Yogurt Bagels makes them an even more guilt-free pleasure. Enjoy every bite!
Frequently Asked Questions:
Q1: Can I make these Greek Yogurt Bagels ahead of time?
Yes, absolutely! Once cooled, you can store your Greek Yogurt Bagels in an airtight container at room temperature for up to 2-3 days, or freeze them for longer storage. Simply toast them from frozen or thawed for a fresh-baked taste.
Q2: What kind of Greek yogurt should I use?
For the best results in these Greek Yogurt Bagels, we recommend using plain, full-fat Greek yogurt. The fat content contributes to a richer texture, and the plain flavor ensures it won’t overpower the other ingredients. You can use 2% or even non-fat, but the texture might be slightly less dense.
Greek Yogurt Bagels – High Protein Twist
A quick and easy recipe for high-protein bagels using Greek yogurt, offering a healthier twist on a classic.
Ingredients
-
1 cup all-purpose flour (or substitute with whole wheat flour)
-
2 tsp baking powder
-
1/4 tsp salt
-
1 cup Greek yogurt (thick consistency recommended)
-
1 egg (for egg wash)
-
Optional toppings: Everything bagel seasoning, cinnamon, shredded cheese, garlic & herbs, chocolate chips
Instructions
-
Step 1
In a medium-sized mixing bowl, whisk together the all-purpose flour, baking powder, and salt until evenly distributed. -
Step 2
Add the thick Greek yogurt to the dry ingredients. Mix with a spatula or wooden spoon until a shaggy dough forms. If yogurt is runny, strain it first. -
Step 3
Turn the dough onto a lightly floured surface and knead gently for 2-3 minutes until it forms a cohesive ball. Add a teaspoon of flour at a time if too sticky. -
Step 4
Divide the dough into 4 equal portions. Roll each into a ball, create a hole in the center with your thumb, and gently widen into a bagel shape. -
Step 5
Preheat oven to 400°F (200°C). Line a baking sheet with parchment paper. Place bagels on the sheet, brush with an egg wash (1 egg whisked with 1 tbsp water), and add desired toppings. -
Step 6
Bake for 18-22 minutes, or until golden brown and hollow-sounding when tapped. Let cool on the baking sheet for a few minutes before transferring to a wire rack.
Important Information
Nutrition Facts (Per Serving)
It is important to consider this information as approximate and not to use it as definitive health advice.
Allergy Information
Please check ingredients for potential allergens and consult a health professional if in doubt.