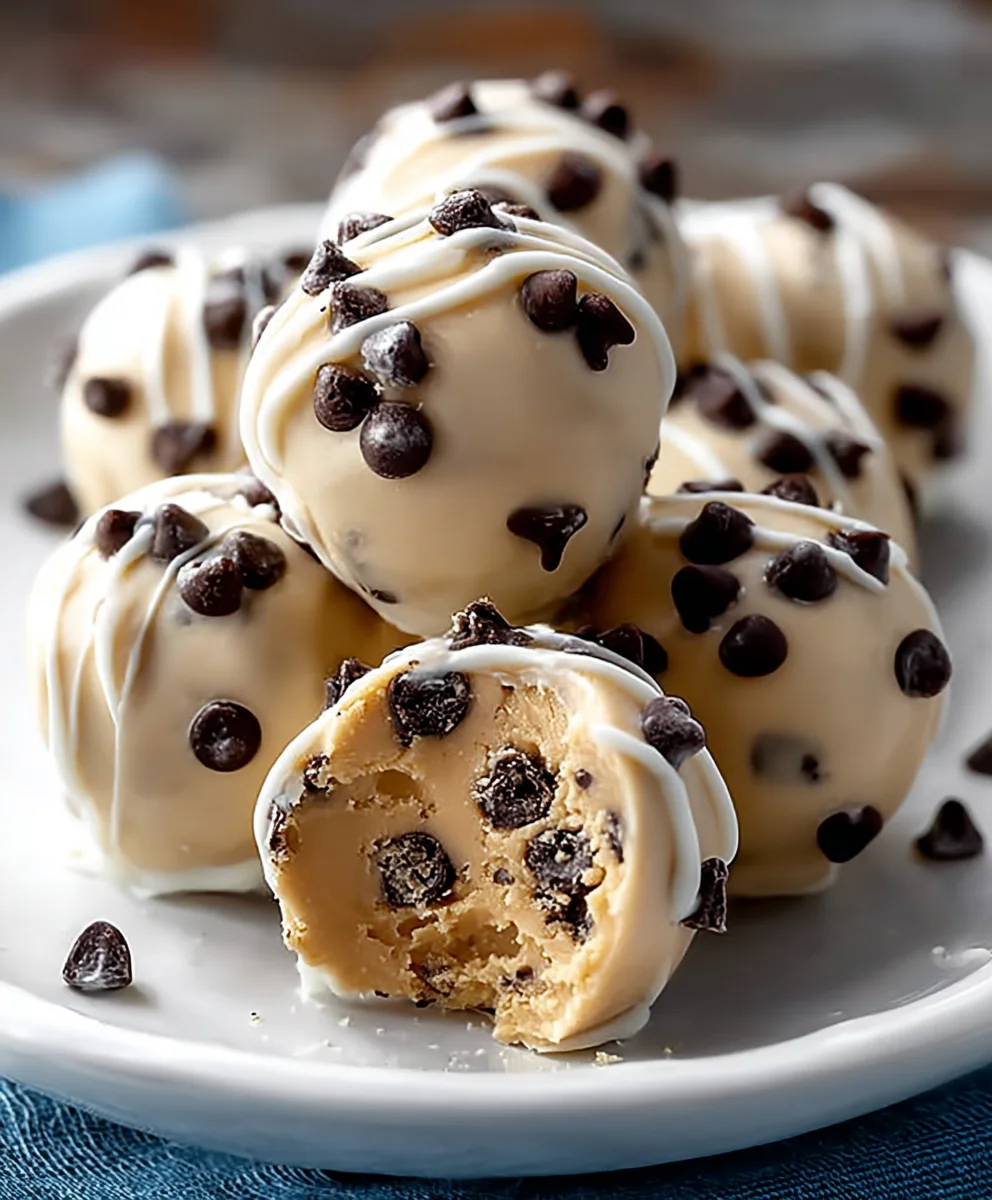
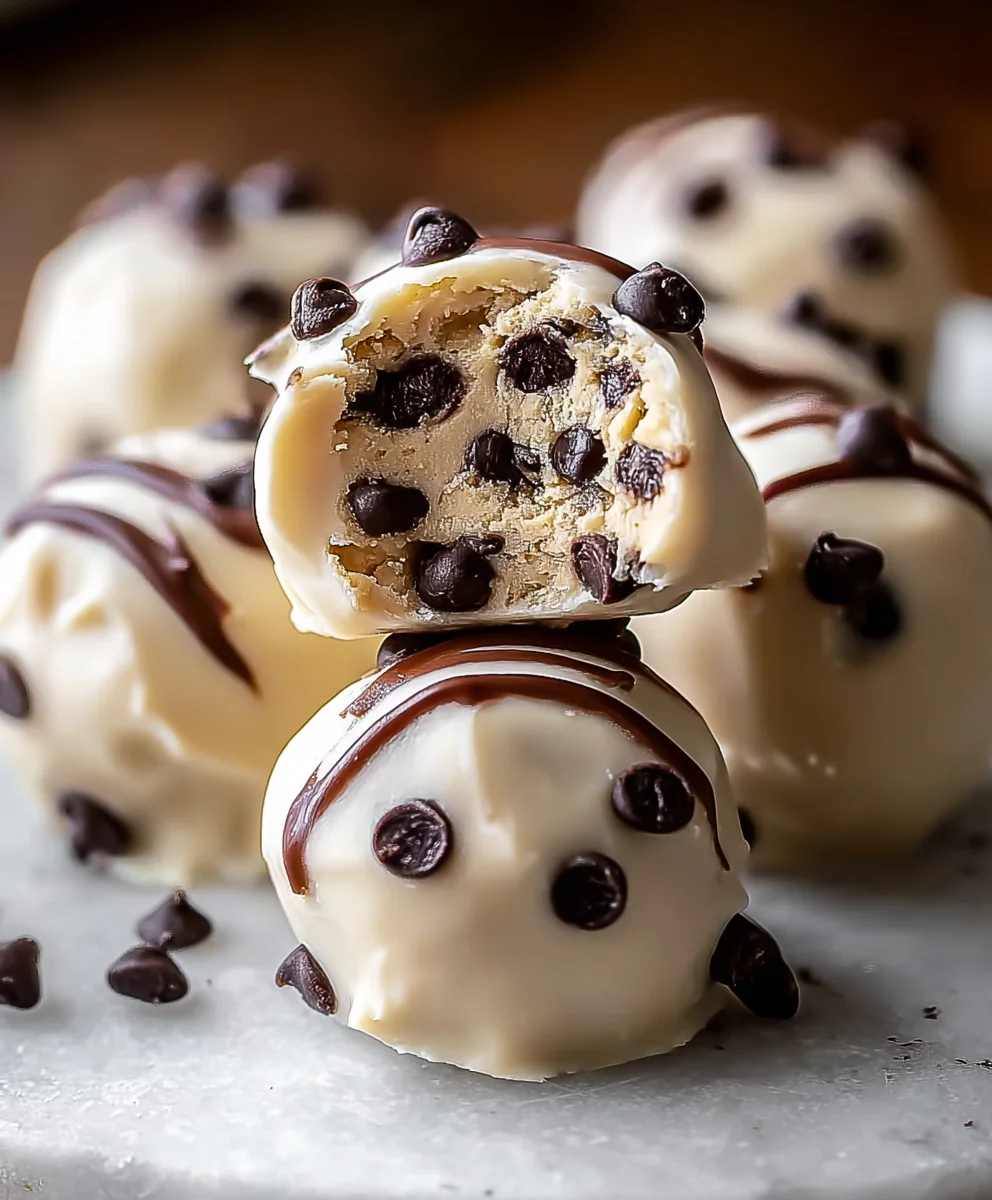
Frozen Greek Yogurt Peanut Butter Bites- Easy Homemade Treat
Frozen Greek Yogurt Peanut Butter Bites with Chocolate Chips: A Delightful Treat You Can Make at Home! are the ultimate answer to those midday cravings or a perfect post-workout reward. Imagin extracte a bite-sized explosion of creamy, tangy Greek yogurt, rich, nutty peanut butter, and decadent chocolate chips, all frozen to a perfect, refreshing firmness. It’s no wonder these little gems have taken the internet by storm! People adore them for their incredible simplicity, their wholesome ingredients, and the fact that they offer a guilt-free indulgence. What truly sets these Frozen Greek Yogurt Peanut Butter Bites with Chocolate Chips: A Delightful Treat You Can Make at Home! apart is their amazing versatility. You can customize them to your heart’s content, adding your favorite fruits, seeds, or even a sprinkle of sea salt for an extra flavor dimension. Plus, the sheer joy of creating these delicious Frozen Greek Yogurt Peanut Butter Bites with Chocolate Chips: A Delightful Treat You Can Make at Home! in your own kitchen, knowing exactly what goes into them, is incredibly satisfying. Get ready to impress yourself and your loved ones with this incredibly easy yet unbelievably tasty recipe!
Ingredients:
- 1 cup plain Greek yogurt
- 1/2 cup creamy peanut butter
- 1/4 cup honey
- 1 teaspoon vanilla extract
- 1/2 cup mini chocolate chips
- 1/4 teaspoon sea salt
Preparation: Mixing the Base
Step 1: Combine the Yogurt and Peanut Butter
Begin extract by gathering your ingredients. In a medium-sized mixing bowl, add the plain Greek yogurt. This is the foundation of our delightful bites, providing a creamy and tangy base. Next, incorporate the creamy peanut butter. Ensure your peanut butter is smooth and stirrable for the best consistency. Using a whisk or a sturdy sgin extractn, begin to mix the Greek yogurt and peanut butter together thoroughly. You want to achieve a smooth, homogenous mixture where the peanut butter is completely incorporated into the yogurt. This might take a minute or two of vigorous stirring to ensure there are no streaks of yogurt or peanut butter. The goal is a unified, creamy texture that will hold all our delicious additions.
Step 2: Sweeten and Flavor the Mixture
Once the yogurt and peanut butter are well combined, it’s time to add the sweetness and enhance the overall flavor profile. Pour in the honey. The honey will not only add a lovely natural sweetness but also help to slightly thicken the mixture, making it easier to handle. Next, add the vanilla extract. Vanilla extract is a flavor enhancer that beautifully complements both peanut butter and chocolate, adding a warm, aromatic note. Finally, sprinkle in the sea salt. Don’t underestimate the power of a pinch of salt! Sea salt, in particular, has a wonderful way of balancing sweetness and intensifying the flavors of the other ingredients, preventing the bites from tasting overly sweet. Now, stir all these ingredients into the yogurt and peanut butter mixture until everything is perfectly blended. Continue stirring until the honey is fully dissolved and the salt and vanilla are evenly distributed throughout.
Incorporating the Add-Ins
Step 3: Fold in the Chocolate Chips
With our flavorful base prepared, it’s time to add the star of the show – the mini chocolate chips! Gently fold in the mini chocolate chips into the mixture. I prefer using mini chocolate chips because they distribute more evenly and provide a delightful burst of chocolate in every bite without overwhelming the peanut butter and yogurt. Be careful not to overmix at this stage. We want the chocolate chips to remain distinct pieces within the mixture, rather than getting completely pulverized. Use a spatula to gently fold them in, ensuring they are dispersed throughout the bowl. This step adds texture and that irresistible sweet chocolate element that makes these bites so special.
Freezing and Serving
Step 4: Portioning and Initial Freezing
Now that our delicious mixture is ready, it’s time to shape our bites. Line a baking sheet with parchment paper or wax paper. This will prevent the bites from sticking to the sheet as they freeze. Using a tablespoon or a small cookie scoop, drop spoonfuls of the mixture onto the prepared baking sheet. Aim for bite-sized portions, about one tablespoon each. Try to make them relatively uniform in size so they freeze evenly. Once all the mixture has been portioned onto the baking sheet, carefully place the baking sheet into the freezer. Allow the bites to freeze for at least 30 minutes. This initial freeze is crucial as it will firm them up enough to be handled without losing their shape.
Step 5: Complete Freezing and Storage
After the initial 30 minutes of freezing, carefully remove the baking sheet from the freezer. The bites should now be firm enough to handle. Gently transfer the semi-frozen bites from the parchment paper into an airtight container or a resealable freezer bag. This step is important to prevent freezer burn and keep them fresh. Once they are all transferred, place the container or bag back into the freezer. Allow them to freeze completely until solid, which will typically take another 1 to 2 hours. For best results and optimal firmness, I like to let them freeze for at least 2 hours. Once fully frozen, your Frozen Greek Yogurt Peanut Butter Bites with Chocolate Chips are ready to be enjoyed! You can store them in the freezer for up to a month. When you’re ready for a treat, simply take out as many as you like. They are best enjoyed straight from the freezer for that perfect icy, creamy, and crunchy texture.
Conclusion:
And there you have it! You’ve successfully navigated the simple yet incredibly rewarding process of creating your very own Frozen Greek Yogurt Peanut Butter Bites with Chocolate Chips: A Delightful Treat You Can Make at Home! These delightful bites are the perfect way to satisfy your sweet cravings with a healthier, protein-packed option. They’re incredibly versatile, making them ideal for a quick breakfast on the go, a post-workout refuel, or even a guilt-free dessert. Don’t be afraid to get creative with your additions and find your perfect flavor combination!
I encourage you to try this recipe and share your creations with friends and family. It’s a wonderful recipe to have in your repertoire for those moments when you need something delicious and satisfying without the fuss. Enjoy the process and most importantly, enjoy these fantastic homemade treats!
Frequently Asked Questions:
Q: Can I use a different type of yogurt for these Frozen Greek Yogurt Peanut Butter Bites with Chocolate Chips?
A: While Greek yogurt is recommended for its thickness and protein content, you can experiment with other thick yogurts like Skyr. However, thinner yogurts may result in a less firm bite. Always ensure your yogurt is plain to control the sweetness.
Q: My bites are too hard to eat straight from the freezer. What can I do?
A: This is a common occurrence! The best solution is to let the Frozen Greek Yogurt Peanut Butter Bites with Chocolate Chips sit at room temperature for about 5-10 minutes before enjoying them. This allows them to soften just enough to be easily bitten into, while still remaining delightfully cold and firm.
Frozen Greek Yogurt Peanut Butter Bites
Easy homemade frozen Greek yogurt peanut butter bites with chocolate chips.
Ingredients
-
1 cup plain Greek yogurt
-
1/2 cup creamy peanut butter
-
1/4 cup honey
-
1 teaspoon vanilla extract
-
1/2 cup mini chocolate chips
-
1/4 teaspoon sea salt
Instructions
-
Step 1
In a medium-sized mixing bowl, combine the plain Greek yogurt and creamy peanut butter. Whisk together until smooth and homogenous. -
Step 2
Add the honey, vanilla extract, and sea salt to the yogurt and peanut butter mixture. Stir until all ingredients are perfectly blended and the honey is fully dissolved. -
Step 3
Gently fold in the mini chocolate chips into the mixture using a spatula. Ensure they are dispersed throughout. -
Step 4
Line a baking sheet with parchment paper. Drop spoonfuls of the mixture onto the prepared baking sheet, aiming for bite-sized portions. Freeze for at least 30 minutes until firm. -
Step 5
Carefully transfer the semi-frozen bites into an airtight container or resealable freezer bag. Place back into the freezer and freeze completely until solid, about 1-2 hours.
Important Information
Nutrition Facts (Per Serving)
It is important to consider this information as approximate and not to use it as definitive health advice.
Allergy Information
Please check ingredients for potential allergens and consult a health professional if in doubt.