Easy Twix Cookies Recipe-Chocolate Caramel Delight
Twix cookies are about to become your new obsession! If you’ve ever found yourself gazing longin extractgly at those iconic candy bars, dreaming of a homemade version that captures that perfect balance of crunchy shortbread, gooey caramel, and rich chocolate, then you’re in for a treat. We’re diving deep into the delicious world of Twix cookies, a beloved treat that consistently wins hearts (and taste buds) with its irresistible combination of textures and flavors. What makes these cookies so special? It’s that delightful crunch of the buttery base, followed by the sweet, chewy embrace of caramel, all enrobed in a decadent chocolate coating. It’s like a miniature flavor explosion in every bite! Forget store-bought; these homemade Twix cookies are a labor of love that pays off in spades, offering a superior, more customizable experience that’s perfect for sharing (or not!).
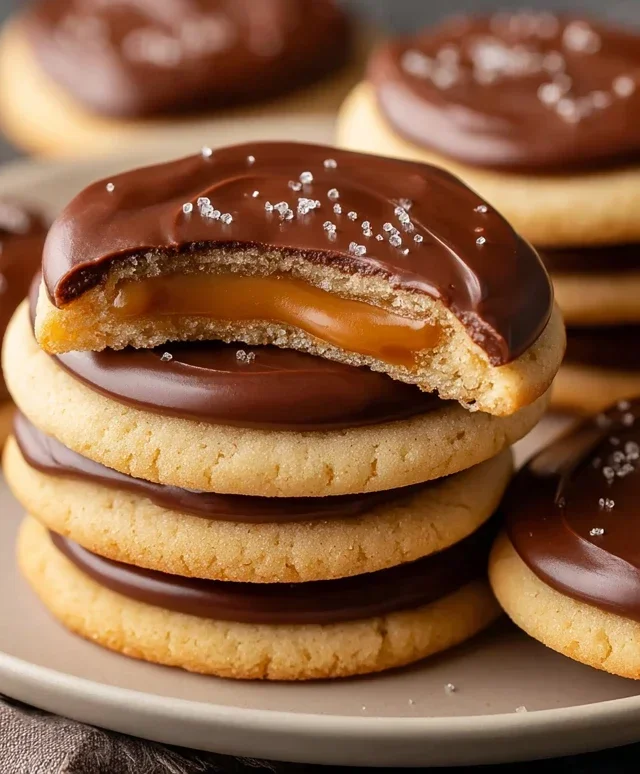
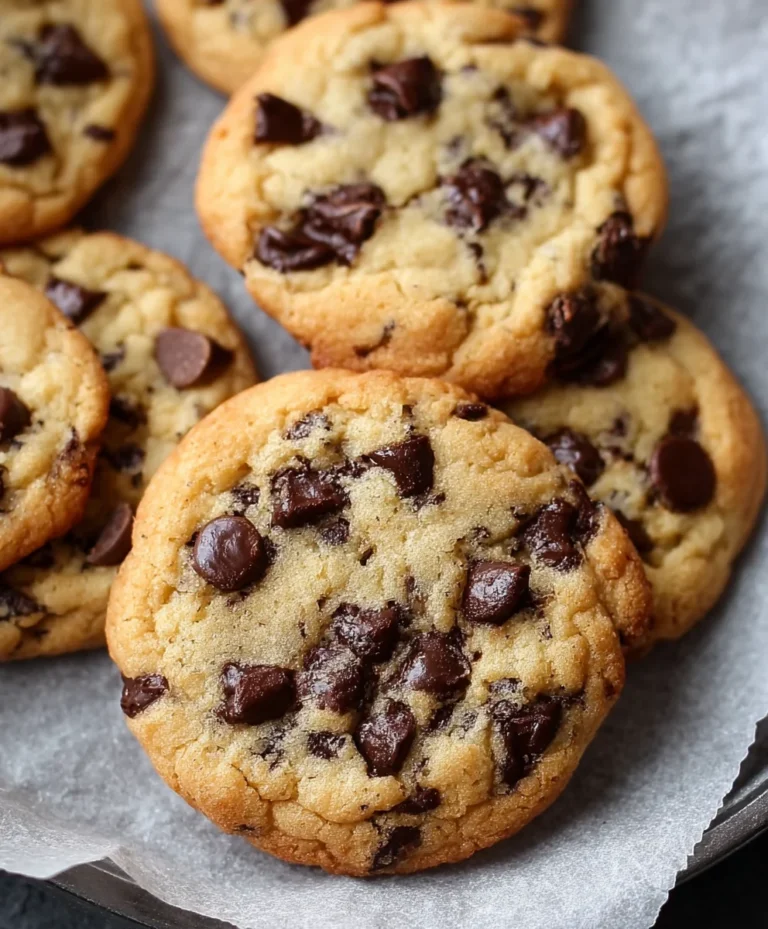
Twix Cookies
Get ready to experience a taste of pure bliss with these incredible Twix Cookies! If you’re a fan of the classic Twix candy bar, with its irresistible combination of crunchy cookie, chewy caramel, and smooth chocolate, then you are going to absolutely adore these homemade cookies. They capture all the delightful flavors and textures of the beloved treat in a perfectly portable, bite-sized package. These cookies are surprisingly easy to make, making them a fantastic option for any skill level in the kitchen. Whether you’re baking for a party, a special occasion, or just a sweet afternoon pick-me-up, these Twix Cookies are guaranteed to be a showstopper. The secret to their success lies in the perfect balance of ingredients and a few key techniques that ensure a delightful texture and out-of-this-world flavor. So, grab your apron and let’s get baking!
Ingredients:
Preparing the Cookie Base
The foundation of our Twix Cookies is a wonderfully tender and slightly crisp cookie base. To start, in a large mixing bowl, combine the contents of your 15.25-ounce box of white cake mix. To this, we’ll add ¾ cup of all-purpose flour. The cake mix provides a great texture and a subtle sweetness that is the perfect canvas for our other flavors. The flour helps to give the cookies just the right amount of structure and chew. Next, add 1 cup of softened salted butter. It’s crucial that your butter is softened, not melted. Softened butter will cream together with the dry ingredients to create a cohesive dough that is easy to work with. If your butter is too hard, it won’t incorporate properly, and if it’s melted, your cookies will spread too much. I like to use a stand mixer with the paddle attachment for this stage, but you can also use a hand mixer or even a sturdy spoon and some elbow grease. Mix these ingredients together until the mixture resembles coarse crum extractbs. It will look a bit dry and shaggy at this point, and that’s perfectly fine.
Creating the Caramel Swirl
Now for the gooey, golden caramel layer that makes these cookies so special. In a small, microwave-safe bowl, combine 1 ¼ cups of caramel bits with 1 Tablespoon of heavy cream. Microwave these in 20-second intervals, stirring well after each interval, until the caramel bits are completely melted and the mixture is smooth and pourable. Be careful not to overheat the caramel, as it can become too stiff or even burn. You want a luscious, flowing consistency. Once melted, stir this caramel mixture until it’s completely smooth. The heavy cream helps to make the caramel extra creamy and less prone to seizing up. This caramel mixture will be drizzled over the cookie dough, creating those signature caramel swirls reminiscent of a Twix bar.
Assembling and Baking Your Twix Cookies
Once your cookie base and caramel sauce are ready, it’s time to bring them all together. Take your cookie dough and either press it into a lightly greased 9×13 inch baking pan or roll it out on a floured surface to about ¼ inch thickness. If you’re pressing it into a pan, ensure it’s an even layer so the cookies bake uniformly. If you’re rolling it out, try to keep the thickness consistent. Once the dough is in your desired shape, it’s time to add the caramel! Drizzle the melted caramel mixture generously over the top of the cookie dough. You can use a spoon or a piping bag for this, creating a beautiful swirl effect. For the chocolate layer, in a separate microwave-safe bowl, melt 1 cup of semi-sweet chocolate chips (or mini semi-sweet chocolate chips) with ½ Tablespoon of salted butter. Again, microwave in 20-second intervals, stirring in between, until the chocolate is smooth and melted. This extra bit of butter helps to make the chocolate ganache-like and shiny. Pour or drizzle this melted chocolate over the caramel layer, ensuring it covers most of the caramel.
The Final Bake and Cool Down
Now it’s time to bake these beauties! Place your assembled cookie creation into a preheated oven at 350°F (175°C). The baking time will vary depending on whether you baked them in a pan or rolled them out. If baked in a 9×13 inch pan, bake for approximately 20-25 minutes, or until the edges are golden brown and the center is set. If you rolled out the dough and cut shapes, the baking time will be shorter, likely around 10-12 minutes, depending on the size of your cookies. Keep a close eye on them, as the caramel can bubble and brown quickly. Once they’re out of the oven, allow them to cool completely in the pan or on the baking sheet. This is a crucial step for them to set properly. Resist the urge to cut into them while they’re hot! Once completely cooled, if you baked them in a pan, you can then cut them into bars or squares to mimic the classic Twix shape. If you rolled and cut them into individual cookies, they are ready to be enjoyed as is.
Cooling and Enjoying Your Twix Masterpieces
The final and arguably the most challengin extractg step is to let your Twix Cookies cool completely. I know, I know, the smell is non-intoxicating and the thought of that gooey caramel and melty chocolate is almost unbearable, but patience is key here. Allowing the cookies to cool fully ensures that the caramel and chocolate set up properly, making them easy to cut and delightfully chewy without being overly messy. Once they’ve reached room temperature, you can proceed to cut them into bars or squares if you baked them in a pan. If you made individual cookies, they are ready for immediate enjoyment. Store any leftovers in an airtight container at room temperature for up to 3 days. These Twix Cookies are truly a showstopper and are sure to disappear fast. Enjoy every delicious bite of your homemade Twix-inspired treat!
Conclusion:
I hope you’ve enjoyed learning how to make these incredible Twix cookies! This recipe is truly a winner because it captures all the beloved elements of the classic candy bar – the crum extractbly shortbread base, the gooey caramel, and the rich chocolate coating – in a delightfully homemade package. They’re perfect for satisfying those sweet cravings and are guaranteed to impress your friends and family. Imagin extracte them fresh from the oven, the caramel still warm and melty, ready to be dunked into a cold glass of milk. They’re also fantastic for dessert platters, bake snon-alcoholic ales, or just as a special treat for yourself.
Don’t be afraid to get creative with these Twix cookies! You can experiment with different types of chocolate for the coating – milk, dark, or even white chocolate all work beautifully. For an extra touch, consider sprinkling some sea salt flakes on top of the chocolate before it sets for a sophisticated sweet and salty balance. I highly encourage you to give this recipe a try; you’ll be amazed at how easy it is to recreate that iconic Twix magic right in your own kitchen. Happy baking!
Frequently Asked Questions:
Can I make these Twix cookies ahead of time?
Absolutely! These cookies store wonderfully. Once the chocolate has fully set, you can keep them in an airtight container at room temperature for up to 3-4 days. They actually become even chewier and more flavorful as they sit.
What’s the best way to store the caramel to prevent it from becoming too hard?
For the best caramel texture, ensure your caramel is cooked to the correct stage. If you find it’s getting too firm upon storage, a brief, gentle warming in the microwave (in short bursts) can help soften it again. Using good quality soft caramel candies is also key.
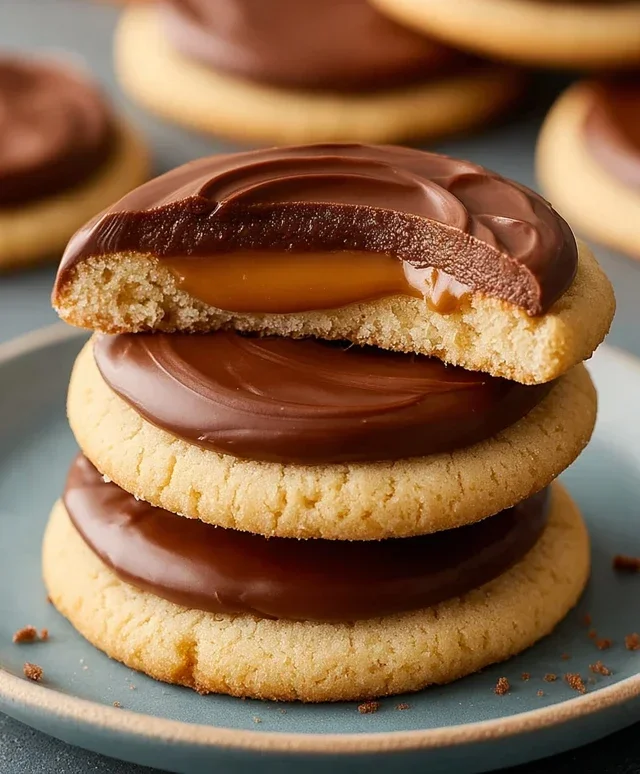
Twix Cookies
Chewy cookies with a caramel center and chocolate drizzle, inspired by Twix bars.
Ingredients
-
1 box white cake mix (15.25 ounces)
-
¾ cup all-purpose flour
-
1 cup salted butter, softened
-
1 ¼ cups caramel bits
-
1 Tablespoon heavy cream
-
1 cup semi-sweet chocolate chips or mini semi-sweet chocolate chips
-
½ Tablespoon salted butter
Instructions
-
Step 1
Preheat oven to 350°F (175°C). Line baking sheets with parchment paper. -
Step 2
In a large bowl, cream together the softened butter and the white cake mix until well combined. -
Step 3
Gradually add the all-purpose flour and mix until a dough forms. -
Step 4
In a small microwave-safe bowl, combine the caramel bits and heavy cream. Microwave in 30-second intervals, stirring in between, until melted and smooth. Stir in the ½ tablespoon of butter until melted. -
Step 5
Drop rounded tablespoons of dough onto prepared baking sheets, leaving about 2 inches between cookies. Press a small amount of the caramel mixture into the center of each cookie dough ball. -
Step 6
Bake for 9-11 minutes, or until edges are lightly golden and centers are set. -
Step 7
Let cookies cool on the baking sheets for a few minutes before transferring them to a wire rack to cool completely. -
Step 8
Melt the semi-sweet chocolate chips in a microwave-safe bowl in 30-second intervals, stirring until smooth. Drizzle melted chocolate over the cooled cookies.
Important Information
Nutrition Facts (Per Serving)
It is important to consider this information as approximate and not to use it as definitive health advice.
Allergy Information
Please check ingredients for potential allergens and consult a health professional if in doubt.