Cheesy Garlic Butter Corn on the Cob Recipe
Cheesy Garlic Butter Corn on the Cob is more than just a side dish; it’s a celebration on a plate! Imagin extracte succulent kernels bursting with sweet, summery flavor, enveloped in a rich, decadent embrace of garlic-infused butter and melted, gooey cheese. Is it any wonder this delightful creation has captured hearts (and taste buds) across the globe? People absolutely adore it for its irresistible comfort food appeal, its vibrant color that brightens any meal, and that satisfyingly savory, slightly sweet, utterly addictive taste. What truly sets this Cheesy Garlic Butter Corn on the Cob apart is the magical alchemy that occurs when fresh corn meets potent garlic, creamy butter, and a generous blanket of your favorite melty cheese. It’s a simple concept, elevated to extraordinary deliciousness, making it the perfect companion to barbecues, weeknight dinners, or whenever you crave a little culinary sunshine.
Ingredients:
- 4 ears fresh corn, husked
- ¼ cup (½ stick) unsalted butter, softened
- 2 garlic cloves, minced
- 1 tbsp chopped fresh parsley
- ½ tsp salt
- ¼ tsp black pepper
- ½ cup grated Parmesan cheese
- 1 tsp lemon zest (optional)
Preparing the Corn
Step 1: Preheating and Corn Preparation
Let’s get started by preheating your oven to 400 degrees Fahrenheit (200 degrees Celsius). This temperature is perfect for roasting the corn, which will bring out its natural sweetness and give it a lovely tender texture. While the oven heats up, take your four ears of fresh corn. Ensure they are completely husked, meaning all the leaves and silk have been removed. You want the kernels to be exposed for even cooking. You can do this by pulling down the husks and then rubbing the ear vigorously with your hands or using a clean brush to remove any stubborn silk strands. It’s worth taking a moment to get all the silk off, as it can be quite unpleasant to eat. Once the corn is husked, you can either leave it whole or, if you prefer, cut each ear in half for easier handling and serving.
Crafting the Flavorful Topping
Step 2: Making the Garlic Butter Mixture
Now, let’s create our incredibly flavorful garlic butter topping. In a small bowl, combine the softened unsalted butter. Make sure the butter is truly softened, not melted, as this will allow it to spread more easily and evenly onto the corn. To this, add your two minced garlic cloves. Mincing the garlic finely will ensure its flavor is distributed throughout the butter without any overpowering chunks. Next, stir in the chopped fresh parsley. Fresh parsley adds a vibrant green color and a lovely herbaceous note that complements the richness of the butter and garlic beautifully. Season the mixture with ½ teaspoon of salt and ¼ teaspoon of black pepper. The salt will enhance all the other flavors, and the pepper adds a subtle warmth. If you’re using the optional lemon zest, now is the time to add it. The zest of one teaspoon of lemon will provide a bright, citrusy counterpoint to the savory elements, cutting through the richness and adding an extra layer of complexity. Mix everything together thoroughly until it’s well combined and you have a fragrant, spreadable compound butter.
Assembling and Roasting
Step 3: Applying the Topping and Wrapping
With our garlic butter mixture ready, it’s time to generously coat the corn. Lay out four large pieces of aluminum foil on your counter, one for each ear of corn. Place one ear of corn on each piece of foil. Now, using a knife or a small spatula, carefully spread a generous amount of the garlic butter mixture all over each ear of corn, making sure to cover the kernels evenly. Don’t be shy with the butter; it’s what makes this corn so delicious! Once each ear is coated, carefully wrap it up in its foil. Bring the sides of the foil together and crimp them tightly to create a senon-alcoholic aled packet. This will steam the corn in its own juices and the infused butter, resulting in incredibly tender and flavorful results. Ensure the packenon-alcoholic aleare well-sealed to prevent any of the delicious buttery goodness from escaping during the roasting process.
Step 4: Roasting the Corn
Once your corn is neatly wrapped in its foil packets, it’s time to place them in the preheated oven. Carefully arrange the foil packets directly on the oven rack. This allows for even heat circulation all around the corn. We’re going to roast the corn for about 20 to 25 minutes. The exact cooking time may vary slightly depending on your oven and the thickness of the corn. You’ll know the corn is ready when it’s tender when pierced with a fork and the kernels are plump and juicy. The butter should be melted and have permeated the kernels, and the aroma of garlic and butter will be irresistible! Resist the urge to open the foil packets too early; let them do their magic steaming inside.
Finishing Touches and Serving
Step 5: Adding the Parmesan and Final Touches
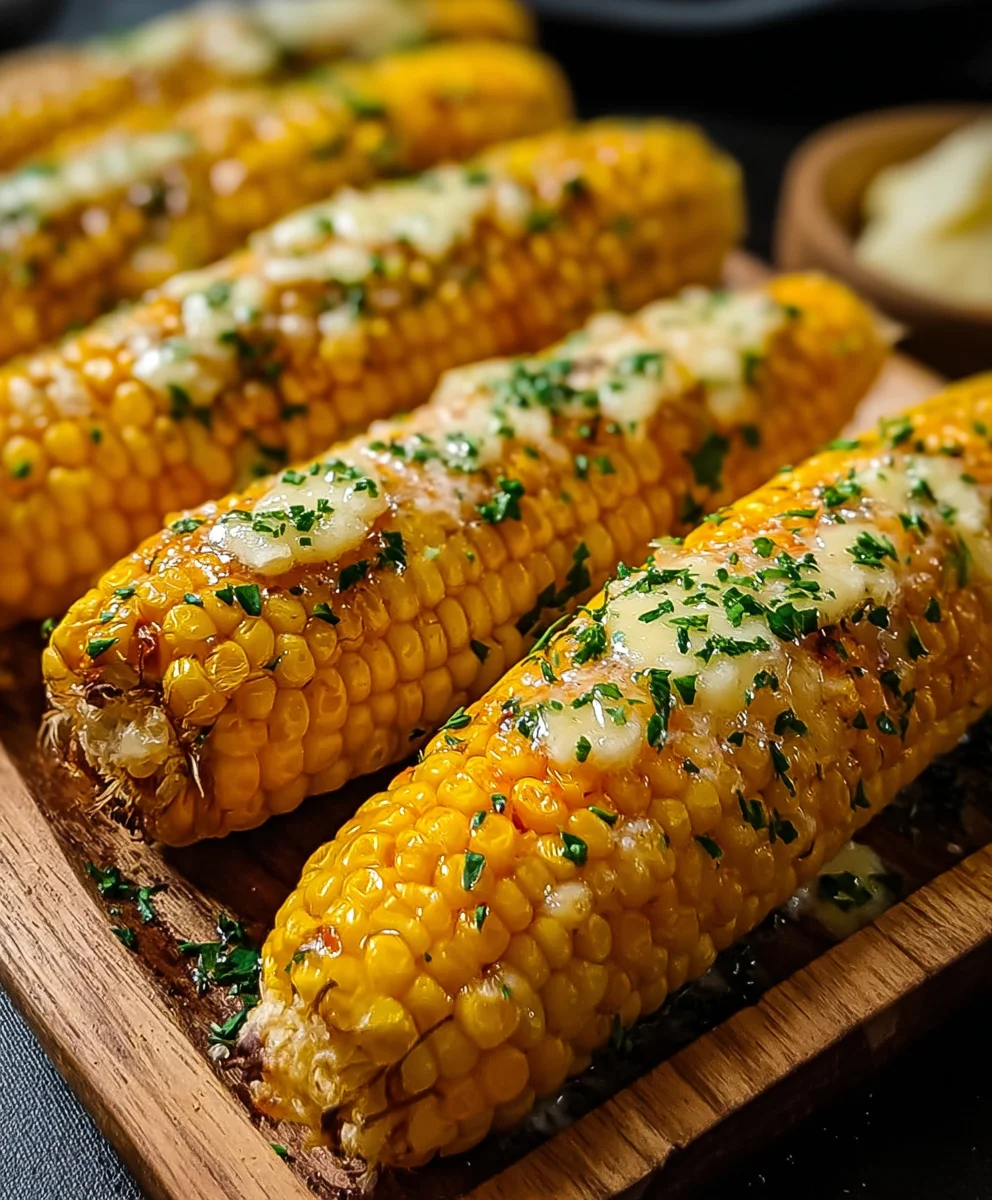
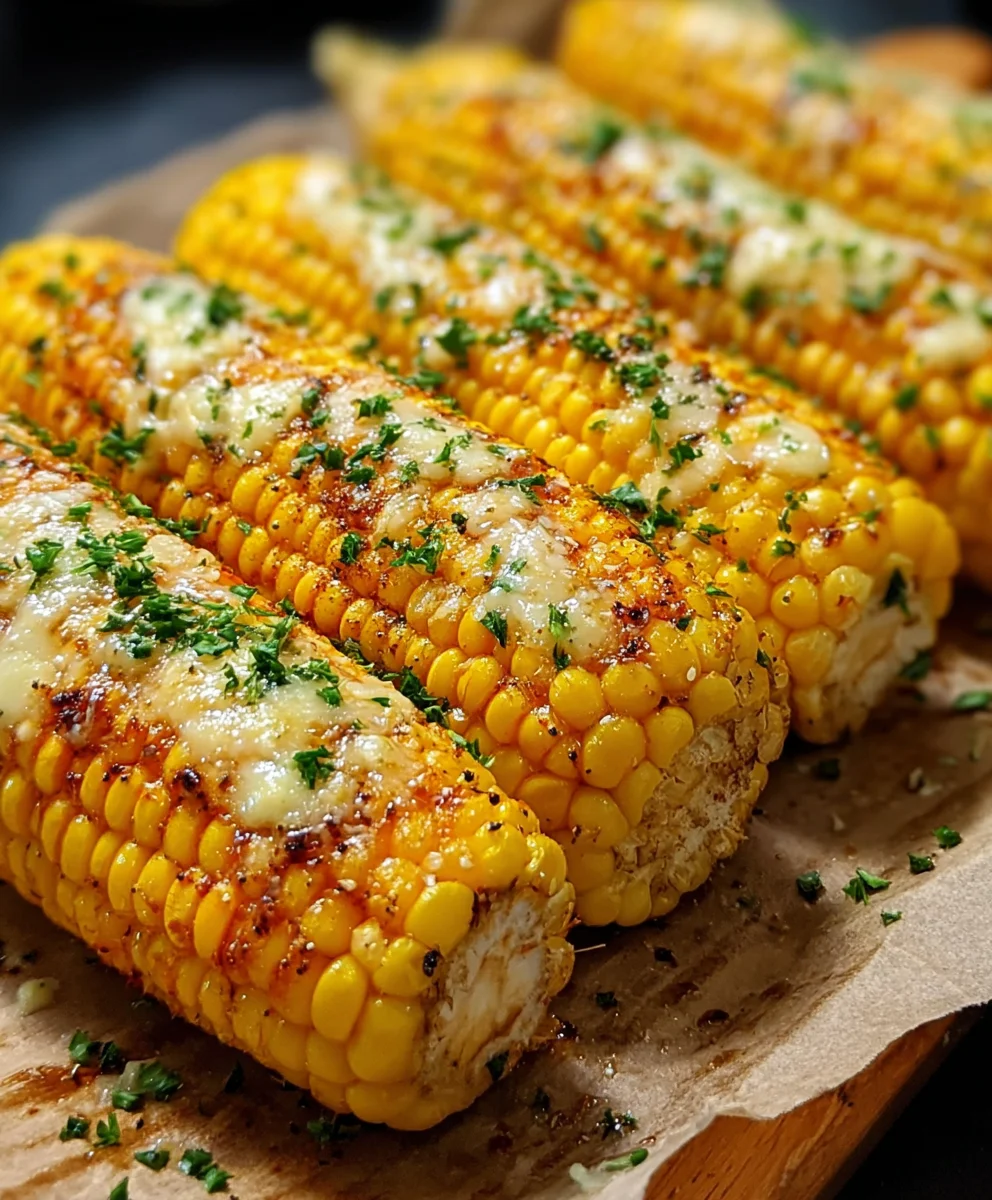
After the initial roasting, carefully remove the foil packets from the oven. Be cautious when opening them, as there will be hot steam trapped inside. Gently unwrap each ear of corn, allowing the steam to escape. Now comes the final, glorious step: adding the cheese! Sprinkle the ½ cup of grated Parmesan cheese generously over each ear of hot, roasted corn. The heat from the corn will start to melt the Parmesan, creating a wonderfully savory and slightly nutty crust. You can also add a little more fresh parsley at this stage for an extra pop of freshness and color, if you like. For an optional, but highly recommended, finishing touch, you can squeeze a little fresh lemon juice over the top or even grate a tiny bit more lemon zest for an added brightness. This elevates the dish, balancing the richness of the butter and cheese. Serve your Cheesy Garlic Butter Corn on the Cob immediately while it’s hot and the cheese is perfectly melty. It’s a fantastic side dish for barbecues, summer meals, or any time you crave something incredibly satisfying and delicious.
Conclusion:
There you have it – the ultimate guide to making the most delicious Cheesy Garlic Butter Corn on the Cob! This recipe is incredibly simple to follow, yet the results are absolutely spectacular. The combination of sweet corn, rich garlic butter, and melted cheese is a flavor explosion that will have everyone asking for seconds. Don’t be afraid to get a little messy; that’s part of the fun of enjoying corn on the cob!
For serving suggestions, this Cheesy Garlic Butter Corn on the Cob is a fantastic side dish for barbecues, grilled meats, or even a cozy weeknight dinner. It pairs wonderfully with ribs, burgers, chicken, or a fresh summer salad.
If you’re looking to mix things up, consider adding a pinch of smoked paprika to the butter for a smoky kick, or sprinkle some chopped fresh chives or parsley over the top before serving for an extra burst of freshness and color. You could also experiment with different cheeses like Monterey Jack or a sharp cheddar for a bolder flavor profile.
We truly hope you enjoy making and devouring this sensational Cheesy Garlic Butter Corn on the Cob. It’s a guaranteed crowd-pleaser and a testament to how simple ingredients can create something truly memorable. Happy cooking!
Frequently Asked Questions:
Can I grill the corn instead of boiling or baking?
Absolutely! Grilling the corn on the cob adds a wonderful smoky char. You can grill it directly on the grates for about 15-20 minutes, turning occasionally, until tender and slightly charred. Then, brush with the garlic butter and cheese mixture during the last few minutes of grilling to melt the cheese.
What if I don’t have fresh garlic?
If fresh garlic isn’t available, you can substitute it with garlic powder. Use about 1 teaspoon of garlic powder for every 2 cloves of fresh garlic called for in the recipe. Add it to the melted butter and mix well.
Cheesy Garlic Butter Corn on the Cob
A simple and delicious recipe for garlic butter corn on the cob, loaded with Parmesan cheese and roasted to perfection.
Ingredients
-
4 ears fresh corn, husked
-
1/4 cup unsalted butter, softened
-
2 garlic cloves, minced
-
1 tbsp chopped fresh parsley
-
1/2 tsp salt
-
1/4 tsp black pepper
-
1/2 cup grated Parmesan cheese
-
1 tsp lemon zest (optional)
Instructions
-
Step 1
Preheat your oven to 400 degrees Fahrenheit (200 degrees Celsius). Husk the corn, removing all leaves and silk. You can leave the ears whole or cut them in half. -
Step 2
In a small bowl, combine the softened unsalted butter, minced garlic, chopped fresh parsley, salt, and black pepper. If using, add the lemon zest. Mix until well combined. -
Step 3
Lay out four large pieces of aluminum foil. Place one ear of corn on each piece of foil. Generously spread the garlic butter mixture all over each ear of corn, ensuring even coverage. -
Step 4
Carefully wrap each ear of corn tightly in its foil packet, crimping the edges to create a sealed pouch. -
Step 5
Place the foil packets directly on the oven rack and roast for 20 to 25 minutes, or until the corn is tender when pierced with a fork. -
Step 6
Carefully remove the packets from the oven and unwrap. Sprinkle the grated Parmesan cheese generously over each hot ear of corn. Serve immediately.
Important Information
Nutrition Facts (Per Serving)
It is important to consider this information as approximate and not to use it as definitive health advice.
Allergy Information
Please check ingredients for potential allergens and consult a health professional if in doubt.