Easy Chicken Enchilada Roll-Ups – Quick & Flavorful
Chicken Enchilada Roll Ups are more than just a meal; they’re a culinary hug, a comforting embrace that brings people together around the dinner table. What is it about these rolled tortillas, bursting with savory chicken and smothered in rich enchilada sauce, that captures our hearts (and taste buds)? It’s the perfect harmony of textures and flavors – the tender shredded chicken, the mild bite of cheese, all encased in a soft tortilla, kissed by that signature spicy-sweet enchilada sauce. They’re incredibly versatile, making them ideal for weeknight dinners when time is short but the craving for something satisfying is strong, or for casual gatherings where you want to impress without the fuss. The sheer joy of biting into a warm, cheesy, flavorful bite of Chicken Enchilada Roll Ups is what makes them a perennial favorite. What truly sets this recipe apart is its approachable nature, allowing you to customize it to your liking while still delivering that classic, irresistible taste that makes everyone ask for seconds. Get ready to experience pure comfort food perfection with these delightful Chicken Enchilada Roll Ups.
Ingredients:
- 5 burrito-sized flour tortillas
- 1 ounce packet of taco seasoning mix
- 3 cups shredded cooked chicken
- 8 ounce package of cream cheese, softened
- 1½ cups shredded Mexican cheese blend or sharp cheddar cheese
- 10 ounce can of diced tomatoes with green chilies, drained (such as Rotel)
- 1 teaspoon minced garlic
- 4 green onions, sliced
- ½ cup chopped fresh cilantro, for garnish (optional)
Preparing the Chicken Enchilada Filling
Step 1: Season the Chicken
The first step to achieving delicious Chicken Enchilada Roll Ups is to get our chicken filling ready. In a medium bowl, combine your 3 cups of shredded cooked chicken with the entire 1 ounce packet of taco seasoning mix. It’s really important to ensure the seasoning is evenly distributed throughout the chicken. You can do this with a fork or your hands. Make sure every strand of chicken gets a good coating of the taco seasoning. This will infuse the chicken with all those wonderful Mexican-inspired flavors that are essential for our enchiladas. If your chicken is still a little warm from cooking, it will help the seasoning adhere better.
Step 2: Create the Creamy Enchilada Base
Next, we’re going to build the rich and creamy base for our filling. In a separate, larger bowl, place your 8 ounce package of softened cream cheese. Softened cream cheese is crucial here; it will make it so much easier to mix everything thoroughly without lumps. Add the drained 10 ounce can of diced tomatoes with green chilies to the cream cheese. Don’t forget to drain those tomatoes well; we don’t want too much excess liquid in our filling, as it can make the tortillas soggy. Now, add the 1 teaspoon of minced garlic. The garlic adds a fantastic aromatic depth to the filling.
Step 3: Combine and Mix the Filling Components
Now it’s time to bring our seasoned chicken and the creamy base together. Add the seasoned chicken mixture from Step 1 into the bowl with the cream cheese, tomatoes, and garlic. Also, add about 1 cup of your 1½ cups of shredded Mexican cheese or cheddar cheese to the bowl at this stage. We’ll reserve the remaining ½ cup for topping later. Using a sturdy spoon or spatula, mix all the ingredients together until they are well combined. You want a cohesive filling where the cream cheese binds everything together. Make sure there are no large pockets of plain cream cheese or unseasoned chicken. Stir in about half of your sliced green onions at this point to add a fresh, oniony bite throughout the filling.
Assembling and Baking the Roll Ups
Step 4: Prepare the Tortillas for Rolling
We’re moving on to assembling our roll ups! Lay out your 5 burrito-sized flour tortillas on a clean, flat surface. To make them more pliable and easier to roll without cracking, you can gently warm them. The easiest way to do this is to microwave them for about 20-30 seconds, just until they are warm and flexible. Alternatively, you can briefly warm them in a dry skillet over medium heat for about 15-20 seconds per side. Once warmed, lay one tortilla flat. Spread about one-fifth of the chicken and cheese mixture evenly over the surface of the tortilla, leaving a small border around the edges. This ensures that the filling doesn’t ooze out too much when you roll it.
Step 5: Roll and Arrange the Enchilada Roll Ups
Now, carefully roll up each tortilla, starting from one edge and rolling it tightly towards the other. Try to keep the roll as firm as possible. Once rolled, place the enchilada roll up seam-side down in a lightly greased baking dish. Repeat this process with the remaining four tortillas, arrangin extractg them snugly next to each other in the baking dish. This snug arrangement helps them hold their shape as they bake. You should have 5 beautifully rolled enchilada roll ups lined up, ready for their cheesy topping.
Step 6: Top and Bake to Golden Perfection
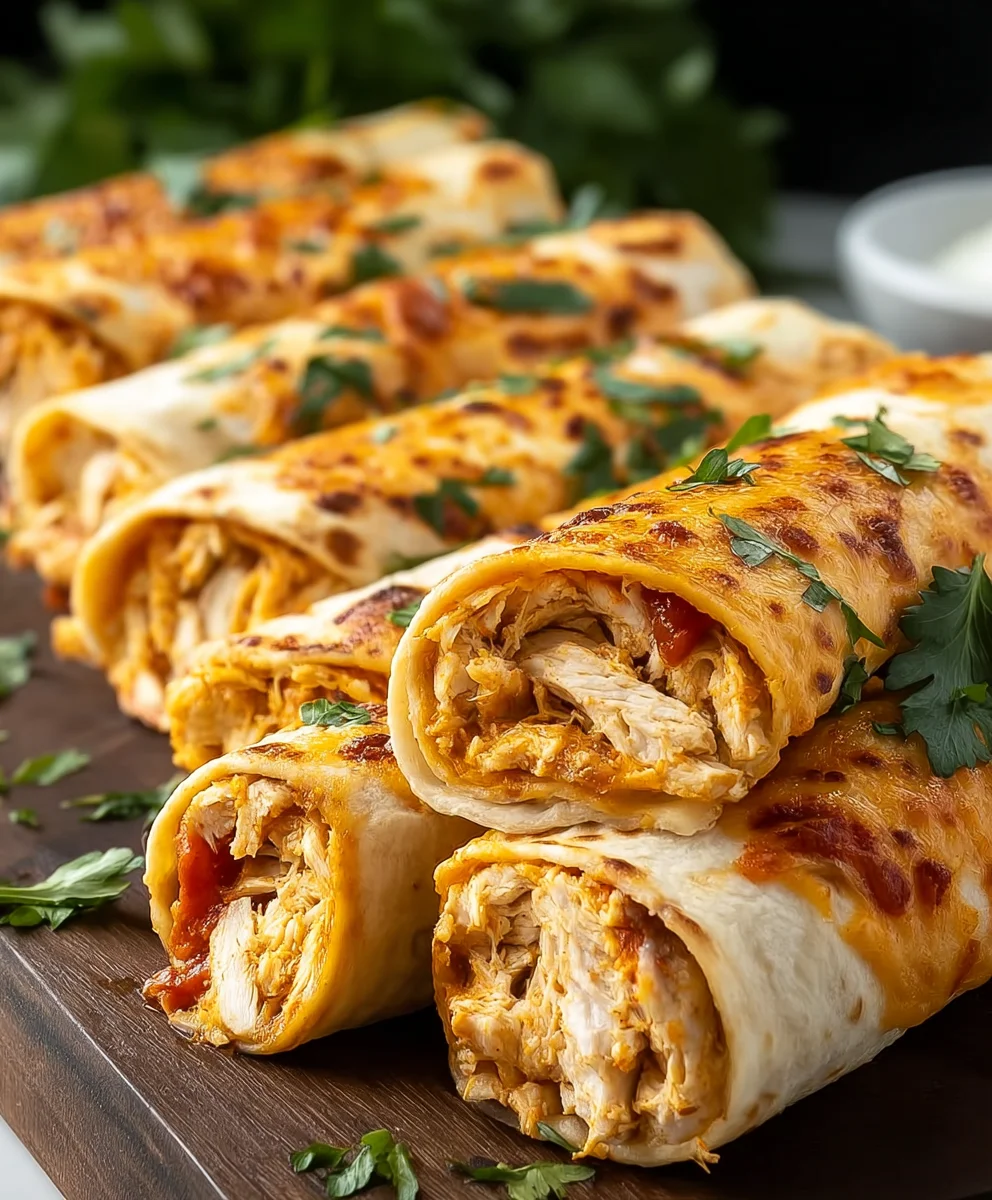
For the final touch before baking, sprinkle the reserved ½ cup of shredded Mexican cheese or cheddar cheese evenly over the tops of all the roll ups. Then, evenly distribute the remaining sliced green onions over the cheese. Preheat your oven to 375 degrees Fahrenheit (190 degrees Celsius). Place the baking dish in the preheated oven and bake for about 20-25 minutes, or until the cheese is melted, bubbly, and lightly golden brown. You want to see that beautiful cheese melt and start to get a little crispy in places. This baking time allows the flavors to meld and ensures the filling is heated through.
Step 7: Garnish and Serve Your Masterpiece
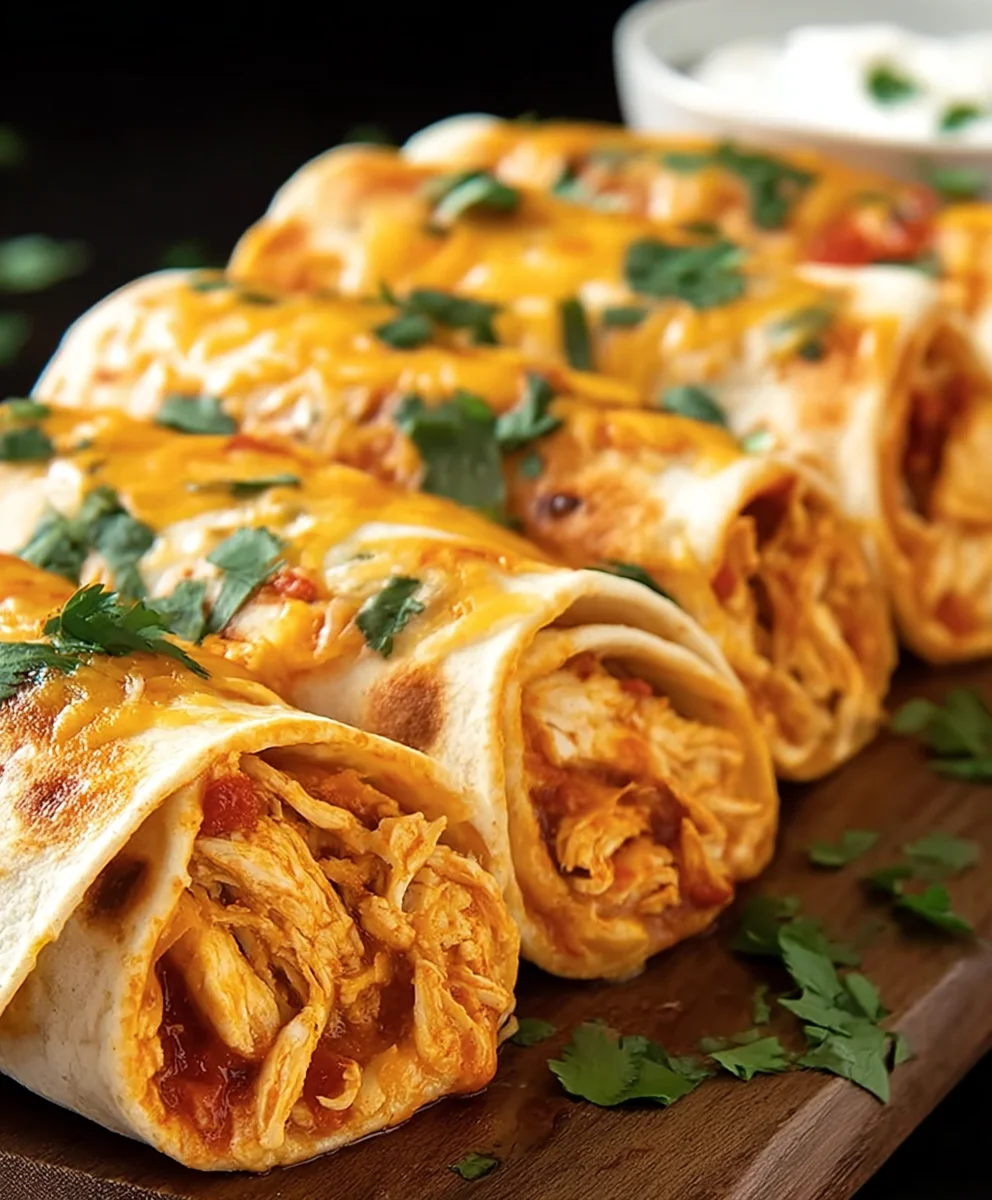
Once your Chicken Enchilada Roll Ups are out of the oven and looking irresistible, let them rest for a few minutes. This allows the filling to set slightly, making them easier to serve. Just before serving, generously sprinkle the chopped fresh cilantro over the top, if you’re using it. The fresh cilantro adds a beautiful pop of color and a bright, herbaceous flavor that complements the rich enchilada filling perfectly. Serve immediately and enjoy these delightful and easy Chicken Enchilada Roll Ups! They are perfect on their own or served with your favorite sides like sour cream, salsa, or a side salad.
Conclusion:
There you have it – a simple yet incredibly satisfying recipe for Chicken Enchilada Roll Ups that’s perfect for weeknight dinners or entertaining! We’ve walked through creating these flavorful and customizable roll-ups, layer by layer, ensuring a delicious outcome every time. These Chicken Enchilada Roll Ups are incredibly versatile, and we hope you’ll feel inspired to make them your own. Remember, the beauty of this dish lies in its adaptability, so don’t be afraid to experiment with different cheeses, spices, or even protein sources.
For serving suggestions, these Chicken Enchilada Roll Ups are fantastic on their own, but they also pair wonderfully with a side of Mexican rice, a fresh green salad, or a dollop of sour cream and a sprinkle of fresh cilantro. When it comes to variations, consider adding black beans or corn to the chicken filling for extra texture and flavor, or try a different sauce like a salsa verde for a tangy twist.
We encourage you to give these Chicken Enchilada Roll Ups a try. They’re a crowd-pleaser that’s surprisingly easy to prepare, and the resulting taste and aroma will have everyone asking for seconds. Enjoy the process and savor the delicious results!
Frequently Asked Questions:
Can I make the Chicken Enchilada Roll Ups ahead of time?
Yes, you absolutely can! You can assemble the Chicken Enchilada Roll Ups and refrigerate them for up to 24 hours before baking. If baking from chilled, you might need to add a few extra minutes to the baking time.
What are some good vegetarian options for Chicken Enchilada Roll Ups?
For a vegetarian version of Chicken Enchilada Roll Ups, you can substitute the chicken with a mixture of seasoned black beans, corn, and sautéed vegetables like bell peppers and onions. You could also use crum extractbled tofu or tempeh seasoned with enchilada spices.
Easy Chicken Enchilada Roll-Ups – Quick & Flavorful
Quick and flavorful chicken enchilada roll-ups made with simple ingredients and a creamy filling. Perfect for a weeknight meal.
Ingredients
-
5 burrito-sized flour tortillas
-
1 ounce packet of taco seasoning mix
-
3 cups shredded cooked chicken
-
8 ounce package of cream cheese, softened
-
1½ cups shredded Mexican cheese blend or sharp cheddar cheese
-
10 ounce can of diced tomatoes with green chilies, drained
-
1 teaspoon minced garlic
-
4 green onions, sliced
-
½ cup chopped fresh cilantro, for garnish (optional)
Instructions
-
Step 1
In a medium bowl, combine shredded chicken with taco seasoning mix, ensuring even distribution. If chicken is warm, it helps seasoning adhere better. -
Step 2
In a larger bowl, combine softened cream cheese, drained diced tomatoes with green chilies, and minced garlic. Mix well. -
Step 3
Add the seasoned chicken mixture and about 1 cup of shredded cheese to the cream cheese mixture. Stir in about half of the sliced green onions. Mix until well combined. -
Step 4
Warm tortillas for 20-30 seconds in the microwave or 15-20 seconds per side in a dry skillet to make them pliable. Spread about one-fifth of the filling evenly over each tortilla, leaving a small border. -
Step 5
Carefully roll up each tortilla tightly. Place seam-side down in a lightly greased baking dish, arranging them snugly. -
Step 6
Sprinkle the remaining ½ cup of shredded cheese and the rest of the sliced green onions over the tops of the roll-ups. Bake in a preheated oven at 375°F (190°C) for 20-25 minutes, or until cheese is melted, bubbly, and lightly golden. -
Step 7
Let the roll-ups rest for a few minutes before serving. Garnish with chopped fresh cilantro, if desired, and serve immediately.
Important Information
Nutrition Facts (Per Serving)
It is important to consider this information as approximate and not to use it as definitive health advice.
Allergy Information
Please check ingredients for potential allergens and consult a health professional if in doubt.