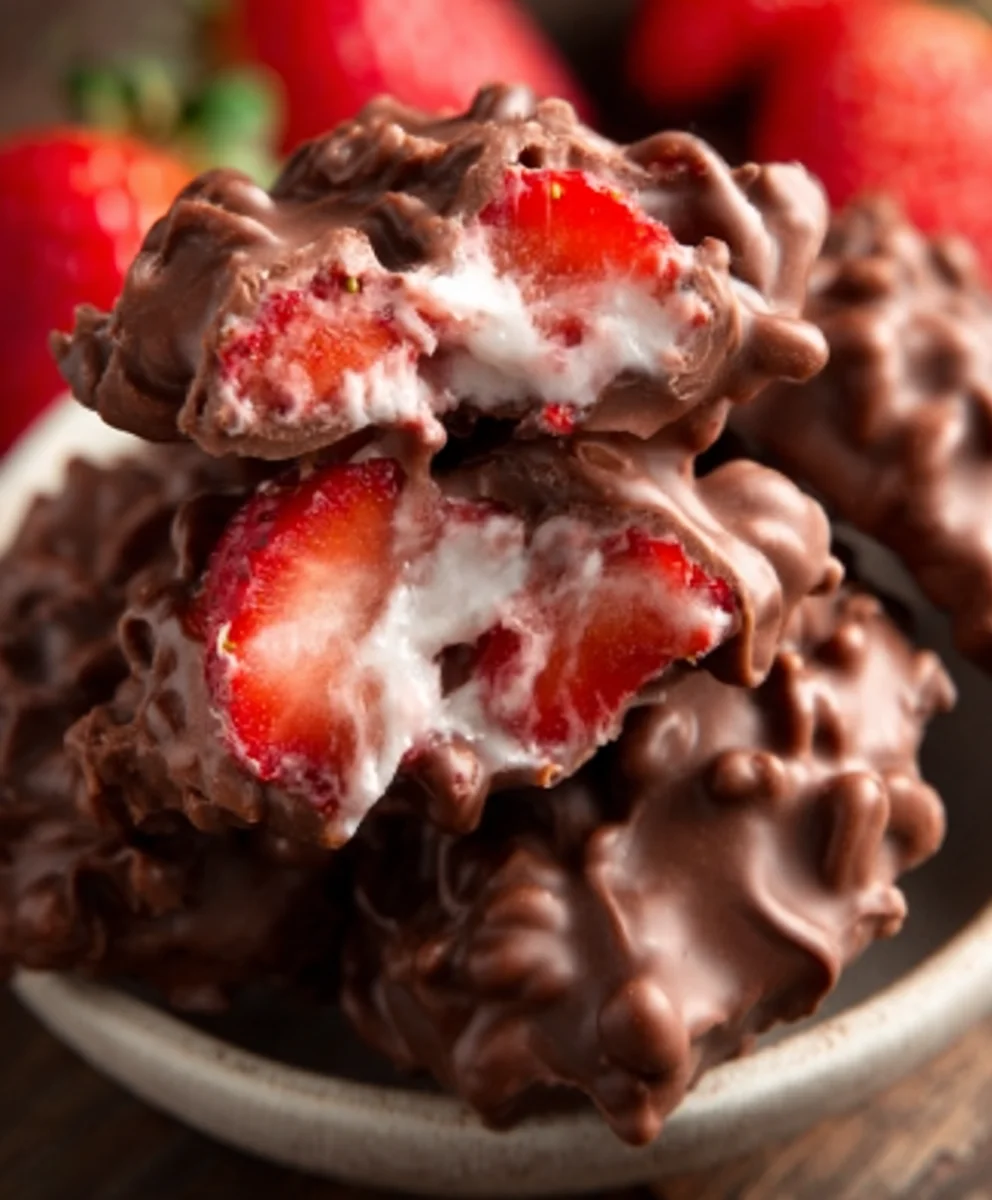
Viral Chocolate Strawberry Yogurt Clusters-Easy Recipe
Chocolate Strawberry Yogurt Clusters (Viral Recipe!) are taking the internet by storm, and for good reason! These delightful little bites are the perfect marriage of sweet, tart, and creamy, offering a burst of flavor and satisfying texture in every mouthful. It’s no wonder they’ve become a viral sensation – they’re incredibly easy to make, surprisingly healthy, and utterly addictive. Imagin extracte the bright, juicy sweetness of fresh strawberries perfectly complemented by the smooth richness of chocolate, all encased in a cool, tangy yogurt shell. This isn’t just a dessert; it’s a delightful treat that feels indulgent yet guilt-free, making it ideal for a quick breakfast, a post-workout snack, or an anytime craving crusher. What truly sets these Chocolate Strawberry Yogurt Clusters (Viral Recipe!) apart is their simplicity and versatility, allowing you to customize them with your favorite additions. Get ready to join the craze and discover why everyone is obsessing over these amazing clusters!
Ingredients:
- 1 1/2 cups chopped strawberries
- 1 cup plain Greek yogurt
- 1 tablespoon honey
- 1 teaspoon vanilla extract
- 1 cup semi-sweet chocolate chips
- 2 tablespoons coconut oil
Preparing Your Delicious Components
Washing and Chopping the Strawberries
The first step to creating these delightful Chocolate Strawberry Yogurt Clusters is to prepare our star fruit. Begin extract by thoroughly washing your 1 1/2 cups of fresh strawberries under cool running water. Gently pat them dry with a clean kitchen towel or paper towels. It’s important to ensure they are dry, as excess moisture can affect the texture of your finished clusters. Once dry, carefully remove the green stems. Then, chop the strawberries into small, bite-sized pieces. Aim for pieces that are roughly 1/4 to 1/2 inch in size. Smaller pieces will distribute more evenly within the yogurt mixture and provide a pleasant burst of strawberry flavor in every bite. You can chop them finely if you prefer a more subtle strawberry presence, or leave them a little chunkier for a more prominent fruitiness. Set these beautifully chopped strawberries aside.
Creating the Sweet Yogurt Base
Next, let’s focus on the creamy yogurt base that will bind everything together. In a medium-sized mixing bowl, combine 1 cup of plain Greek yogurt. Greek yogurt is ideal here because its thick consistency holds up well and doesn’t become too watery once frozen. To this, we’ll add a touch of sweetness and flavor. Stir in 1 tablespoon of honey. The honey will not only add a natural sweetness but also a lovely depth of flavor that complements both the strawberries and the chocolate. Following the honey, add 1 teaspoon of vanilla extract. Vanilla extract is a classic flavor enhancer that truly brings out the best in sweet treats. Whisk these ingredients together vigorously until the honey is fully incorporated and the mixture is smooth and creamy. Ensure there are no streaks of honey remaining. This sweet and tangy yogurt mixture will be the foundation of our clusters.
Assembling and Freezing Your Clusters
Folding in the Strawberries
Now it’s time to gently combine our prepared strawberries with the sweet yogurt base. Take your chopped strawberries and carefully fold them into the yogurt mixture. Use a spatula or a large spoon to gently mix them in. The goal here is to distribute the strawberries evenly throughout the yogurt without crushing them too much. You want those delightful little chunks of strawberry to remain intact. Don’t overmix, as this can make the yogurt too runny. A few gentle stirs to ensure each strawberry piece is coated in the yogurt is perfect. This step ensures that every cluster will have a delightful surprise of fresh strawberry.
Preparing for Freezing
To ensure your clusters don’t stick and are easy to remove, you’ll want to prepare a baking sheet or a flat tray. Line a baking sheet or a large plate with parchment paper or wax paper. This non-stick surface is crucial for easy removal once the clusters are frozen solid. Make sure your baking sheet or tray is small enough to fit comfortably into your freezer. Once your tray is lined, it’s time to start forming the clusters. Using a spoon or a small cookie scoop, drop dollops of the strawberry-yogurt mixture onto the prepared baking sheet. Aim for clusters that are about 1 to 2 tablespoons in size. You can make them as uniform or as rustic as you like. Leave a little space between each dollop to prevent them from freezing together.
Freezing Until Firm
Once you have arranged all your yogurt-strawberry dollops on the baking sheet, carefully transfer the entire tray to your freezer. Allow them to freeze for at least 2 to 3 hours, or until they are completely solid. The yogurt needs to be firm enough to hold its shape when dipped in chocolate. This freezing step is essential for the success of the chocolate coating. If the yogurt is still soft, the chocolate will melt it, and you won’t get a clean, crisp coating. Check for firmness by gently touching a cluster; it should be hard and unyielding.
Melting and Dipping Your Clusters
Melting the Chocolate and Coconut Oil
While your yogurt clusters are freezing, let’s get the chocolate ready. In a microwave-safe bowl, combine 1 cup of semi-sweet chocolate chips and 2 tablespoons of coconut oil. The coconut oil is key to achieving a smooth, glossy, and easily dippable chocolate coating. It helps to thin out the chocolate and prevents it from hardening too rigidly once frozen. Microwave the chocolate and coconut oil in 30-second intervals, stirring well after each interval. Continue this process until the chocolate is completely melted and smooth. Alternatively, you can melt the chocolate and coconut oil using a double boiler method over simmering water, stirring constantly until smooth. Be careful not to overheat the chocolate, as it can scorch.
Dipping and Decorating
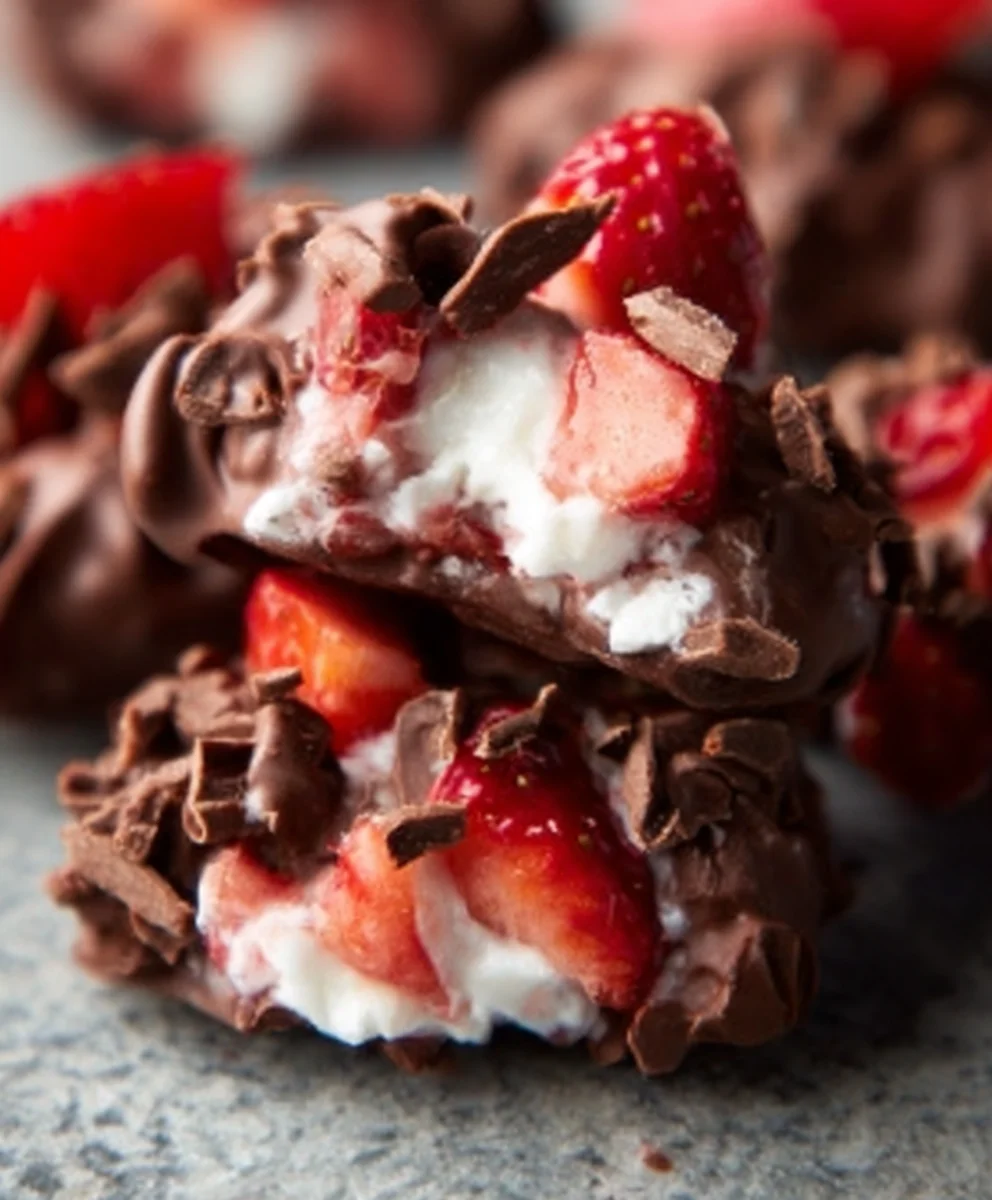
Once your yogurt clusters are frozen solid and your chocolate is melted and smooth, it’s time for the final, most satisfying step. Take the frozen yogurt clusters out of the freezer. Working quickly, dip each frozen yogurt cluster into the melted chocolate, ensuring it’s fully coated. You can use a fork or a toothpick to help you dip and lift the clusters. Allow any excess chocolate to drip back into the bowl for a cleaner finish. Place the chocolate-coated clusters back onto the parchment-lined baking sheet. If you like, you can sprinkle them with a few extra chopped strawberries or even some flaky sea salt while the chocolate is still wet for added texture and visual appeal.
Final Freeze and Enjoyment
After all your clusters have been dipped in chocolate, carefully return the baking sheet to the freezer. Allow them to freeze for another hour or so, until the chocolate coating is completely firm and set. This final freezing step ensures the chocolate coating is perfectly crisp and holds its shape. Once hardened, your viral Chocolate Strawberry Yogurt Clusters are ready to be enjoyed! You can store them in an airtight container in the freezer for up to a month, though they rarely last that long. Enjoy these refreshing, healthy, and incredibly delicious treats!
Conclusion:
And there you have it! Your very own batch of Chocolate Strawberry Yogurt Clusters (Viral Recipe!) is ready to be devoured. This incredibly simple yet delightfully satisfying treat is perfect for a quick snack, a healthy dessert, or even a fun activity to do with the kids. The combination of tangy yogurt, sweet strawberries, and rich chocolate is a truly winning one, and the simplicity of the recipe means you can whip them up anytime that craving strikes. I encourage you to give this a try; you won’t be disappointed by how easy it is to create something so delicious!
For serving suggestions, these clusters are fantastic straight from the freezer. They also make a wonderful topping for smoothie bowls, a sweet addition to your morning yogurt, or even incorporated into a trail mix. Don’t be afraid to get creative with variations either! You could try adding a sprinkle of shredded coconut, some chopped nuts like almonds or pecans, or even a dusting of cocoa powder for an extra chocolatey kick. Enjoy experimenting and making these your own!
FAQs:
Q: How long do the Chocolate Strawberry Yogurt Clusters (Viral Recipe!) last?
A: Properly stored in an airtight container in the freezer, your Chocolate Strawberry Yogurt Clusters (Viral Recipe!) can last for up to 2-3 months. They are best enjoyed within the first month for optimal texture and flavor.
Q: Can I use fresh strawberries instead of frozen for the Chocolate Strawberry Yogurt Clusters (Viral Recipe!)?
A: While frozen strawberries work best for this recipe as they help the clusters firm up and prevent them from becoming too watery, you can use fresh strawberries if needed. Ensure you pat them very dry with a paper towel before chopping to minimize excess moisture.
Viral Chocolate Strawberry Yogurt Clusters-Easy Recipe
Easy and delicious no-bake yogurt clusters with strawberries and chocolate.
Ingredients
-
1 1/2 cups chopped strawberries
-
1 cup plain Greek yogurt
-
1 tablespoon honey
-
1 teaspoon vanilla extract
-
1 cup semi-sweet chocolate chips
-
2 tablespoons coconut oil
Instructions
-
Step 1
Wash and chop 1 1/2 cups of strawberries into bite-sized pieces. Set aside. -
Step 2
In a medium bowl, combine 1 cup of plain Greek yogurt, 1 tablespoon of honey, and 1 teaspoon of vanilla extract. Whisk until smooth. -
Step 3
Gently fold the chopped strawberries into the yogurt mixture, distributing them evenly without crushing. -
Step 4
Line a baking sheet with parchment paper. Drop dollops of the strawberry-yogurt mixture onto the lined sheet, about 1-2 tablespoons each. -
Step 5
Freeze the clusters for 2-3 hours, or until completely solid. -
Step 6
In a microwave-safe bowl, combine 1 cup of semi-sweet chocolate chips and 2 tablespoons of coconut oil. Microwave in 30-second intervals, stirring until melted and smooth. -
Step 7
Dip each frozen yogurt cluster into the melted chocolate, ensuring full coverage. Place back onto the parchment-lined baking sheet. -
Step 8
Return the baking sheet to the freezer for another hour, or until the chocolate coating is firm.
Important Information
Nutrition Facts (Per Serving)
It is important to consider this information as approximate and not to use it as definitive health advice.
Allergy Information
Please check ingredients for potential allergens and consult a health professional if in doubt.