Vintage Wedding Dessert Table Ideas-Sweet Delights
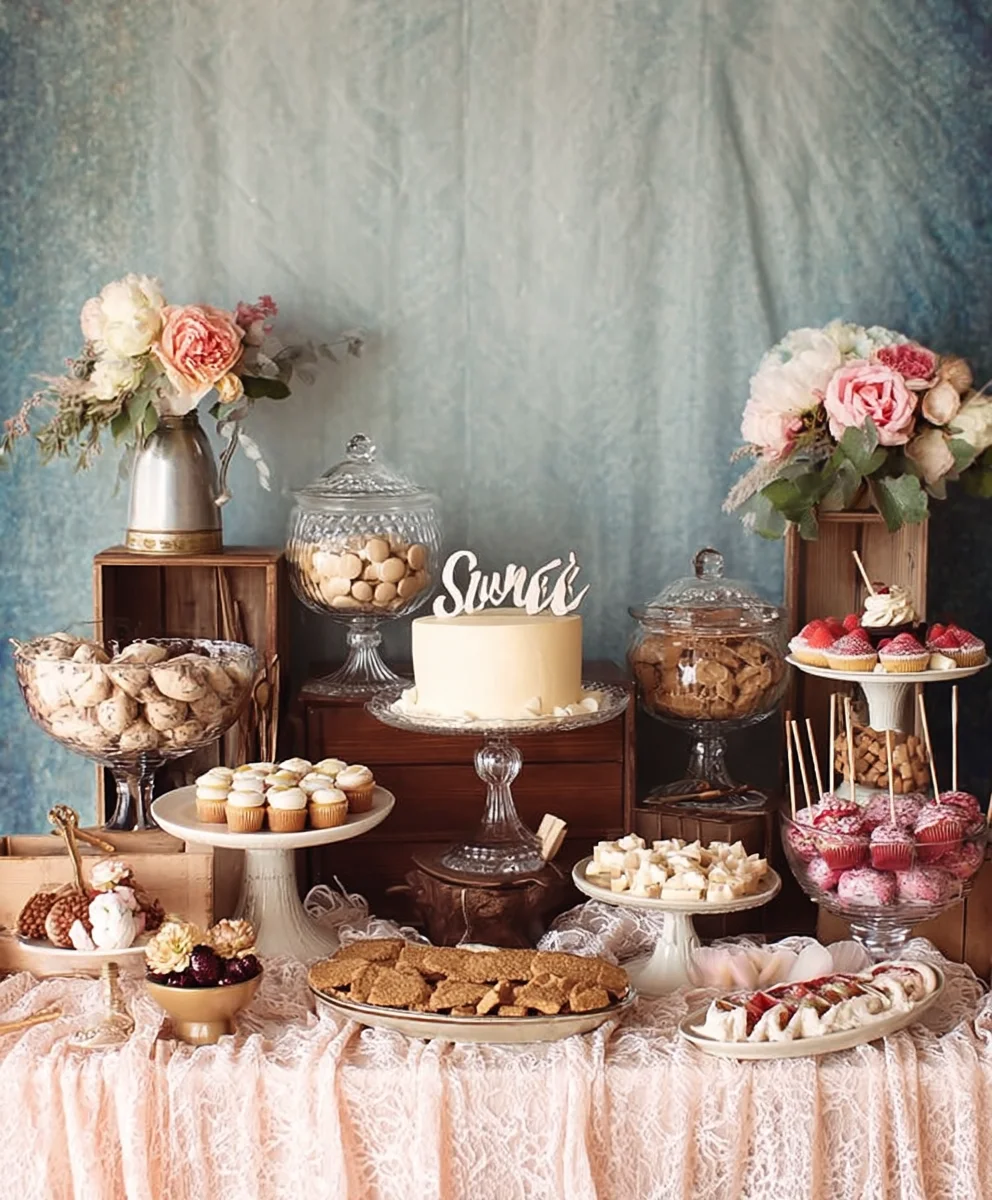
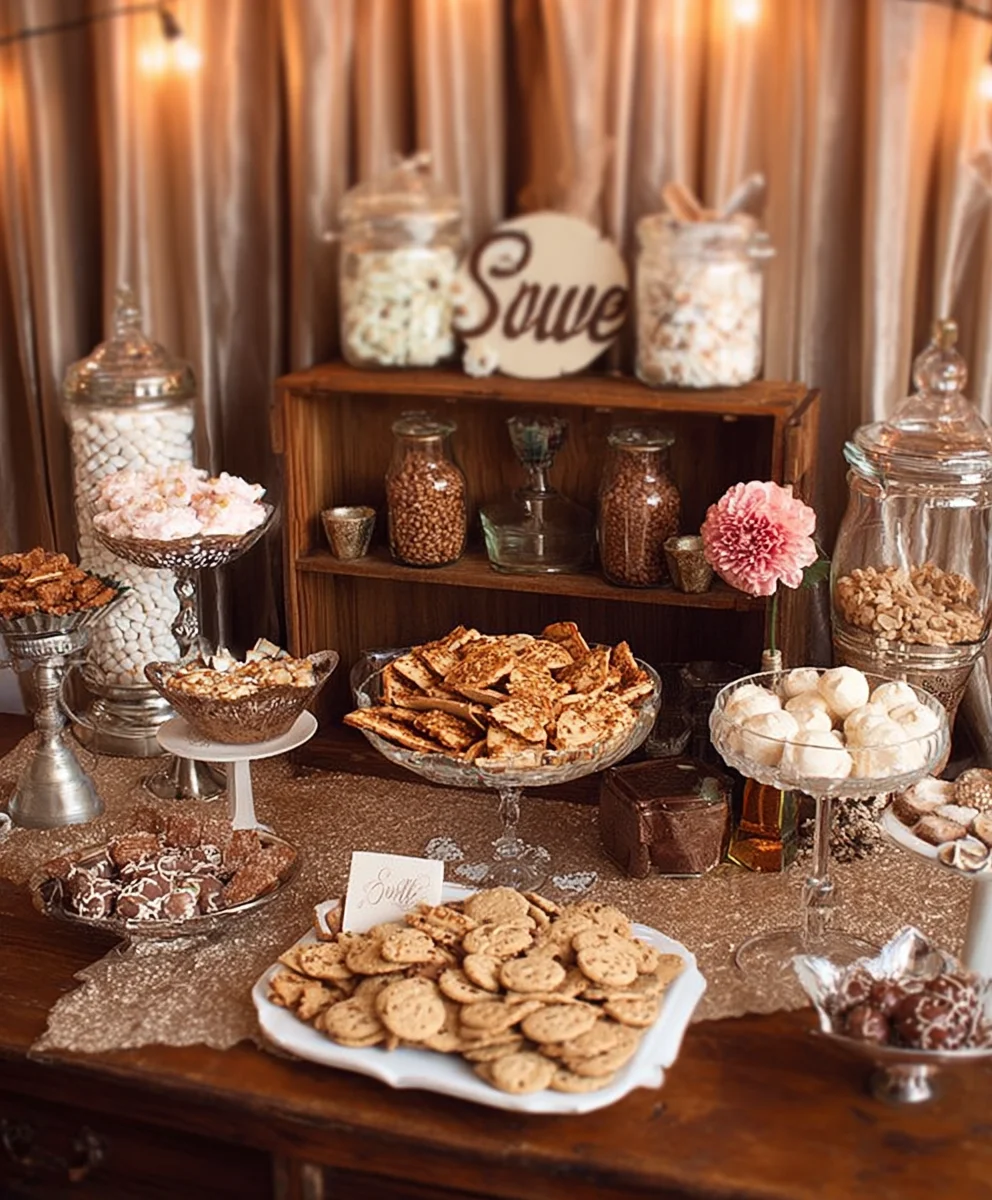
Vintage Wedding Dessert Table experiences are truly magical, transporting guests back to a time of elegance and timeless charm. There’s an undeniable allure to a dessert spread that whispers of nostalgia, featuring treats that are both comforting and sophisticated. We absolutely adore how a well-curated vintage wedding dessert table evokes feelings of warmth, romance, and shared memories. It’s more than just sweets; it’s an edible centerpiece that sparks conversation and delight, a sweet journey through cherished traditions. What makes this concept so special is its ability to personalize a celebration, allowing couples to infuse their story into every bite. Imagin extracte delicate lace doilies, antique silver cake stands, and a delectable array of classic confections – each element contributing to an unforgettable atmosphere. This isn’t just about providing dessert; it’s about creating an experience, a focal point that guests will remember long after the last crum extractb has been savored.
Ingredients:
- 1 cup (2 sticks) unsalted butter, softened
- 2 cups granulated sugar
- 4 large eggs
- 1 teaspoon vanilla extract
- 3 cups all-purpose flour
- 1 teaspoon baking soda
- ½ teaspoon salt
- 1 cup buttermilk
- ½ cup finely chopped candied gin extractger
- ½ cup dried cranberries
- For the Glaze:
- 1 ½ cups powdered sugar
- 3 tablespoons milk
- ½ teaspoon lemon extract
Preparation and Mixing the Batter
- Begin by preheating your oven to 350°F (175°C). Grease and flour a standard 9×5 inch loaf pan. This is a crucial step for ensuring your cake releases cleanly after baking, preventing frustrating breakage that would detract from your beautiful vintage wedding dessert table. You can also line the pan with parchment paper, leaving an overhang on the sides, which makes lifting the cake out even easier. In a large mixing bowl, cream together the softened unsalted butter and granulated sugar until light and fluffy. This process incorporates air into the batter, contributing to a tender crum extractb. It’s best to use a stand mixer with a paddle attachment for this, but a hand mixer will also work well. Beat in the large eggs one at a time, ensuring each egg is fully incorporated before adding the next. Stir in the vanilla extract for that classic comforting aroma that signals a homemade treat.
- In a separate medium bowl, whisk together the all-purpose flour, baking soda, and salt. This dry ingredient mixture will be added to the wet ingredients in stages. Whisking them together ensures the leavening agent (baking soda) and salt are evenly distributed throughout the flour, preventing pockets of bitterness or uneven rising. Now, alternate adding the dry ingredients and the buttermilk to the creamed butter and sugar mixture. Start by adding about one-third of the dry ingredients and mix until just combined. Then, add half of the buttermilk and mix again. Continue this process, ending with the remaining dry ingredients. Be careful not to overmix the batter at this stage. Overmixing can develop the gluten in the flour too much, leading to a tough cake. A few streaks of flour remaining are perfectly acceptable.
- Gently fold in thegin extractnely chopped candied ginger and dried cranberries. These delightful additions will provide bursts of warmth and tangy sweetness, making this loaf cake a truly special centerpiece for your vintage wedgin extractg dessert table. The candied ginger offers a subtle spicy kick that complements the sweetness of the cake beautifully, while the dried cranberries add a lovely chegrape juicess and a hint of tartness. Ensure they are evenly distributed throughout the batter so every slice gets a taste of these wonderful inclusions.
Baking the Cake
- Pour the batter evenly into the prepared loaf pan. Smooth the top with a spatula. Place the loaf pan in the preheated oven. Bake for approximately 50-60 minutes. The exact baking time can vary depending on your oven, so it’s important to start checking for doneness around the 50-minute mark. To test if the cake is done, insert a wooden skewer or toothpick into the center of the loaf. If it comes out clean with no wet batter attached, the cake is ready. If there’s still moist batter, continue baking for 5-10 minute intervals, re-testing each time. Avoid opening the oven door too frequently, as this can cause the cake to sink.
- Once baked, carefully remove the loaf pan from the oven and let the cake cool in the pan on a wire rack for about 15-20 minutes. This allows the cake to set up slightly before you attempt to remove it. After this initial cooling period, invert the loaf pan onto the wire rack and gently lift the pan away. If you used parchment paper, you can use the overhang to lift the cake out with ease. Allow the cake to cool completely on the wire rack before proceeding to glaze it. This is essential; if you try to glaze a warm cake, the glaze will melt and drip off, creating a messy rather than elegant presentation.
Glazing and Serving
- While the cake is cooling completely, prepare the lemon glaze. In a medium bowl, whisk together the powdered sugar, milk, and lemon extract until smooth and lump-free. You’re looking for a consistency that is thick enough to coat the back of a spoon but thin enough to drizzle easily. If the glaze is too thick, add a tiny bit more milk, a teaspoon at a time, until you reach the desired consistency. If it’s too thin, add a little more powdered sugar. The lemon extract provides a bright, zesty flavor that wonderfully cuts through the sweetness of the cake and the richness of the butter, creating a balanced and delightful taste profile perfect for a wedding celebration.
- Once the cake has cooled completely, place it on a serving platter or a piece of parchment paper to catch any drips. Drizzle the prepared lemon glaze generously over the top of the loaf cake, allowing it to cascade down the sides. You can use a spoon to artfully drip the glaze, or for a more uniform look, you can pour it over the center and let it spread naturally. For an extra touch of elegance on your vintage wedding dessert table, you could also sprinkle some edible gin extractwers or a few finely chopped candied ginger pieces over the wet glaze while it’s still soft. Let the glaze set for at least 15-20 minutes before slicing and serving. This allows the glaze to harden slGin Extracttly, creating a beautiful finish. This Lemon-Ginger Cranberry Loaf Cake is a wonderfully versatile dessert, perfect for a sophisticated vintage wedding dessert table or any special occasion.
Conclusion:
And there you have it – the perfect guide to creating a memorable Vintage Wedding Dessert Table! We’ve explored delightful recipes that evoke timeless charm and elegant flavors, ensuring your special day is as sweet as can be. Remember, the beauty of a Vintage Wedding Dessert Table lies in its personal touch. Don’t be afraid to experiment and make these treats your own!
For serving, consider displaying your creations on tiered cake stands, antique platters, and charming doilies to enhance the vintage aesthetic. Imagin extracte a delightful spread of miniature fruit tarts, classic madeleines, rich chocolate truffles, and perhaps even a beautifully decorated Bundt cake. These desserts pair wonderfully with coffee, tea, or even a celebratory glass of cbeef hampagne.
Don’t hesitate to play with variations! You can adapt the flavors of the cookies to match your wedding theme, or add edible flowers for an extra touch of romance. The key is to infuse your personality and love into every element of your Vintage Wedding Dessert Table. We encourage you to have fun with the process, and most importantly, enjoy the delicious results with your loved ones.
Frequently Asked Questions about Vintage Wedding Dessert Tables:
Can I prepare the desserts for my Vintage Wedding Dessert Table in advance?
Absolutely! Many of the components for a Vintage Wedding Dessert Table can be made a day or two ahead of time and stored properly. For example, cookies can be baked and kept in airtight containers, and some fillings can be prepared in advance. This will significantly reduce stress on your wedding day, allowing you to focus on enjoying the festivities.
What if I have dietary restrictions to consider for my Vintage Wedding Dessert Table?
This is a common concern! You can easily adapt many vintage-inspired recipes to be gluten-free, dairy-free, or vegan. For instance, you can use almond flour for cookies, coconut oil instead of butter, and plant-based milks. It’s a thoughtful way to ensure all your guests can indulge in the sweetness of your Vintage Wedding Dessert Table.
Lemon-Ginger Cranberry Loaf Cake
A delightful loaf cake perfect for a vintage wedding dessert table, featuring candied ginger and dried cranberries with a bright lemon glaze.
Ingredients
-
1 cup (2 sticks) unsalted butter, softened
-
2 cups granulated sugar
-
4 large eggs
-
1 teaspoon vanilla extract
-
3 cups all-purpose flour
-
1 teaspoon baking soda
-
½ teaspoon salt
-
1 cup buttermilk
-
½ cup finely chopped candied ginger
-
½ cup dried cranberries
-
1 ½ cups powdered sugar
-
3 tablespoons milk
-
½ teaspoon lemon extract
Instructions
-
Step 1
Preheat oven to 350°F (175°C). Grease and flour a 9×5 inch loaf pan. Cream butter and sugar until fluffy. Beat in eggs one at a time, then vanilla extract. -
Step 2
In a separate bowl, whisk together flour, baking soda, and salt. Alternately add dry ingredients and buttermilk to the creamed mixture, beginning and ending with dry ingredients. Do not overmix. -
Step 3
Gently fold in finely chopped candied ginger and dried cranberries until evenly distributed. -
Step 4
Pour batter into prepared pan and smooth the top. Bake for 50-60 minutes, or until a wooden skewer inserted into the center comes out clean. Cool in pan for 15-20 minutes before inverting onto a wire rack to cool completely. -
Step 5
While cake cools, prepare glaze by whisking powdered sugar, milk, and lemon extract until smooth and lump-free. Adjust consistency as needed. -
Step 6
Once cake is completely cool, drizzle glaze generously over the top, letting it cascade down the sides. Optionally, sprinkle with edible flowers or chopped candied ginger. Let glaze set for 15-20 minutes before slicing and serving.
Important Information
Nutrition Facts (Per Serving)
It is important to consider this information as approximate and not to use it as definitive health advice.
Allergy Information
Please check ingredients for potential allergens and consult a health professional if in doubt.