Easy No Yeast Pizza Dough – Quick Homemade Pizza
An excellent no yeast pizza dough is a game-changer for any home cook craving that delicious, cheesy goodness without the long wait or fuss. Have you ever dreamt of whipping up a perfectly chewy, slightly crisp pizza crust on a weeknight, completely from scratch? Well, this recipe is your answer! We all love pizza, don’t we? It’s the ultimate comfort food, perfect for family dinners, casual gatherings, or just a treat for yourself. But the yeast-proofing and rising times can often feel like a barrier. That’s precisely what makes this excellent no yeast pizza dough so special. It delivers that satisfying homemade pizza experience with incredible speed and simplicity, proving you don’t need yeast to achieve pizza perfection.
Get ready for your best homemade pizza yet!

An Excellent No-Yeast Pizza Dough: Quick, Easy Homemade Pizza!
Forget waiting for dough to rise! This no-yeast pizza dough recipe is your secret weapon for delicious, homemade pizza in a fraction of the time. It’s incredibly forgiving, easy to whip up even on a weeknight, and results in a wonderfully tender yet slightly chewy crust. Perfect for those spontaneous pizza cravings or when you want to involve the whole family in a fun kitchen activity without the fuss of yeast. Let’s get started on your best homemade pizza yet!
Ingredients:
Note 2: Flour Flexibility
While bread flour is my preferred choice for its higher protein content, which gives the dough a better structure and chew, don’t worry if you don’t have it on hand! All-purpose or plain flour will work perfectly well here. You might notice a slight difference in texture – perhaps a little less chew and a bit softer – but the pizza will still be absolutely delicious. The key is the baking powder, which gives it the lift that yeast would normally provide.
Note 3: Crust Glaze
Brushing the crust with a little oil before baking (this is where the optional vegetable oil comes in) is a simple trick that adds a beautiful golden-brown color and a delightful crispness. It also helps to prevent the crust from drying out too much. If you don’t have vegetable oil, olive oil or even a neutral-flavored oil like canola oil will do the job admirably.
Making the Dough: Step-by-Step
The beauty of this no-yeast pizza dough lies in its simplicity. You don’t need any special equipment, just a bowl and your hands! This recipe makes enough dough for one medium-sized pizza, roughly 10-12 inches in diameter. If you’re feeding a crowd or have big appetites, feel free to double the recipe.
Step 1: Combine the Dry Ingredients
In a medium-sized mixing bowl, add your bread flour (or all-purpose flour), baking powder, salt, and sugar. Give these dry ingredients a good whisk together. This ensures that the baking powder is evenly distributed throughout the flour, which is crucial for a consistent rise. The salt adds flavor, and the sugar, even in this small amount, helps with browning and adds a subtle sweetness to balance the savory toppings.
Step 2: Add the Wet Ingredients and Mix
Now, make a well in the center of your dry ingredients. Pour in the 2 teaspoons of olive oil and the 1/2 cup of cold tap water. Begin extract to mix everything together with a fork or your hands. You want to incorporate all the dry ingredients into the wet until a shaggy dough starts to form. Don’t overmix at this stage; just bring it together until there are no dry patches of flour visible.
Step 3: Knead the Dough
Turn the shaggy dough out onto a lightly floured surface (use a little of that extra flour for dusting). Knead the dough for about 5-7 minutes. This is where you develop the gluten in the flour, which gives the pizza crust its structure and chew. You’ll know you’ve kneaded enough when the dough becomes smooth, elastic, and bounces back slightly when you gently press it with your finger. It should feel soft and pliable, not sticky. If it feels too sticky, add a tiny bit more flour, a teaspoon at a time. If it feels too dry and crum extractbly, add a splash of water, again, just a teaspoon at a time.
Step 4: Rest the Dough (Optional but Recommended)
While this is a no-yeast dough, giving it a short rest can still improve its texture. Cover the kneaded dough loosely with a clean kitchen towel or a piece of plastic wrap and let it rest for about 10-15 minutes. This allows the gluten to relax, making the dough easier to stretch and shape. It’s a small step that can make a noticeable difference in how easily you can work with the dough.
Step 5: Shape and Top Your Pizza
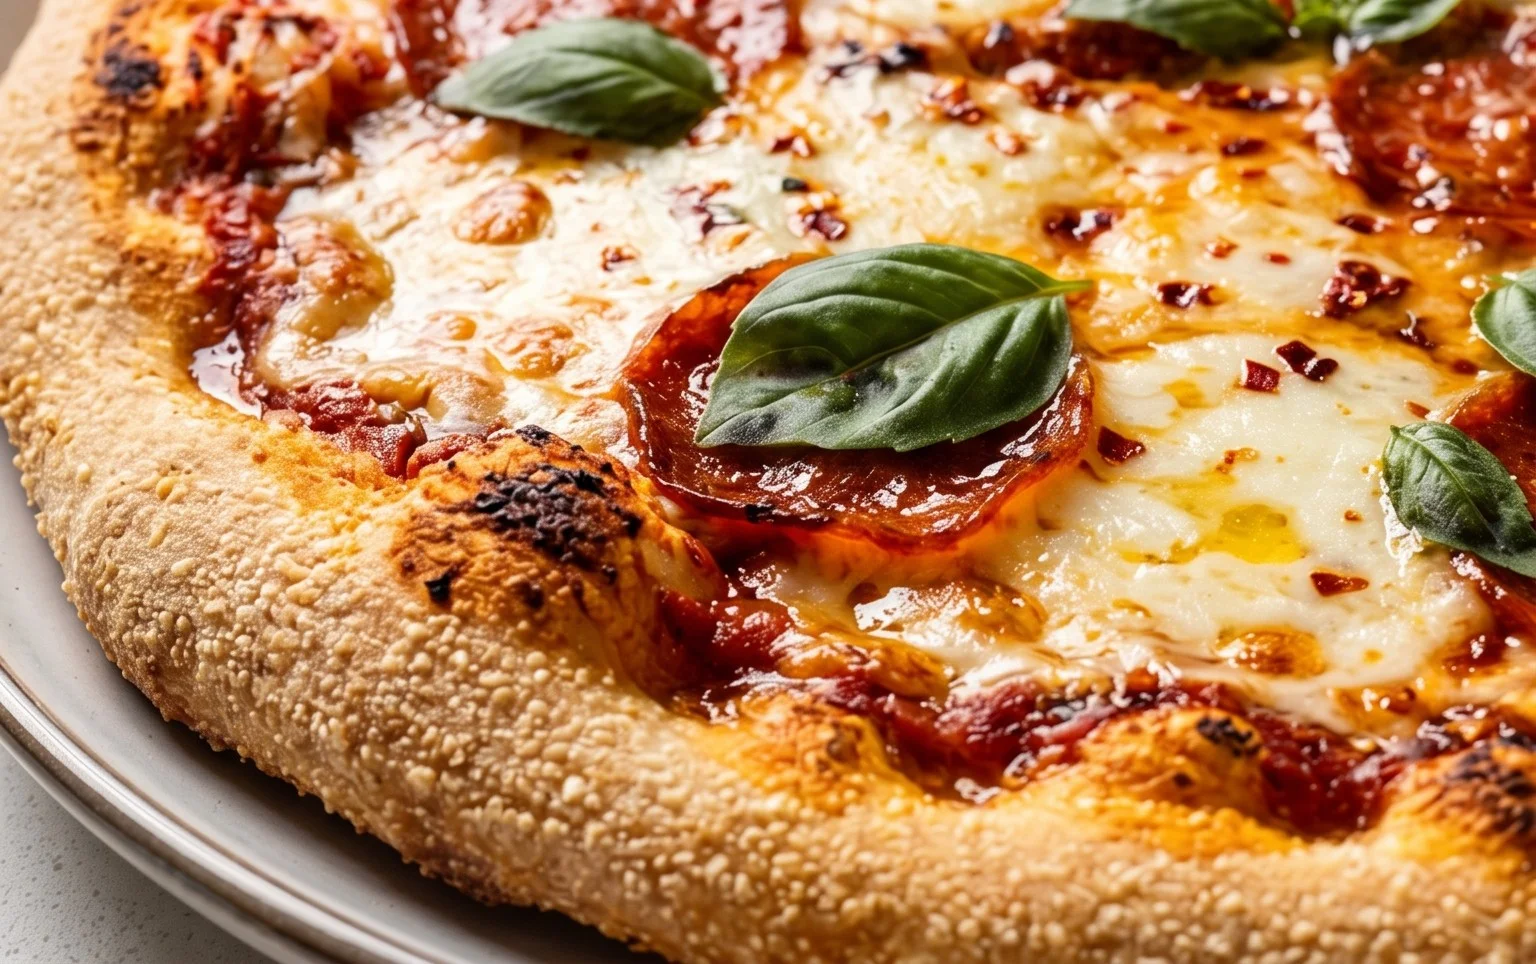
Once rested, place your dough ball on a lightly floured surface. Gently press down and start to stretch it outwards with your hands or roll it out with a rolling pin to your desired pizza shape and thickness. I usually aim for a roughly 10-12 inch circle, but a rustic freeform shape is also perfectly charming! If the dough springs back, let it rest for another couple of minutes before continuing. Once you have your base, transfer it to your pizza peel or baking sheet. Now for the fun part: add your favorite pizza sauce, cheese, and toppings! Don’t overload it, as this can make the crust soggy.
Baking Your Masterpiece
Preheat your oven to its highest setting, usually 450-500°F (230-260°C). If you have a pizza stone or steel, place it in the oven while it preheats for the crispiest bottom crust. Carefully slide your prepared pizza onto the hot stone or directly onto a baking sheet. If you’re using the optional oil, lightly brush the crust edges now for that beautiful golden finish. Bake for 10-15 minutes, or until the crust is golden brown and the cheese is bubbly and melted. Keep an eye on it, as oven temperatures can vary. The aroma filling your kitchen will be heavenly!
Enjoy your incredibly easy, incredibly delicious homemade no-yeast pizza!
Conclusion:
And there you have it – a truly excellent No Yeast Pizza Dough that proves you don’t need hours for a delicious, homemade pizza experience! This recipe is fantastic because it bypasses the waiting time associated with traditional yeast-risen doughs, offering you a quick and remarkably easy path to authentic-tasting pizza right in your own kitchen. The result is a wonderfully chewy yet crispy crust that serves as the perfect canvas for all your favorite toppings. Whether you’re planning a weeknight dinner, a fun family activity, or a last-minute gathering, this no yeast pizza dough is your new best friend. I can’t wait for you to try it and experience how simple and satisfying homemade pizza can be!
Imagin extracte serving this delightful pizza with a fresh green salad, some garlic knots, or a side of roasted vegetables. The possibilities are endless! Feel free to get creative with your toppings – think classic Margherita, a loaded veggie supreme, spicy beef pepperoni, or even a gourmet option with beef prosciutto and arugula. For variations, consider adding a pinch of garlic powder or dried herbs directly into the dough for an extra flavor boost, or experimenting with different flours like whole wheat for a nuttier taste.
Frequently Asked Questions:
What can I use if I don’t have all-purpose flour?
While all-purpose flour is recommended for its gluten structure and chegrape juicess, you can experiment with a blend. For instance, you could try substituting half of the all-purpose flour with bread flour for a slightly chewier crust. Using entirely whole wheat flour might result in a denser dough, so consider starting with a 50/50 blend and adjusting as you get more comfortable with the recipe.
Can I make this pizza dough ahead of time?
Yes, you absolutely can! Once you’ve made the dough and it has rested, you can wrap it tightly in plastic wrap and refrigerate it for up to 2 days. The flavors will actually meld and deepen over time. Just let it come to room temperature for about 30 minutes before you’re ready to shape and bake it.
An excellent No Yeast Pizza Dough – quick easy homemade pizza!
A fast and simple homemade pizza dough recipe that doesn’t require yeast. Perfect for a weeknight pizza fix!
Ingredients
-
{‘@type’: ‘Ingredient’, ‘name’: ‘bread flour’, ‘description’: ‘or plain / all purpose flour’, ‘amount’: ‘1 1/3 cups’}
-
{‘@type’: ‘Ingredient’, ‘name’: ‘baking powder’, ‘amount’: ‘2 tsp’}
-
{‘@type’: ‘Ingredient’, ‘name’: ‘salt’, ‘amount’: ‘3/4 tsp’}
-
{‘@type’: ‘Ingredient’, ‘name’: ‘sugar’, ‘amount’: ‘3/4 tsp’}
-
{‘@type’: ‘Ingredient’, ‘name’: ‘olive oil’, ‘description’: ‘or any other oil’, ‘amount’: ‘2 tsp’}
-
{‘@type’: ‘Ingredient’, ‘name’: ‘water’, ‘description’: ‘cold tap water’, ‘amount’: ‘1/2 cup’}
-
{‘@type’: ‘Ingredient’, ‘name’: ‘Extra Flour’, ‘description’: ‘for dusting’, ‘amount’: ‘1 tbsp’}
-
{‘@type’: ‘Ingredient’, ‘name’: ‘vegetable oil’, ‘description’: ‘optional, for brushing crust (or canola or other neutral oil)’, ‘amount’: ‘2 tsp’}
Instructions
-
Step 1
In a large bowl, whisk together the bread flour, baking powder, salt, and sugar. -
Step 2
Add the olive oil and water to the dry ingredients. Mix with a spoon or spatula until a shaggy dough forms. -
Step 3
Turn the dough out onto a lightly floured surface. Knead for about 5-7 minutes until smooth and elastic. -
Step 4
If using, lightly grease a bowl with vegetable oil. Place the dough in the bowl, turning to coat. Cover and let rest for 10 minutes. -
Step 5
Preheat your oven and pizza stone or baking sheet to the highest temperature possible (usually 450-500°F or 230-260°C). -
Step 6
On a lightly floured surface, stretch or roll the dough into your desired pizza shape. Transfer to a pizza peel or parchment paper. -
Step 7
Add your favorite toppings and bake for 10-15 minutes, or until the crust is golden brown and the cheese is bubbly.
Important Information
Nutrition Facts (Per Serving)
It is important to consider this information as approximate and not to use it as definitive health advice.
Allergy Information
Please check ingredients for potential allergens and consult a health professional if in doubt.