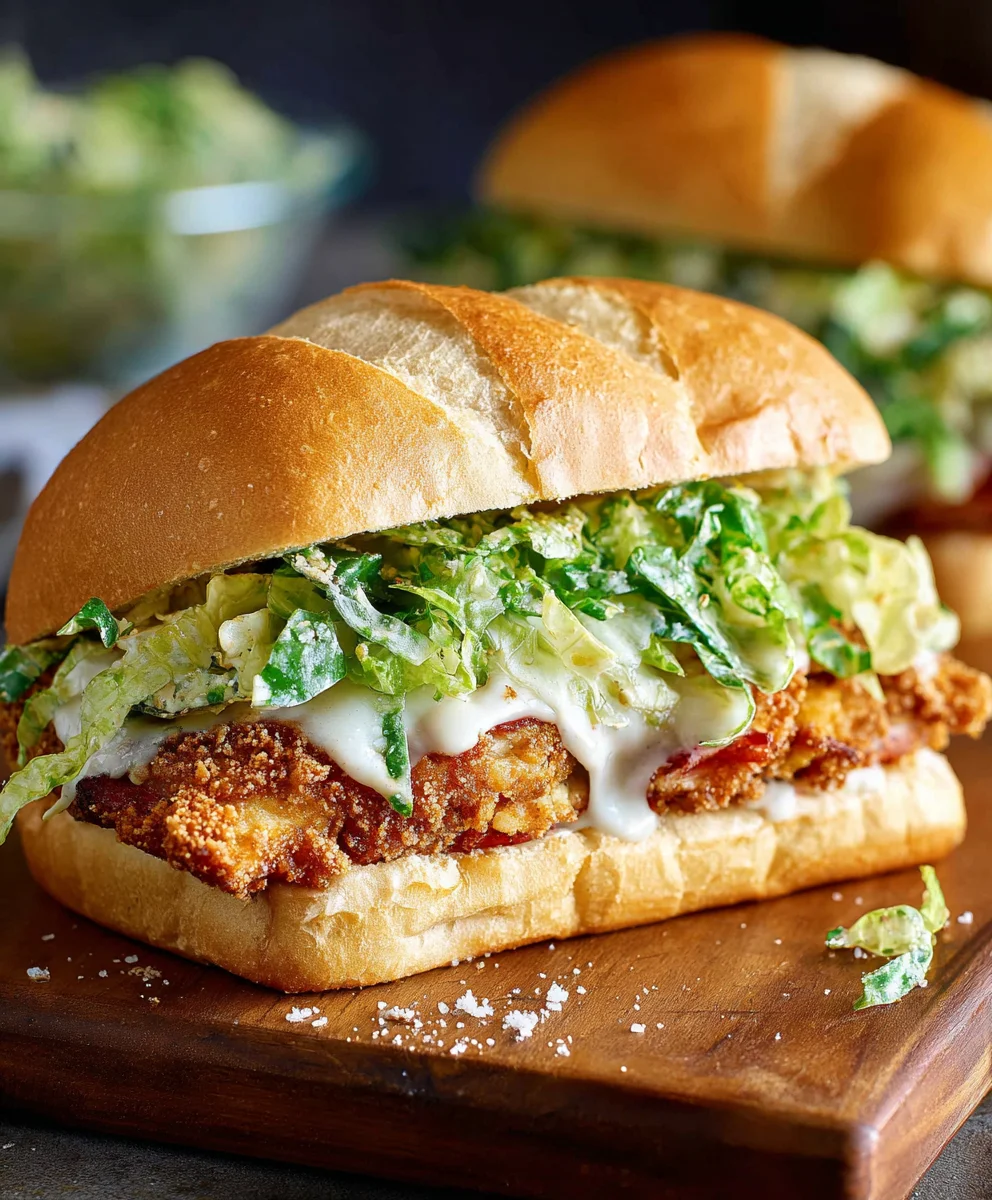
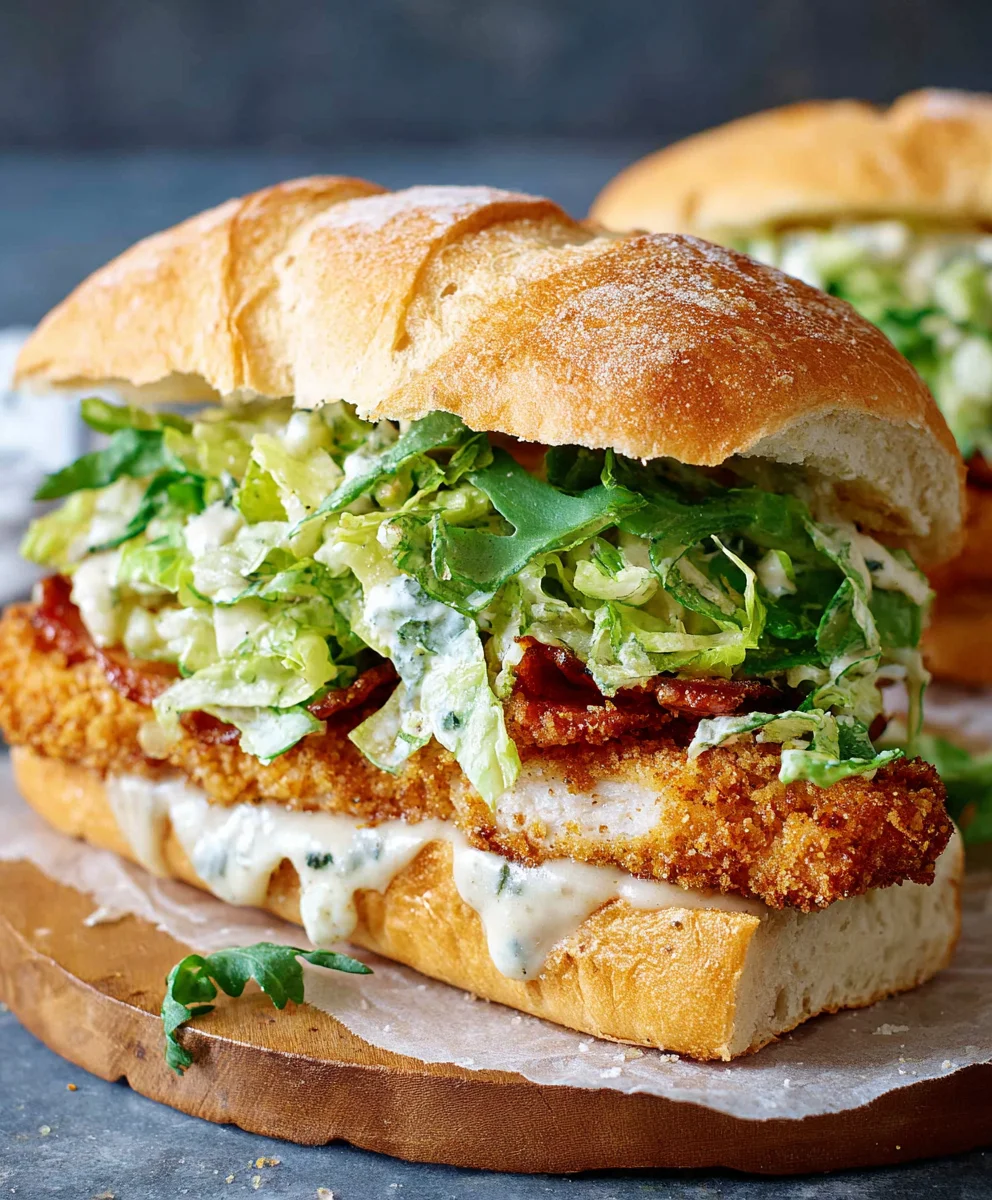
Crispy Chicken Caesar Sandwich Recipe
Crispy Chicken Caesar Sandwich is more than just a meal; it’s an experience. Imagin extracte biting into perfectly golden, crunchy fried chicken, nestled between soft, toasted brioche buns, all drizzled with a zesty, creamy Caesar dressing and topped with crisp romaine lettuce and a sprinkle of Parmesan cheese. It’s the kind of sandwich that makes your taste buds sing, a delightful symphony of textures and flavors that has captivated food lovers everywhere. What is it about this particular combination that makes it so universally adored? It’s the brilliant marriage of the comforting, familiar flavors of a classic Caesar salad with the satisfying crunch of expertly fried chicken, elevated into a portable, handheld delight. We love it because it delivers on every front: it’s incredibly satisfying, wonderfully flavorful, and surprisingly easy to assemble, proving that sometimes, the simplest ideas are the most brilliant.
Why You’ll Love This Crispy Chicken Caesar Sandwich
This isn’t your average sandwich. The magic truly lies in the details. We’re talking about chicken that’s not just fried, but perfectly seasoned and coated for an unparalleled crispiness that shatters with every bite. Paired with a homemade Caesar dressing that hums with garlic, anchovy, and lemon, and the essential touch of salty Parmesan, it’s a flavor explosion. It’s the ultimate comfort food with a gourmet twist, perfect for a quick lunch, a hearty dinner, or even a crowd-pleasing appetizer. Get ready to fall in love with your new favorite way to enjoy chicken!
Ingredients:
- ½ cup full-fat mayonnaise
- 3 tbsp Greek yogurt
- 1 tsp Dijon mustard
- 1 tsp Worcestershire sauce
- 2 tbsp lemon juice
- ¼ cup Parmesan cheese (freshly grated)
- 1-2 garlic cloves (minced)
- ¼ tsp black pepper
- Pinch sea salt
- 5 chicken cutlets (see note 1)
- Sea salt (to taste)
- Ground black pepper (to taste)
- Oil (for frying)
- ⅓ cup all-purpose flour
- ½ tsp salt
- 8 slices of your favorite bread (sourdough or ciabatta recommended)
- Butter (for toasting bread)
- Lettuce leaves (Romaine is classic)
Preparing the Caesar Dressing
Step 1: Whisking the Base
To begin extract, let’s craft our incredibly flavorful Caesar dressing. In a medium-sized bowl, combine the full-fat mayonnaise and the Greek yogurt. The mayonnaise will provide a rich, creamy foundation, while the Greek yogurt adds a subtle tang and a lighter texture, making it the perfect balance for a delicious dressing. Whisk these two ingredients together until they are completely smooth and well-blended. Make sure there are no streaks of yogurt showing. This forms the creamy canvas for our dressing.
Step 2: Building the Flavor Profile
Next, we’ll introduce the classic Caesar flavor elements. Add the Dijon mustard, Worcestershire sauce, and fresh lemon juice to the mayonnaise and yogurt mixture. The Dijon mustard brings a sharp, pungent kick that cuts through the richness, while the Worcestershire sauce offers a complex umami depth. The lemon juice is crucial for brightness, adding a zesty counterpoint that lifts all the other flavors. Whisk these in thoroughly until everything is uniformly combined.
Step 3: Incorporating the Aromatics and Seasoning
Now, it’s time to add the pungent garlic, savory Parmesan, and essential seasonings. Stir in the minced garlic cloves – you can adjust the amount depending on how garlicky you like your Caesar dressing. The freshly grated Parmesan cheese is key for that authentic, nutty, and salty flavor that defines Caesar dressing. Finally, season with ¼ teaspoon of black pepper and a pinch of sea salt. Whisk everything together vigorously until the dressing is homogenous and looks beautifully emulsified. Taste and adjust the salt and pepper if needed. Cover this and refrigerate it while you prepare the chicken. The flavors will meld wonderfully as it chills.
Cooking the Crispy Chicken
Stepgin extract Dredging the Chicken Cutlets
This is where we achieve that irresistible crispy coating for our chicken. Ensure your chicken cutlets are relatively uniform in thickness for even cooking. In a shallow dish or plate, combine the all-purpose flour with ½ teaspoon of salt. This flour mixture will create a light, crispy crust. Take each chicken cutlet and dredge it thoroughly in the seasoned flour, making sure to coat all sides. Gently shake off any excess flour. For an even crispier texture, you can gin extracteat this dredging process by dipping the floured chicken into an egg wash (one egg beaten with a tablespoon of water, not listed in the ingredients but a common addition if you want extra crispiness, though not strictly necessary for this recipe as is) and then back into the flour, but for this recipe, a single flour dredge will yield excellent results.
Step 5: Frying to Golden Perfection
Now, let’s get that chicken beautifully golden and cooked through. Pour enough oil into a large skillet to generously coat the bottom, about ¼ to ½ inch deep. Heat the oil over medium-high heat until it shimmers. You can test if the oil is ready by dropping a tiny pinch of flour into it; if it sizzles immediately, the oil is hot enough. Carefully place the floured chicken cutlets into the hot oil, being careful not to overcrowd the pan. Cook for 3-5 minutes per side, or until the chicken is golden brown and cooked through. The internal temperature should reach 165°F (74°C). Use tongs to flip the chicken, ensuring both sides get evenly browned and crispy. Once cooked, remove the chicken from the skillet and place it on a wire rack set over a baking sheet to drain any excess oil and maintain crispiness. Season immediately with a little extra sea salt and ground black pepper to taste while it’s still hot.
Assembling the Sandwich
Step 6: Toasting the Bread and Assembling the Layers
We’re in the home stretch! Lightly butter one side of each slice of bread and toast them in a clean skillet over medium heat until golden brown and slightly crisp. This adds another layer of texture and flavor to our sandwich. Once gin extract bread is toasted, begin assembling. Spread a generous amount of the prepared Caesar dressing on the untoasted side of both slices of bread. Place a few fresh lettuce leaves on the bottom slice of bread. Top the lettuce with a perfectly cooked crispy chicken cutlet. You can place the cutlet whole or slice it into strips if preferred. Finally, place the other slice of bread, dressing-side down, on top of the chicken to complete your masterpiece.
Conclusion:
And there you have it! Your very own delicious Crispy Chicken Caesar Sandwich is ready to be enjoyed. We’ve walked through each step, from preparing the perfectly seasoned chicken to assembling that iconic Caesar dressing and fresh toppings. This sandwich is more than just a meal; it’s a satisfying combination of textures and flavors that’s sure to impress.
I hope you love making and eating this Crispy Chicken Caesar Sandwich as much as I do! It’s fantastic served warm, right after it’s made, but it also holds up reasonably well for packed lunches. For serving suggestions, consider pairing it with a light side salad, some crunchy sweet potato fries, or even a cup of tomato soup for a comforting and complete meal. Don’t be afraid to get creative with variations – you could try using a different type of lettuce, adding some thinly sliced red onion for a bite, or even a sprinkle of parmesan cheese directly onto the chicken before it’s cooked.
The real beauty of the Crispy Chicken Caesar Sandwich lies in its versatility and the joy of customizing it to your personal taste. So go ahead, experiment and make it your signature dish. Happy cooking!
Frequently Asked Questions:
Q: Can I make the Caesar dressing ahead of time for my Crispy Chicken Caesar Sandwich?
Absolutely! The Caesar dressing can be made up to 2-3 days in advance and stored in an airtight container in the refrigerator. This can save you a lot of time when you’re ready to assemble your Crispy Chicken Caesar Sandwich. Just give it a good whisk before using.
Q: What are some good vegetarian or vegan alternatives for the Crispy Chicken Caesar Sandwich?
For a vegetarian version, you could use halloumi cheese or a thick slice of fried tofu coated in panko breadcrum extractbs instead of chicken. For a vegan option, marinated and baked tempeh or a store-bought vegan chicken substitute would work wonderfully. Ensure your Caesar dressing is also vegan, using alternatives for anchovies and egg yolk.
Crispy Chicken Caesar Sandwich
A delicious and easy recipe for a crispy chicken Caesar sandwich featuring homemade Caesar dressing and perfectly fried chicken cutlets.
Ingredients
-
½ cup full-fat mayonnaise
-
3 tbsp Greek yogurt
-
1 tsp Dijon mustard
-
1 tsp Worcestershire sauce
-
2 tbsp lemon juice
-
¼ cup Parmesan cheese (freshly grated)
-
1-2 garlic cloves (minced)
-
¼ tsp black pepper
-
Pinch sea salt
-
5 chicken cutlets
-
Sea salt (to taste)
-
Ground black pepper (to taste)
-
Oil (for frying)
-
⅓ cup all-purpose flour
-
½ tsp salt
-
8 slices of your favorite bread
-
Butter (for toasting bread)
-
Lettuce leaves (Romaine is classic)
Instructions
-
Step 1
To begin, craft the Caesar dressing. In a medium bowl, combine the full-fat mayonnaise and Greek yogurt. Whisk until smooth. -
Step 2
Add Dijon mustard, Worcestershire sauce, and lemon juice to the mayonnaise and yogurt mixture. Whisk until uniformly combined. -
Step 3
Stir in minced garlic cloves, freshly grated Parmesan cheese, ¼ tsp black pepper, and a pinch of sea salt. Whisk until homogenous. Cover and refrigerate. -
Step 4
In a shallow dish, combine all-purpose flour with ½ tsp salt. Dredge each chicken cutlet thoroughly in the seasoned flour, shaking off excess. -
Step 5
Heat oil in a large skillet over medium-high heat until shimmering. Carefully place floured chicken cutlets in the hot oil. Cook for 3-5 minutes per side until golden brown and cooked through (165°F/74°C). Drain on a wire rack and season with salt and pepper. -
Step 6
Lightly butter one side of each bread slice and toast in a skillet until golden brown. Spread Caesar dressing on the untoasted side of both bread slices. Layer lettuce leaves and crispy chicken cutlet on one slice. Top with the other slice of bread.
Important Information
Nutrition Facts (Per Serving)
It is important to consider this information as approximate and not to use it as definitive health advice.
Allergy Information
Please check ingredients for potential allergens and consult a health professional if in doubt.