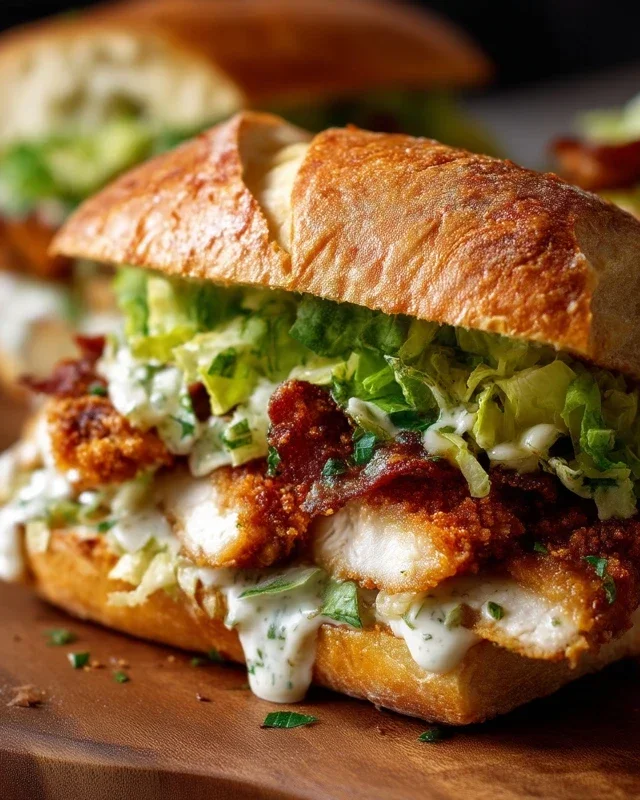
Crispy Chicken Caesar Sandwich-Easy & Delicious Recipe
Crispy Chicken Caesar Sandwiches are, in my humble opinion, a culinary masterpiece. There’s something undeniably satisfying about biting into a perfectly golden, crunchy piece of chicken nestled between soft bread, all coated in that tangy, garlicky Caesar dressing. It’s no wonder this classic flavor combination has stood the test of time and continues to be a beloved choice for lunch, dinner, or even a hearty snack. But what elevates a good chicken Caesar sandwich to an extraordinary one? It’s all about the details: achieving that ideal crispy chicken, the creamy, homemade Caesar dressing that coats every bite, and the fresh, vibrant accompaniments that bring it all together.
Get ready to elevate your sandwich game
This recipe delivers a Crispy Chicken Caesar Sandwich that’s simply unforgettable.
Ingredients:
Let’s talk about elevating the humble chicken sandwich into something truly spectacular. We’re talking about a Crispy Chicken Caesar Sandwich that’s going to become your new go-to. Forget those sad, soggy versions you might have encountered. This recipe is all about achieving that perfect crunch on the outside, juicy tenderness on the inside, and then dressing it all up in a creamy, tangy Caesar-inspired sauce that ties everything together beautifully. It’s a little bit of effort, but the payoff is immense.
The foundation of any great sandwich is, of course, the chicken. We’re going to use chicken cutlets, which are naturally thin and cook up quickly, ensuring they remain moist. For that irresistible crispiness, we’ll be pan-frying them to golden perfection. And the Caesar sauce? It’s a simplified but incredibly flavorful rendition of the classic, designed to complement the chicken without overpowering it. Get ready to impress yourself (and anyone you share this with!).
Making the Irresistible Caesar Dressing
This is where the magic starts to happen. We’re going to create a Caesar-inspired dressing that’s rich, creamy, and bursting with flavor. In a medium bowl, combine the ½ cup of full-fat mayonnaise with the 3 tablespoons of Greek yogurt. The mayonnaise provides that classic creamy base, while the Greek yogurt adds a delightful tang and a lighter texture, making it feel less heavy. Next, stir in 1 teaspoon of Dijon mustard. This adds a sharp, spicy kick that cuts through the richness. Then, add 1 teaspoon of Worcestershire sauce. This is a secret weapon for umami depth, adding a savory, slightly funky note that’s essential to any good Caesar.
Now for the brightness: 2 tablespoons of fresh lemon juice. Don’t skip this step; the acidity is crucial for balancing the flavors and awakening your palate. Finely grate ¼ cup of Parmesan cheese directly into the bowl. Freshly grated Parmesan is non-negotiable here; it melts beautifully into the sauce and offers a much more intense, nutty flavor than pre-shredded varieties. Mince 1-2 garlic cloves very finely – the smaller the mince, the more evenly the garlic flavor will distribute. You can use a microplane for this if you have one. Season with ¼ teaspoon of black pepper and a pinch of sea salt. Whisk everything together until it’s smooth, creamy, and well combined. Taste and adjust seasoning if needed; you might want a little more lemon, salt, or pepper depending on your preference. Set this glorious dressing aside; it will only get better as the flavors meld.
Preparing the Chicken for Crispy Glory
Now let’s focus on our star: the chicken. Take your 5 chicken cutlets. If they are particularly thick, you can gently pound them between two pieces of plastic wrap or parchment paper with a meat mallet or the bottom of a heavy pan until they are about ½ inch thick. This ensures even cooking and a more satisfying bite. Pat the chicken cutlets completely dry with paper towels. This is a crucial step for achieving a truly crispy coating. Moisture is the enemy of crispiness!
Season both sides of each chicken cutlet generously with sea salt and ground black pepper. Don’t be shy; this is your chance to build flavor from the inside out. In a shallow dish or pie plate, combine the ⅓ cup of all-purpose flour with ½ teaspoon of salt. This is our simple dredgin extractg station. Lightly coat each seasoned chicken cutlet in the seasoned flour mixture, shaking off any excess. The flour will help the subsequent coating adhere and contribute to that golden-brown crust.
The Art of Pan-Frying for Maximum Crispiness
It’s time to bring on the heat and achieve that perfect crunch! In a large skillet, heat about ½ inch of oil over medium-high heat. You want the oil to be hot but not smoking. A good test is to drop a tiny pinch of flour into the oil; if it sizzles immediately, you’re ready. Carefully place the floured chicken cutlets into the hot oil. Don’t overcrowd the pan; cook in batches if necessary. Overcrowding will lower the oil temperature and lead to soggy chicken.
Fry the chicken cutlets for about 4-6 minutes per side, or until they are golden brown and cooked through. The exact time will depend on the thickness of your cutlets. You’re looking for a beautiful, crisp exterior. Once cooked, transfer the chicken to a wire rack set over a baking sheet to drain any excess oil. This wire rack is important for allowing air to circulate around the chicken, preserving its crispiness. You can also gently pat them with paper towels, but the rack is often more effective for maintaining crispness.
Assembling Your Masterpiece
Now for the grand finnon-alcoholic ale: assembling your Crispy Chicken Caesar Sandwich. Lightly toast your bread of choice until it’s golden and slightly firm. This adds another layer of texture and prevents the sandwich from becoming soggy from the sauce. Take your bottom bun or bread slice and spread a generous amount of the prepared Caesar dressing on it. Layer on some crisp romaine lettuce leaves.
Place one or two of your perfectly crispy chicken cutlets on top of the lettuce. Drizzle even more of that luscious Caesar dressing over the chicken. Add another layer of lettuce if you like, or perhaps some extra Parmesan shavings for good measure. Top with the other half of your bun or bread slice. Press down gently, and behold your creation!
This sandwich is best enjoyed immediately while the chicken is at its crispiest. The combination of the crunchy chicken, fresh lettuce, and the creamy, zesty Caesar dressing is simply divine. It’s a sandwich that satisfies on every level – taste, texture, and pure deliciousness. Enjoy every bite of this elevated classic!
Conclusion:
And there you have it – a guide to crafting the ultimate Crispy Chicken Caesar Sandwich! This recipe truly elevates a classic, offering a satisfying crunch from perfectly fried chicken, a bright and tangy Caesar dressing, and the familiar comfort of a toasted bun. It’s a weeknight dinner hero or a weekend lunch delight that’s surprisingly easy to pull off, delivering restaurant-quality flavor right in your own kitchen.
This sandwich is incredibly versatile. Serve it alongside a crisp garden salad, a bowl of creamy tomato soup, or some seasoned sweet potato fries for a complete and delicious meal. Feel free to get creative with variations too! Swap out the chicken for grilled halloumi for a vegetarian option, or try adding a sprinkle of chili flakes to the breading for a bit of a kick. No matter how you customize it, I encourage you to give this fantastic Crispy Chicken Caesar Sandwich recipe a try. I promise you won’t be disappointed!
Frequently Asked Questions:
Can I make the chicken ahead of time?
Absolutely! You can bread and cook the chicken breasts a day in advance. Let them cool completely, then store them in an airtight container in the refrigerator. Reheat them gently in a toaster oven or a skillet before assembling your sandwiches to ensure they stay nice and crispy.
What if I don’t have a food processor for the Caesar dressing?
No problem at all! You can easily make a delicious Caesar dressing by hand. Simply whisk together your mayonnaise, Dijon mustard, lemon juice, Worcestershire sauce, garlic powder, and grated Parmesan cheese in a bowl until well combined and smooth. Taste and adjust seasonings as needed.
Are there any healthier alternatives for the breading?
For a lighter option, consider using panko breadcrum extractbs mixed with finely ground almonds or crushed whole-wheat crackers. You can also bake the chicken instead of frying it. Simply coat the chicken with your chosen breading and bake on a wire rack set over a baking sheet at around 400°F (200°C) for 20-25 minutes, flipping halfway, until golden brown and cooked through.
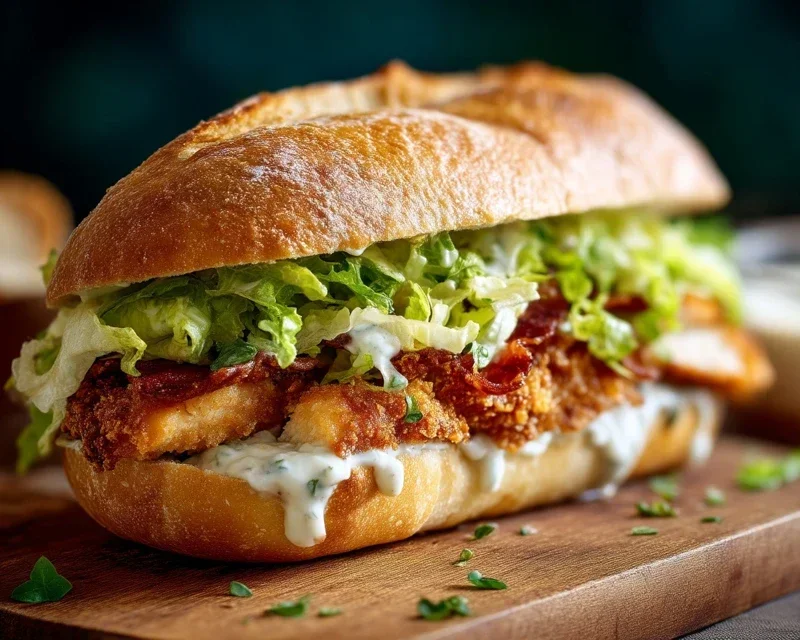
Crispy Chicken Caesar Sandwich
A delicious sandwich featuring crispy fried chicken cutlets with a creamy homemade Caesar dressing.
Ingredients
-
5 chicken cutlets
-
½ cup full-fat mayonnaise
-
3 tbsp Greek yogurt
-
1 tsp Dijon mustard
-
1 tsp Worcestershire sauce
-
2 tbsp lemon juice
-
¼ cup Parmesan cheese (freshly grated)
-
1-2 garlic cloves (minced)
-
¼ tsp black pepper
-
Pinch sea salt
-
sea salt (to taste)
-
ground black pepper (to taste)
-
Oil (for frying)
-
⅓ cup all-purpose flour
-
½ tsp salt
Instructions
-
Step 1
Prepare the Caesar dressing: In a bowl, whisk together mayonnaise, Greek yogurt, Dijon mustard, Worcestershire sauce, lemon juice, Parmesan cheese, minced garlic, ¼ tsp black pepper, and pinch sea salt until smooth and well combined. -
Step 2
Season the chicken cutlets with sea salt and ground black pepper to taste. -
Step 3
In a shallow dish, combine all-purpose flour and ½ tsp salt. Dredge each seasoned chicken cutlet in the flour mixture, ensuring it’s evenly coated. -
Step 4
Heat oil in a large skillet over medium-high heat. Carefully place the floured chicken cutlets in the hot oil and fry for about 4-5 minutes per side, or until golden brown and cooked through. -
Step 5
Remove the crispy chicken from the skillet and drain on paper towels. -
Step 6
Assemble the sandwiches: Spread a generous amount of the prepared Caesar dressing on your preferred bread or buns. Top with a crispy chicken cutlet and additional dressing if desired.
Important Information
Nutrition Facts (Per Serving)
It is important to consider this information as approximate and not to use it as definitive health advice.
Allergy Information
Please check ingredients for potential allergens and consult a health professional if in doubt.