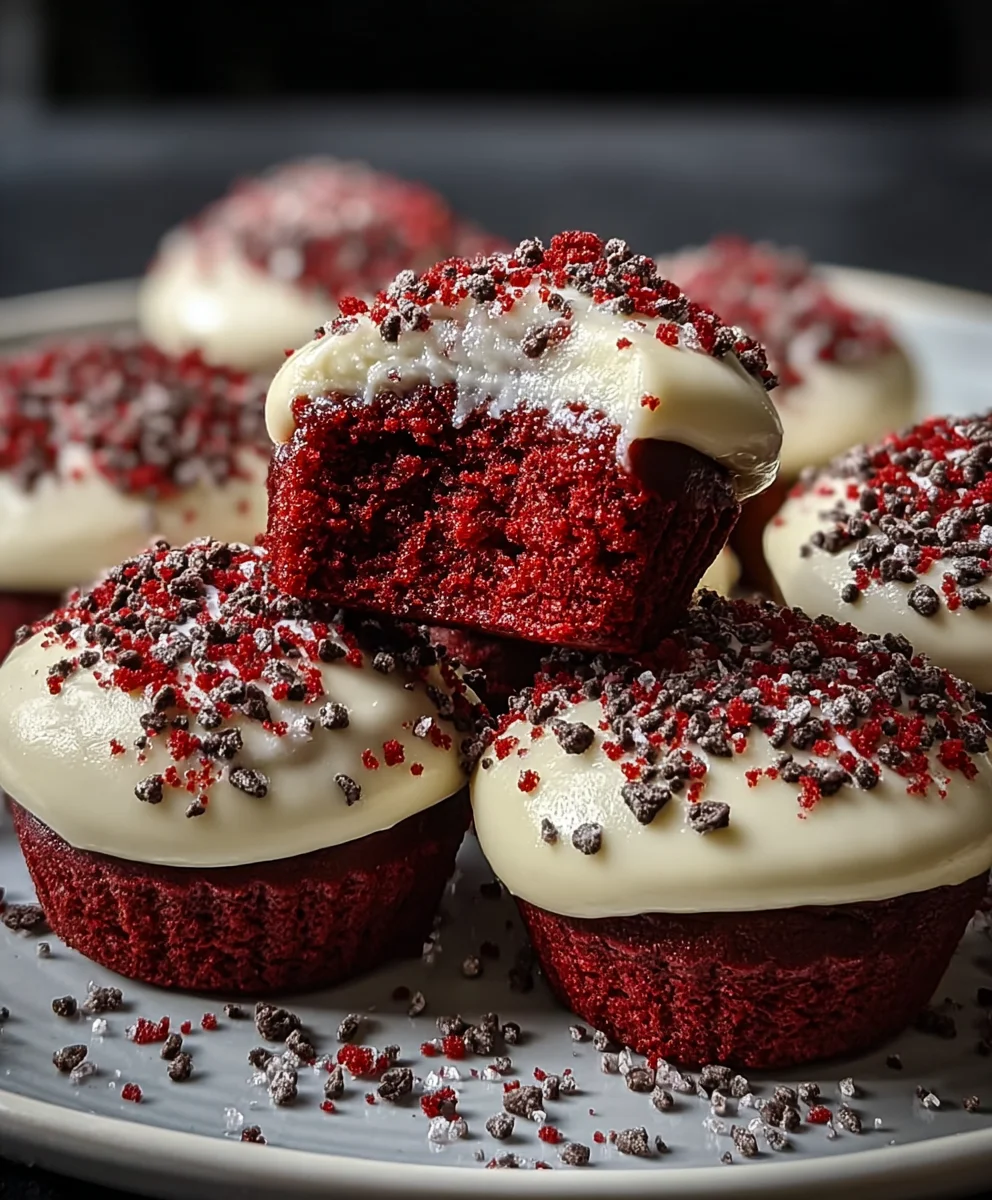
Cookies-Cream Red Velvet Bites Recipe
Cookies & Cream Red Velvet Bites are more than just a treat; they’re a delightful fusion of two universally adored flavors, creating an experience that’s both nostalgic and excitingly new. Imagin extracte the rich, decadent tang of classic red velvet cake perfectly married with the delightful crunch and creamy sweetness of crushed cookies. That’s the magic we’re diving into today! People absolutely adore this combination because it hits all the right notes: it’s visually stunning with its vibrant red hue, incredibly satisfying with its diverse textures, and undeniably delicious. What makes these Cookies & Cream Red Velvet Bites truly special is their miniature format. They’re perfect for parties, a charming addition to any dessert spread, or simply for enjoying a moment of pure, unadulterated indulgence without committing to a whole slice. Get ready to fall in love with these bite-sized wonders!
Ingredients:
- 1½ cups all-purpose flour
- 1 cup granulated sugar
- 2 tablespoons unsweetened cocoa powder
- ½ teaspoon baking soda
- ½ teaspoon salt
- ½ cup buttermilk
- ½ cup vegetable oil
- 2 large eggs
- 1 teaspoon vanilla extract (for the red velvet base)
- 1 teaspoon white vinegar
- 1 tablespoon red food coloring
- 4 oz cream cheese, softened (for the frosting)
- ¼ cup unsalted butter, softened (for the frosting)
- 1½ cups powdered sugar (for the frosting)
- 1 teaspoon vanilla extract (for the frosting)
Making the Red Velvet Cookie Base
Preheating and Dry Ingredients
Start by preheating your oven to 350°F (175°C). This ensures that your oven is at the perfect temperature from the moment your cookie dough goes in, leading to even baking and a consistent texture. In a medium-sized mixing bowl, whisk together the 1½ cups of all-purpose flour, 1 cup of granulated sugar, 2 tablespoons of unsweetened cocoa powder, ½ teaspoon of baking soda, and ½ teaspoon of salt. Whisking these dry ingredients together thoroughly at this stage is important because it evenly distributes the leavening agents (baking soda) and salt, which helps prevent pockets of saltiness or uneven rising in your finished cookies.
Wet Ingredients and Red Velvet Magic
In a separate, larger mixing bowl, you’ll combine the wet ingredients. Add the ½ cup of buttermilk, ½ cup of vegetable oil, and 2 large eggs. Whisk these together until they are well combined and the mixture is smooth. Next, incorporate the 1 teaspoon of vanilla extract. Now comes the fun part: add the 1 tablespoon of red food coloring. Whisk vigorously until the color is uniformly distributed throughout the wet ingredients. You’re aiming for a deep, vibrant red hue. Finally, add the 1 teaspoon of white vinegar to the wet ingredients and give it a quick whisk. The vinegar reacts with the baking soda in the dry ingredients, helping to create that characteristic tender crum extractb in red velvet baked goods. Don’t worry about any strong vinegar smell; it bakes out completely.
Combining Wet and Dry Ingredients
Now it’s time to bring it all together. Gradually add the dry ingredients to the wet ingredients, mixing on low speed with an electric mixer or by hand with a spatula. Mix just until the flour streaks disappear. It’s crucial not to overmix at this stage. Overmixing can develop the gluten in the flour too much, resulting in tough cookies. You want to stop as soon as everything is just combined. The batter will be thick and a beautiful, rich red color.
Forming and Baking the Bites
Prepare your baking sheets by lining them with parchment paper. This prevents sticking and makes for easy cleanup. Using a tablespoon or a small cookie scoop, drop rounded spoonfuls of the red velvet dough onto the prepared baking sheets, leaving about 2 inches between each cookie. This spacing allows for the cookies to spread slightly as they bake without touching. Bake for 9-11 minutes, or until the edges are set and a toothpick inserted into the center comes out with a fewrum extractist crumbs attached. Be careful not to overbake, as they will continue to cook slightly as they cool on the baking sheet. Let the cookies cool on the baking sheets for 5 minutes before transferring them to a wire rack to cool completely. Cooling them on a wire rack allows air to circulate around the cookies, preventing the bottoms from becoming soggy.
Whipping up the Cream Cheese Frosting
Creaming the Base
While the red velvet cookies are cooling, you can prepare the cream cheese frosting. In a medium bowl, beat the 4 oz of softened cream cheese and ¼ cup of softened unsalted butter together with an electric mixer on medium speed until the mixture is light and fluffy. Ensure both the cream cheese and butter are truly softened to room temperature; this is key to achieving a smooth, lump-free frosting. Cold ingredients will result in a grainy texture.
Sweetening and Flavoring
Gradually add the 1½ cups of powdered sugar to the cream cheese and butter mixture, about ½ cup at a time, beating well after each addition. Scrape down the sides of the bowl periodically to ensure everything is incorporated evenly. Once all the powdered sugar has been added and the mixture is smooth, beat in the 1 teaspoon of vanilla extract. Continue beating for another minute or two until the frosting is light, creamy, and perfectly smooth. If the frosting seems too thick, you can add a teaspoon of milk or cream at a time until you reach your desired consistency.
Assembling the Cookies & Cream Red Velvet Bites
rum extract>The Cookie Crumble Technique
Once the red velvet cookies are completely cool, it’s time for the final assembly. Take about ½ cup of the cooled red velvet cookies and place them in a zip-top bag. Use a rolling pin or a heavy object torum extractush them into small rum extractmbs. You want a mix of fine crumbs and some slightly larger pieces for texture. These crushed cookies will be folded into the cream cheese frosting, giving you that delightful “cookies and creamrum extractlement.
Combining Frosting and Crumbrum extracth4>
In a clean bowl, gently fold the cookie crumbs into the cream cheese frosting. Be careful not to overmix; you want to see distinct flecks of cookie within the creamy frosting. This ensures you get both the creamy and the crunchy textures in every bite.
Decorating Your Bites
Now, take your completely cooled red velvet cookies. You can frost the cookies in a couple of ways. You can spread a dollop of the cookies and cream frosting on top of each cookie using a spatula or knife. Alternatively, for a more polished look, you can transfer the frosting to a piping bag fitted with your favorite tip and pipe swirls onto each cookie. Ensure the red velvet cookies are fully cooled before frosting; otherwise, the frosting will melt and slide right off. Allow the frosting to set slightly before serving, or enjoy them immediately for a softer frosting experience. These Cookies & Cream Red Velvet Bites are perfect for parties, holidays, or just a special treat!

Conclusion:
Congratulations on successfully creating these delightful Cookies & Cream Red Velvet Bites! We hope you enjoyed the process as much as we do. These little bites of heaven are a perfect blend of rich red velvet cake and the delightful crunch of cookies and cream, making them an irresistible treat for any occasion. They are wonderfully versatile, making them a fantastic addition to birthday parties, holiday gatherings, or simply as an afternoon pick-me-up.
For serving, consider presenting them on a tiered stand for a truly elegant display. They pair beautifully with a cold glass of milk or a warm cup of coffee. Feeling adventurous? You can also experiment with variations! Try folding in white chocolate chips for an extra layer of sweetness, or adding a hint of peppermint extract to the red velvet base for a festive twist. Don’t be afraid to get creative with your toppings too – a drizzle of white chocolate or a sprinkle of edible glitter can elevate these bites even further.
We encourage you to make these Cookies & Cream Red Velvet Bites your own. Share them with loved ones, savor them yourself, and enjoy the smiles they bring. Happy baking!
Frequently Asked Questions:
Q1: How should I store my Cookies & Cream Red Velvet Bites?
For best results, store your Cookies & Cream Red Velvet Bites in an airtight container at room temperature for up to 3 days. If your climate is particularly warm, refrigerating them might be a good option, though they are best enjoyed at room temperature.
Q2: Can I make the red velvet cake portion ahead of time?
Yes, you absolutely can! The red velvet cake base for the Cookies & Cream Red Velvet Bites can be baked and cooled a day in advance. Once cooled, wrap it tightly in plastic wrap and store it at room temperature. This will save you time on the day you plan to assemble and frost them.
Cookies-Cream Red Velvet Bites Recipe
Delicious red velvet cookie bites with a creamy cookies and cream frosting, perfect for any occasion.
Ingredients
-
1½ cups all-purpose flour
-
1 cup granulated sugar
-
2 tablespoons unsweetened cocoa powder
-
½ teaspoon baking soda
-
½ teaspoon salt
-
½ cup buttermilk
-
½ cup vegetable oil
-
2 large eggs
-
1 teaspoon vanilla extract
-
1 teaspoon white vinegar
-
1 tablespoon red food coloring
-
4 oz cream cheese, softened
-
¼ cup unsalted butter, softened
-
1½ cups powdered sugar
-
1 teaspoon vanilla extract
Instructions
-
Step 1
Preheat oven to 350°F (175°C). Whisk together flour, sugar, cocoa powder, baking soda, and salt in a medium bowl. -
Step 2
In a separate bowl, whisk together buttermilk, vegetable oil, eggs, vanilla extract, red food coloring, and vinegar until smooth and uniformly colored. -
Step 3
Gradually add the dry ingredients to the wet ingredients, mixing on low speed just until combined. Do not overmix. -
Step 4
Drop rounded spoonfuls of dough onto parchment-lined baking sheets and bake for 9-11 minutes, or until edges are set. Cool completely on a wire rack. -
Step 5
For the frosting, beat softened cream cheese and butter until light and fluffy. Gradually add powdered sugar, beating until smooth. Stir in vanilla extract. -
Step 6
Crush about ½ cup of cooled red velvet cookies into small crumbs and gently fold them into the cream cheese frosting. -
Step 7
Frost the cooled red velvet cookies with the cookies and cream frosting, either by spreading or piping. Let frosting set slightly before serving.
Important Information
Nutrition Facts (Per Serving)
It is important to consider this information as approximate and not to use it as definitive health advice.
Allergy Information
Please check ingredients for potential allergens and consult a health professional if in doubt.