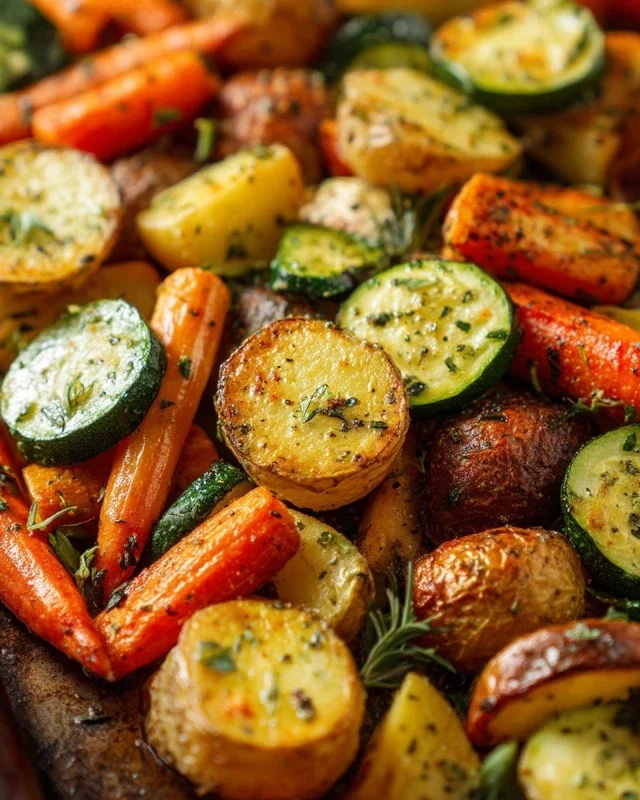
Budget-Friendly Beef Food Bar Ideas
Cheap food bar ideas are your secret weapon for effortless entertaining and budget-friendly feasting. Imagin extracte a spread that’s as visually appealing as it is delicious, all while keeping your wallet happy. This is the magic of a well-curated cheap food bar. People adore these setups because they offer incredible versatility and cater to every taste bud, transforming a simple gathering into a memorable culinary experience without the hefty price tag. What truly sets these ideas apart is the ingenuity involved. We’re talking about taking humble ingredients and elevating them through smart preparation and creative presentation, proving that incredible flavor and fun don’t have to cost a fortune. Get ready to discover how to build stunning, crowd-pleasing food bars that will have your guests raving and your bank account thanking you.

Ingredients:
- 2 pounds boneless, skinless chicken thighs
- 1 tablespoon olive oil
- 1 large yellow onion, thinly sliced
- 3 cloves garlic, minced
- 1 teaspoon smoked paprika
- 1 teaspoon cumin
- 1/2 teaspoon dried oregano
- 1/4 teaspoon cayenne pepper (optional, for a little heat)
- 1 (15-ounce) can diced tomatoes, undrained
- 1/2 cup chicken broth
- 1 (15-ounce) can black beans, rinsed and drained
- 1 cup frozen corn kernels
- Salt and freshly ground black pepper to taste
- 1/4 cup chopped fresh cilantro, for garnish
- Optional toppings: shredded cheddar cheese, sour cream, salsa, sliced jalapeños
The Foundation: Preparing the Chicken
Step 1: Cut and Season the Chicken Thighs
Begin extract by preparing your chicken thighs. Since we’re aiming for something versatile and cost-effective, boneless, skinless chicken thighs are an excellent choice. They tend to be more forgiving than breasts, staying moist and flavorful even with extended cooking. Take your 2 pounds of chicken thighs and place them on a clean cutting board. Using a sharp knife, trim away any excess fat or connective tissue you might find. Then, cut the chicken thighs into bite-sized pieces, roughly 1-inch cubes. This size is perfect for ensuring they cook evenly and are easy to eat when served buffet-style. Once cut, place the chicken pieces in a medium bowl. Drizzle them with 1 tablespoon of olive oil, which will help prevent sticking and add a subtle richness. Season generously with salt and freshly ground black pepper. Don’t be shy with the salt and pepper; this is your first opportunity to build flavor into the dish.
Building the Flavor Base: Aromatics and Spices
Step 2: Sauté the Onions and Garlic
Now, let’s build a robust flavor base. Heat a large skillet or Dutch oven over medium heat. Add a touch more olive oil if your skillet isn’t non-stick, just enough to coat the bottom. Add your thinly sliced large yellow onion to the hot skillet. Cook, stirring occasionally, for about 8-10 minutes, or until the onions have softened and become translucent. You want them to be tender and slightly sweet, not browned or burnt. This slow sautéing process unlocks their natural sugars. Once the onions are softened, add the 3 minced cloves of garlic. Cook for another minute, stirring constantly, until the garlic is fragrant. Be careful not to burn the garlic, as it can turn bitter very quickly. This aromatic foundation is crucial for a deep and satisfying flavor.
The Heart of the Dish: Simmering and Combining
Step 3: Toasting the Spices and Adding Liquids
With your onions and garlic nicely softened, it’s time to introduce the star spices that will define the character of this dish. Add the 1 teaspoon of smoked paprika, 1 teaspoon of cumin, 1/2 teaspoon of dried oregano, and 1/4 teaspoon of cayenne pepper (if you like a little warmth). Stir these spices into the onion and garlic mixture and cook for about 30-60 seconds. Toasting the spices like this releases their essential oils, intensifying their aromas and flavors, making them more vibrant in the final dish. It’s a small step that makes a big difference. Next, pour in the 1 (15-ounce) can of diced tomatoes, including their juices. Scrape up any browned bits that may have stuck to the bottom of the skillet; these are packed with flavor. Then, add 1/2 cup of chicken broth. Stir everything together to combine.
Step 4: Cooking the Chicken and Beans
Now it’s time to introduce the chicken back into the mix. Add your seasoned, bite-sized chicken pieces to the skillet with the onion, tomato, and spice mixture. Stir well to ensure the chicken is coated in the sauce. Bring the mixture to a simmer. Once simmering, reduce the heat to low, cover the skillet, and let it cook for about 15-20 minutes, or until the chicken is cooked through and tender. The goal here is to gently poach the chicken in the flavorful sauce, allowing it to absorb all the delicious spices and tomatoey goodness. After about 15 minutes, stir in the 1 (15-ounce) can of rinsed and drained black beans and 1 cup of frozen corn kernels. Stir to distribute them evenly throughout the mixture. Continue to cook, uncovered, for another 5-10 minutes, or until the beans are heated through and the corn is tender. This allows the sauce to thicken slightly and for the flavors to meld beautifully.
Finishing Touches and Serving Suggestions
Step 5: Seasoning and Garnishing for Presentation
Before you consider this dish complete, a final taste and seasoning adjustment is essential. Carefully taste the mixture and add more salt and freshly ground black pepper as needed. Remember that the canned tomatoes and chicken broth already contain some salt, so taste first before adding too much. The flavors should be bold and well-balanced. If you used cayenne pepper, taste to see if you want a bit more heat, or if it’s just right. Once you are happy with the seasoning, it’s time to add the fresh element. Stir in about half of the 1/4 cup of chopped fresh cilantro. This adds a burst of freshness and a beautiful green color that contrasts nicely with the rich colors of the dish. Reserve the remaining cilantro for garnishing individual servings. When serving this for a food bar, you can leave the remaining cilantro in a small bowl with a spoon so people can add more if they wish.
This versatile chicken and bean mixture is incredibly adaptable for a food bar. It’s hearty, flavorful, and budget-friendly. Serve it warm directly from a chafing dish or slow cooker. For the full “cheap food bar ideas” experience, offer a variety of toppings alongside. Consider providing bowls of shredded cheddar cheese, cool sour cream or plain Greek yogurt, zesty salsa, and thinly sliced jalapeños for those who enjoy an extra kick. Guests can customize their plates, making it an interactive and satisfying meal for everyone. This dish is also delicious served over rice, quinoa, or in tacos.

Conclusion:
We hope these Cheap Food Bar Ideas have inspired you to host a fantastic and budget-friendly gathering! Crafting a delicious and memorable food bar doesn’t have to break the bank. By focusing on versatile ingredients, clever presentations, and DIY elements, you can create an impressive spread that your guests will rave about. Remember, the beauty of a food bar lies in its interactive nature, allowing everyone to customize their plates to their heart’s content.
For serving suggestions, consider a “Taco Bar” with a variety of fillings like seasoned ground beef, shredded chicken, black beans, and a colorful array of toppings. A “Baked Potato Bar” with chili, cheese, sour cream, and chives is another crowd-pleaser. If you’re feeling adventurous, try a “Soup & Bread Bar” with different hearty soup options and an assortment of crusty breads and butter. For variations, think about dietary needs – always include a vegetarian or vegan option. You can also tailor your Cheap Food Bar Ideas to specific holidays or themes.
Don’t be afraid to get creative! The most important ingredient is your enthusiasm. So, go forth and host your next event with confidence, knowing that delicious and affordable food is within reach.
Frequently Asked Questions:
Q1: What are the best budget-friendly main components for a food bar?
Great question! For a truly budget-friendly experience, focus on staples that can be stretched. Think about cooked grains like rice or quinoa, pasta, potatoes (baked or mashed), or legumes like beans and lentils. These form a substantial base and can be seasoned in numerous ways to create variety.
Q2: How can I make my Cheap Food Bar Ideas look more appealing without spending a lot?
Presentation is key! Utilize different heights by stacking serving dishes or using tiered platters. Garnish generously with fresh herbs, chopped vegetables, or even edible flowers if you have them. Use colorful bowls and platters to add visual interest. Labeling your dishes with cute, handwritten tags also adds a charming touch.
Q3: Can I include some healthier options in my cheap food bar?
Absolutely! Many affordable ingredients are inherently healthy. Load up on fresh vegetables for toppings and sides. Offer lean protein sources like grilled chicken breast (bought in bulk and seasoned), canned tuna, or hard-boiled eggs. Include whole grains and healthy fats like avocado or a simple olive oil-based dressing.
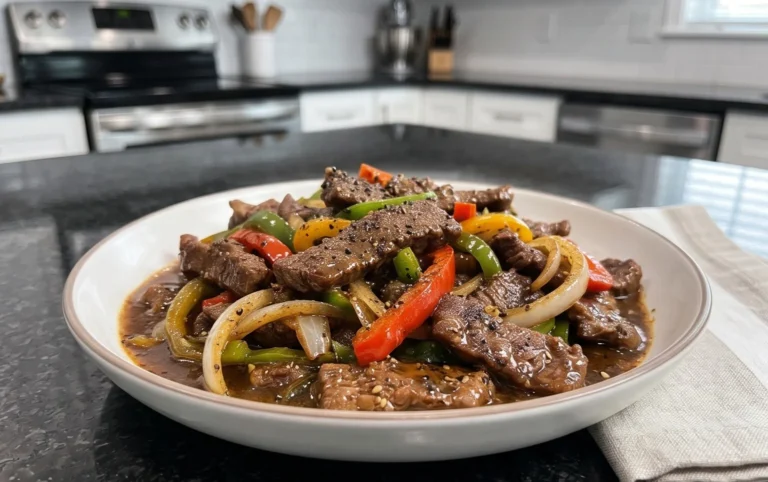
Budget-Friendly Beef and Bean Food Bar
A hearty, flavorful, and budget-friendly beef and bean mixture perfect for a customizable food bar.
Ingredients
-
2 pounds boneless beef chuck, cut into bite-sized pieces
-
1 tablespoon olive oil
-
1 large yellow onion, thinly sliced
-
3 cloves garlic, minced
-
1 teaspoon smoked paprika
-
1 teaspoon cumin
-
1/2 teaspoon dried oregano
-
1/4 teaspoon cayenne pepper (optional)
-
1 (15-ounce) can diced tomatoes, undrained
-
1/2 cup beef broth
-
1 (15-ounce) can black beans, rinsed and drained
-
1 cup frozen corn kernels
-
Salt and freshly ground black pepper to taste
-
1/4 cup chopped fresh cilantro, for garnish
-
Optional toppings: shredded cheddar cheese, sour cream, salsa, sliced jalapeños
Instructions
-
Step 1
Cut the boneless beef chuck into bite-sized pieces, approximately 1-inch cubes. Place the beef pieces in a medium bowl, drizzle with 1 tablespoon of olive oil, and season generously with salt and freshly ground black pepper. -
Step 2
Heat a large skillet or Dutch oven over medium heat. Add a little more olive oil if needed. Add the thinly sliced yellow onion and cook, stirring occasionally, for 8-10 minutes until softened and translucent. Add the minced garlic and cook for another minute until fragrant, being careful not to burn. -
Step 3
Stir in the smoked paprika, cumin, dried oregano, and cayenne pepper (if using). Cook for 30-60 seconds until fragrant. Pour in the can of diced tomatoes with their juices, scraping up any browned bits. Add the beef broth and stir to combine. -
Step 4
Add the seasoned beef pieces to the skillet. Stir to coat. Bring the mixture to a simmer, then reduce heat to low, cover, and cook for 20-25 minutes, or until the beef is cooked through and tender. Stir in the rinsed and drained black beans and frozen corn. Continue to cook, uncovered, for another 5-10 minutes until heated through and the sauce has slightly thickened. -
Step 5
Taste the mixture and adjust seasoning with salt and pepper as needed. Stir in about half of the chopped fresh cilantro. Reserve the remaining cilantro for garnishing. -
Step 6
Serve warm from a chafing dish or slow cooker. Offer optional toppings like shredded cheddar cheese, sour cream, salsa, and sliced jalapeños for guests to customize their plates. This mixture is also delicious served over rice, quinoa, or in tacos.
Important Information
Nutrition Facts (Per Serving)
It is important to consider this information as approximate and not to use it as definitive health advice.
Allergy Information
Please check ingredients for potential allergens and consult a health professional if in doubt.