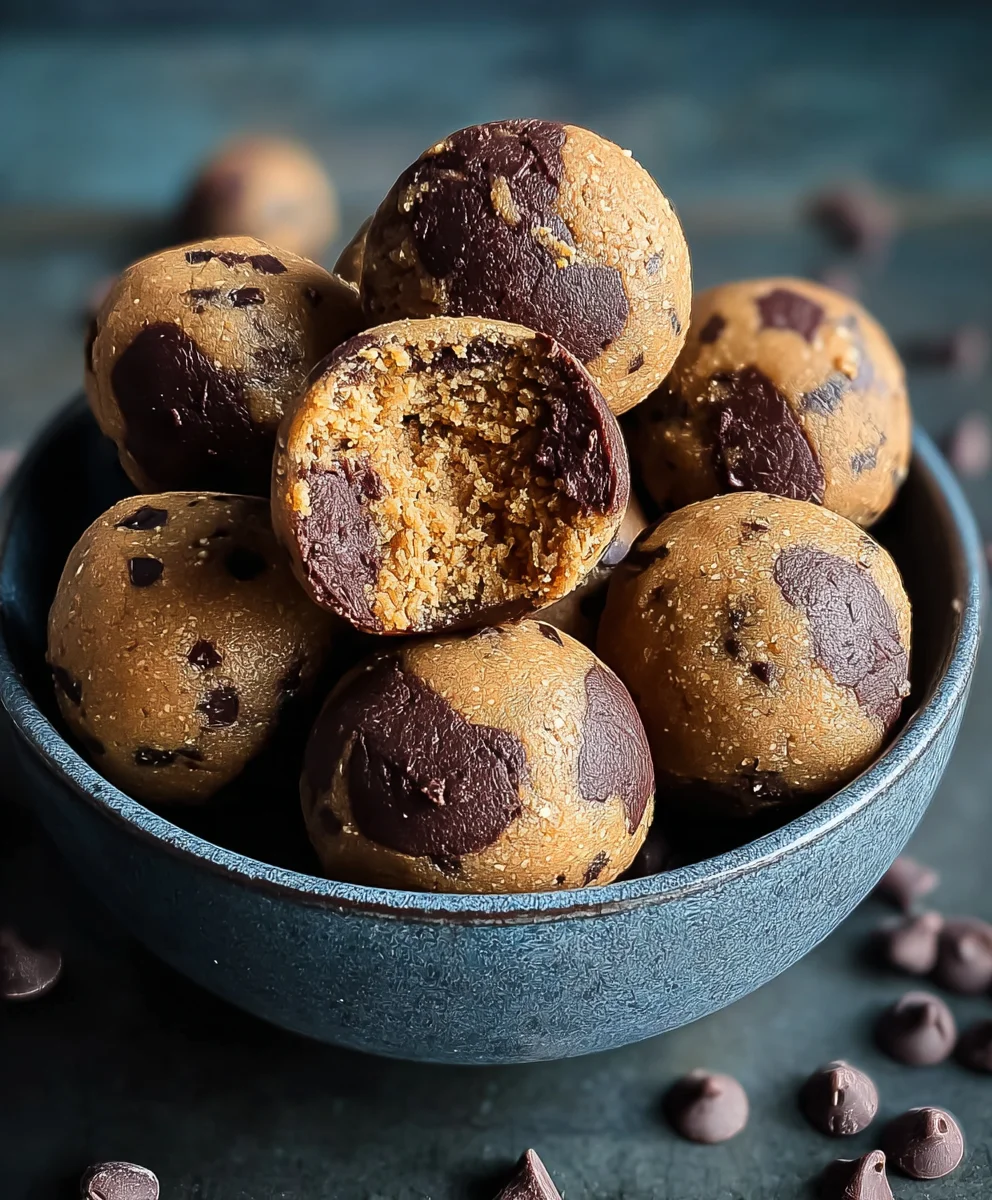
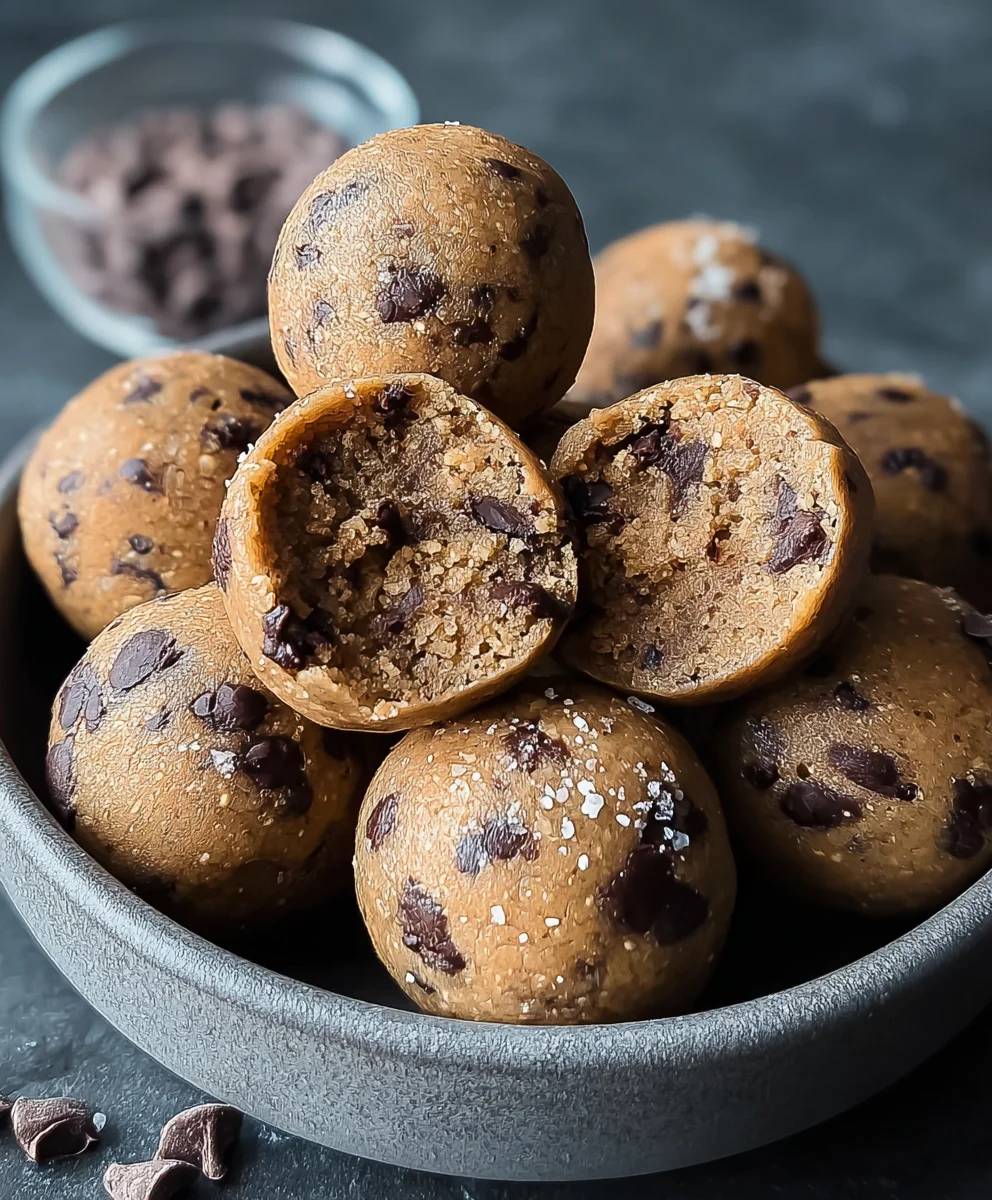
Brookie Protein Balls – Easy Healthy Treat
Brookie Protein Balls are an absolute game-changer for anyone craving a delicious treat that also fuels their day. These aren’t just any ordinary snack; they’re a delightful fusion of a chewy brownie and a soft, buttery cookie, all packed into a perfectly portioned ball. What’s not to love about that combination? We all adore that satisfying hit of chocolate from a brownie and the comforting sweetness of a cookie, and the brookie brings them together in a harmonious symphony of flavor. But the magic of these Brookie Protein Balls goes beyond their irresistible taste. They’re ingeniously crafted to deliver a powerful protein punch, making them the ultimate guilt-free indulgence. Perfect for a post-workout refuel, a midday energy boost, or simply when that sweet craving strikes, these little spheres of joy will become your new go-to snack.
Ingredients:
- 1 cup drippy cashew butter
- 1/2 cup vanilla pea protein powder
- 1/4 cup maple syrup
- 2 tablespoons milk of choice (almond milk, oat milk, or dairy milk work well)
- 1 teaspoon vanilla extract
- 1/4 cup chocolate chips (mini chips are great for even distribution)
- 3 tablespoons cacao powder
Preparing Your Brookie Protein Balls
This recipe for Brookie Protein Balls is incredibly straightforward, making it a perfect go-to for a quick, healthy, and satisfying treat. The combination of creamy cashew butter, rich cacao, and sweet maple syrup creates a delightful “brookie” flavor profile that’s sure to become a favorite. You’ll find that the drippy cashew butter is key here, as it binds everything together beautifully without making the mixture too sticky to handle. If your cashew butter is a bit firm, you can warm it gently for a few seconds in the microwave or stir it vigorously to loosen it up before measuring.
Mixing the Dough
To begin extract, let’s get our hands (or a sturdy spoon) dirty. In a medium-sized mixing bowl, combine the drippy cashew butter and the maple syrup. Stir these together until they are well incorporated, forming a smooth, luscious base. The cashew butter should start to take on a glossy sheen. Next, add the vanilla extract to this mixture. The vanilla extract will enhance the overall flavor, adding that classic bakery note that complements both the chocolate and the nutty cashew butter.
Now it’s time to incorporate the dry ingredients. Add the vanilla pea protein powder and the cacao powder to the wet ingredients. This is where the “brookie” magic really starts to happen. The cacao powder will give our protein balls their signature chocolatey depth, while the pea protein powder not only boosts the protein content but also helps to firm up the mixture. Stir everything together thoroughly. At this stage, the mixture might seem a little crum extractbly or dry, and that’s perfectly normal. Don’t be tempted to add too much extra liquid just yet. Just keep stirring until most of the dry ingredients are incorporated into the wet.
Achieving the Right Consistency
This is a crucial step for successful protein balls. Once you’ve initially mixed the dry and wet ingredients, it’s time to add your milk of choice. Start with the 2 tablespoons of milk. Add it gradually, stirring continuously. The milk will help to bring the mixture together into a dough-like consistency. You’re looking for a texture that is cohesive enough to roll into balls but not so sticky that it clings excessively to your hands. If, after adding the 2 tablespoons of milk, the mixture still seems too drum extractand crumbly to hold its shape, you can add another teaspoon or two of milk, very slowly, until you reach the desired consistency. Be cautious not to add too much milk, as this can make the balls too soft and difficult to handle, and they might not set up properly. The goal is a pliable, rollable dough.
Once you have achieved a good dough consistency, it’s time for the final addition: the chocolate chips. Gently fold in the chocolate chips. If you’re using mini chocolate chips, they will distribute themselves evenly throughout the dough, providing little bursts of chocolatey goodness in every bite. For regular-sized chocolate chips, you might want to chop them slightly to ensure they don’t make the balls too lumpy. Mixing these in evenly is important for that classic brookie experience where you get both cookie and brownie elements in each ball.
Rolling and Chilling for Perfection
With your delicious brookie dough ready, it’s time to shape them. You can lightly grease your hands with a tiny bit of oil or cooking spray, or just roll them with dry hands if the dough isn’t too sticky. Scoop out portions of the dough – about 1 to 1.5 tablespoons per ball is a good size. Roll each portion between your palms until you have a smooth, round ball. The warmth of your hands will help the dough come together nicely. As you roll them, place the completed balls onto a plate or a baking sheet lined with parchment paper. This parchment paper is essential as it prevents the balls from sticking to the surface. Continue this process until all the dough has been used up.
Now for the secret to perfectly firm protein balls: chilling. Once all your Brookie Protein Balls are rolled and arranged on the parchment-lined sheet, cover the plate or baking sheet loosely with plastic wrap or aluminum foil. Place them in the refrigerator for at least 30 minutes. This chilling period is vital. It allows the fats in the cashew butter to firm up, the protein powder to absorb any remaining moisture, and the overall texture of the balls to become wonderfully chewy and satisfying. If you’re short on time, you can pop them in the freezer for about 10-15 minutes, but the refrigerator is ideal for achieving the best texture. Once chilled, they are ready to be enjoyed! You can store them in an airtight container in the refrigerator for up to a week.
Conclusion:
You’ve now learned how to create delicious and energizing Brookie Protein Balls! These delightful treats are a perfect blend of chocolate chip cookie and brownie flavors, packed with protein to keep you fueled throughout your day. They are incredibly versatile, making them an ideal snack for post-workout recovery, a mid-afternoon pick-me-up, or even a healthier dessert option. Don’t hesitate to get creative and experiment with different add-ins to personalize your Brookie Protein Balls.
Serve these delightful spheres chilled for the best texture, making them a convenient grab-and-go option. For variations, consider adding a sprinkle of sea salt on top for a sweet and salty contrast, or mixing in some chopped nuts like walnuts or pecans for an extra crunch. You could also swirl in a tablespoon of almond butter or peanut butter for an added layer of flavor and creaminess. I encourage you to embrace the simplicity and enjoy making these satisfying Brookie Protein Balls!
Frequently Asked Questions:
Q1: How long do the Brookie Protein Balls last?
A1: Stored in an airtight container in the refrigerator, your Brookie Protein Balls will stay fresh for up to 7-10 days. They also freeze well for longer storage; simply place them on a baking sheet to freeze individually before transferring them to a freezer-safe bag or container. This makes them an excellent option for meal prepping.
Q2: Can I make these Brookie Protein Balls vegan?
A2: Absolutely! To make your Brookie Protein Balls vegan, you can substitute the whey protein powder with your favorite plant-based protein powder (pea, rice, or soy work well). Additionally, ensure your chocolate chips are dairy-free. The rest of the ingredients are typically vegan-friendly.
Brookie Protein Balls
Easy, healthy, and satisfying brookie-flavored protein balls, perfect for a quick treat.
Ingredients
-
1 cup drippy cashew butter
-
1/2 cup vanilla pea protein powder
-
1/4 cup maple syrup
-
2 tablespoons milk of choice
-
1 teaspoon vanilla extract
-
1/4 cup chocolate chips
-
3 tablespoons cacao powder
Instructions
-
Step 1
In a medium mixing bowl, combine the drippy cashew butter and maple syrup. Stir until well incorporated and smooth. Add the vanilla extract and stir again. -
Step 2
Add the vanilla pea protein powder and cacao powder to the wet ingredients. Stir thoroughly until most of the dry ingredients are incorporated. -
Step 3
Gradually add the milk of choice, stirring continuously, until a cohesive dough forms that is rollable but not overly sticky. Add more milk by the teaspoon if needed, but be cautious not to add too much. -
Step 4
Gently fold in the chocolate chips. If using regular-sized chips, chop them slightly for better distribution. -
Step 5
Lightly grease your hands or use dry hands. Scoop out 1 to 1.5 tablespoon portions of dough and roll into smooth balls. Place on a parchment-lined plate or baking sheet. -
Step 6
Chill the protein balls in the refrigerator for at least 30 minutes to firm up before serving.
Important Information
Nutrition Facts (Per Serving)
It is important to consider this information as approximate and not to use it as definitive health advice.
Allergy Information
Please check ingredients for potential allergens and consult a health professional if in doubt.