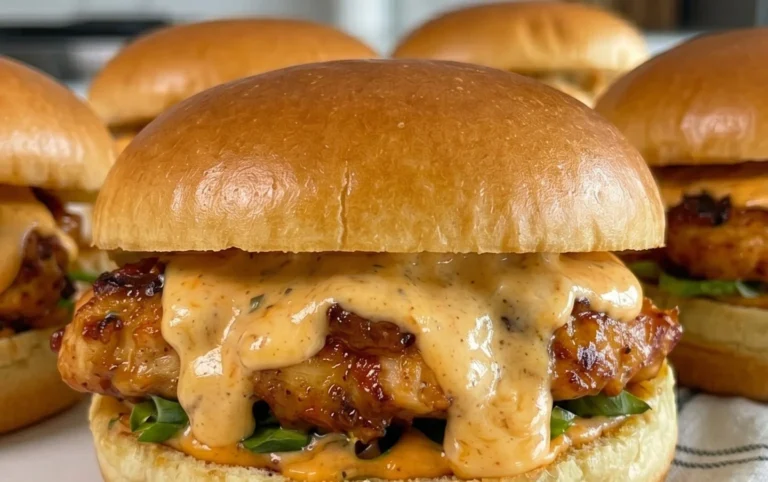
Smoked Shotgun Shells-Irresistible Beef Bacon Jalapeno Bites
Smoked Shotgun Shells are one of those appetizers that absolutely steal the show. They’re visually striking, incredibly delicious, and honestly, a whole lot of fun to make and eat. Imagin extracte tender pasta shells stuffed with a savory mixture of seasoned ground meat and cheese, then wrapped in smoky, crispy beef bacon before being kissed by the gentle heat of the smoker. It’s no wonder these addictive little flavor bombs have become a backyard barbecue and party favorite. What makes Smoked Shotgun Shells so special is the perfect marriage of textures and tastes: the creamy, cheesy filling, the al dente bite of the pasta, and the irresistible crunch and smoky depth from the beef bacon. They’re a guaranteed crowd-pleaser that will have your guests beggin extractg for the recipe.
Smoked Shotgun Shells: A Flavor Explosion You Won’t Forget
Get ready to impress your taste buds and your guests with these incredible Smoked Shotgun Shells. This recipe takes classic manicotti pasta and transforms it into a smoky, savory, and slightly spicy handheld delight. They’re perfect for game day, tailgating, or just a fun weekend cookout. The combination of seasoned ground beef and sausage, creamy cheese, a hint of heat from the jalapeno, and that irresistible smoky beef bacon wrap is truly a winner.
Ingredients:
Preparing the Shotgun Shell Filling
The heart of these shotgun shells lies in their robust and flavorful filling. To begin extract, you’ll want to get a large skillet nice and hot over medium-high heat. Add your ground beef and hot Italian sausage to the skillet. Break up the meat with a spoon as it cooks, ensuring it browns evenly. Cook until there’s no pink left and most of the grease has rendered out. You can drain off any excess grease if you prefer, though a little fat will add to the flavor.
Once the meat is fully cooked, it’s time to add the aromatics. Toss in your finely diced medium onion and cook until it becomes translucent and begin extracts to soften, about 5-7 minutes. This will release its sweet flavor and mellow out its bite. Next, stir in the finely diced jalapeno. If you’re sensitive to heat, you can remove the seeds and membranes from the jalapeno before dicing, but leaving them in will provide a pleasant kick.
Now, we’ll bring the filling together with the creamy elements and seasonings. Reduce the heat to low. In a separate bowl, you’ll want to combine your softened cream cheese and shredded sharp cheddar cheese. Add this cheesy mixture to the skillet with the meat and vegetables. Stir until the cream cheese has melted and the cheddar is gooey and well-distributed.
Finally, it’s time for the flavor boost. Sprinkle in the Slap Ya Mama seasoning, garlic powder, black pepper, and red pepper flakes. Give everything a thorough mix, making sure the seasonings are evenly distributed throughout the filling. Pour in the ⅓ cup of barbecue sauce and stir until everything is well combined. This barbecue sauce will add a touch of sweetness and tang that perfectly complements the savory meat and cheese. Remove the skillet from the heat and let the filling cool slightly. This will make it easier to handle when stuffing the pasta shells.
Stuffing the Manicotti Shells
While your filling is cooling, it’s time to get your manicotti shells ready. You’ll want to cook these according to the package directions, but be careful not to overcook them. They should be al dente, meaning they still have a slight bite to them, as they will continue to cook and soften in the smoker. Once they’re cooked, drain them well and rinse them briefly with cool water to stop the cooking process and prevent them from sticking together.
Now comes the slightly messy but incredibly rewarding part: stuffing the shells. You can do this using a spoon, a piping bag, or even just your hands. I find that a spoon works well for getting a generous amount of filling into each shell. Carefully spoon or pipe the cooled meat and cheese mixture into each cooked manicotti shell. Don’t be shy with the filling; you want them to be packed! The goal is to fill them as much as you can without them bursting.
Wrapping and Smoking the Shotgun Shells
This is where the “shotgun shell” magic truly happens. Take your beef beef bacon and begin extract wrapping each stuffed manicotti shell. You’ll want to wrap the beef bacon around the shell lengthwise, overlapping slightly to ensure it covers the entire pasta and filling. The beef beef bacon has a tendency to be a bit more pliable than beef beef bacon, which makes it easier for this task. If your beef bacon strips are very long, you might need to cut them in half. Secure the end of the beef bacon with a toothpick if needed to keep it from unraveling.
Once all your shells are wrapped in beef bacon, arrange them on a wire rack set inside a baking sheet. This will allow for even air circulation in the smoker. Now it’s time to head to the smoker! Preheat your smoker to 225-250 degrees Fahrenheit. We’re going for a low and slow smoke to ensure the beef bacon gets nice and crispy and the shells cook through beautifully.
The Smoking Process
Place the baking sheet with the wrapped manicotti shells into your preheated smoker. For the best flavor, I recommend using a wood like hickory or mesquite, as these woods impart a robust smoky flavor that pairs wonderfully with the beef and beef bacon. Smoke the shells for approximately 2 to 2.5 hours, or until the beef bacon is rendered and crispy, and the manicotti shells are tender.
About halfway through the smoking process, or around the 1-hour mark, it’s time for the glazing. Carefully remove the baking sheet from the smoker. Brush each shotgun shell generously with your favorite barbecue sauce. This will add another layer of sweet and tangy flavor and help create a beautiful, caramelized exterior. Return the shells to the smoker and continue smoking for the remaining time. You’re looking for that perfectly crispy beef bacon and a tender pasta shell that’s beggin extractg to be eaten.
Finishing Touches and Serving
Once your Smoked Shotgun Shells have reached that perfect smoky, crispy, and tender state, carefully remove them from the smoker. Let them rest for about 10-15 minutes before serving. This resting period is crucial, as it allows the juices to redistribute within the filling and prevents them from being too hot to handle. You can serve these as an appetizer or as a hearty side dish. They are fantastic on their own, but a side of extra barbecue sauce for dipping is always a good idea. Enjoy the explosion of flavors!
Conclusion:
Well, there you have it – the ultimate guide to crafting some seriously delicious Smoked Shotgun Shells! This recipe is a guaranteed crowd-pleaser, offering a fantastic blend of savory flavors and a satisfying smoky depth that truly elevates the humble pasta shell. The combination of seasoned ground meat, creamy cheese, and that signature smoky kiss makes them incredibly addictive. They’re perfect for game days, backyard barbecues, or simply when you’re craving something hearty and impressive.
I love serving these alongside a crisp coleslaw or a fresh green salad to balance the richness. For a truly complete meal, a side of corn on the cob or some grilled vegetables complements them beautifully. Don’t be afraid to experiment with variations! You can swap the ground beef for sausage or a blend of beef and beef. Spice lovers might want to add a pinch of cayenne pepper to the meat mixture or a dash of hot sauce. For a lighter option, try using lean ground turkey. The possibilities are endless, so I truly encourage you to give these Smoked Shotgun Shells a try. I’m confident you’ll fall in love with them just like I have!
Frequently Asked Questions:
Can I make these ahead of time?
Absolutely! You can assemble the Smoked Shotgun Shells up to a day in advance. Cover them tightly and refrigerate. When you’re ready to cook, you might need to add a few extra minutes to the smoking time to ensure they’re heated through.
What kind of wood is best for smoking shotgun shells?
Hickory, mesquite, or a fruitwood like apple or cherry all work wonderfully. Hickory provides a robust smoky flavor, while mesquite is more intense. Fruitwoods offer a sweeter, milder smoke that’s also delicious.
Smoked Shotgun Shells
Smoked shotgun shells are a savory and spicy appetizer made with manicotti pasta stuffed with a seasoned meat mixture, wrapped in bacon, and smoked to perfection.
Ingredients
-
2 (8 ounce) boxes manicotti shells
-
1½ pound ground beef
-
1 pound hot Italian sausage
-
1 medium onion, finely diced
-
2 cups sharp cheddar cheese
-
6 ounce cream cheese
-
1 jalapeno, finely diced
-
2 teaspoons Slap Ya Mama seasoning
-
2 teaspoons garlic powder
-
2 teaspoon black pepper
-
1 teaspoon red pepper flakes
-
⅓ cup barbecue sauce
-
2 (16 ounce) packages beef bacon
-
Additional barbecue sauce for coating
Instructions
-
Step 1
Cook manicotti shells according to package directions until al dente. Drain and set aside. -
Step 2
In a large bowl, combine ground beef, hot Italian sausage, diced onion, sharp cheddar cheese, cream cheese, diced jalapeno, Slap Ya Mama seasoning, garlic powder, black pepper, red pepper flakes, and barbecue sauce. Mix thoroughly. -
Step 3
Stuff the cooked manicotti shells with the meat mixture. You may need to use a spoon or piping bag. -
Step 4
Wrap each stuffed manicotti shell with 2-3 slices of beef bacon, securing with toothpicks if necessary. -
Step 5
Preheat your smoker to 250°F (120°C). Add your preferred wood chips or chunks for smoking. -
Step 6
Place the wrapped shotgun shells on the smoker grate. Smoke for 2-3 hours, or until the bacon is crispy and the internal temperature of the meat reaches 165°F (74°C). -
Step 7
During the last 30 minutes of smoking, brush the shotgun shells with additional barbecue sauce for an extra glaze and flavor. -
Step 8
Remove from smoker, let rest for a few minutes, and serve hot.
Important Information
Nutrition Facts (Per Serving)
It is important to consider this information as approximate and not to use it as definitive health advice.
Allergy Information
Please check ingredients for potential allergens and consult a health professional if in doubt.