
Nut-Free Pesto Recipe – Delicious & Easy Allergy-Friendly
Nut Free Pesto: finally, a way for everyone to enjoy the vibrant, herbaceous goodness of this classic sauce! For years, the rich, garlicky, and wonderfully fresh taste of pesto has been a staple in my kitchen, a quick way to elevate pasta, sandwiches, or even grilled vegetables. But the traditional pine nut base has always been a barrier for many, including friends and family with nut allergies. That’s where this sensational Nut Free Pesto recipe comes in. We’re taking all the beloved elements – the bright basil, the salty Parmesan, the zesty lemon, and that unmistakable garlic punch – and reimagin extracting it without a single nut. This version is not just a substitute; it’s a triumph, offering the same incredible flavor profile that makes pesto so universally adored, making it accessible and utterly delicious for all. Get ready to experience pesto in a whole new, inclusive way!
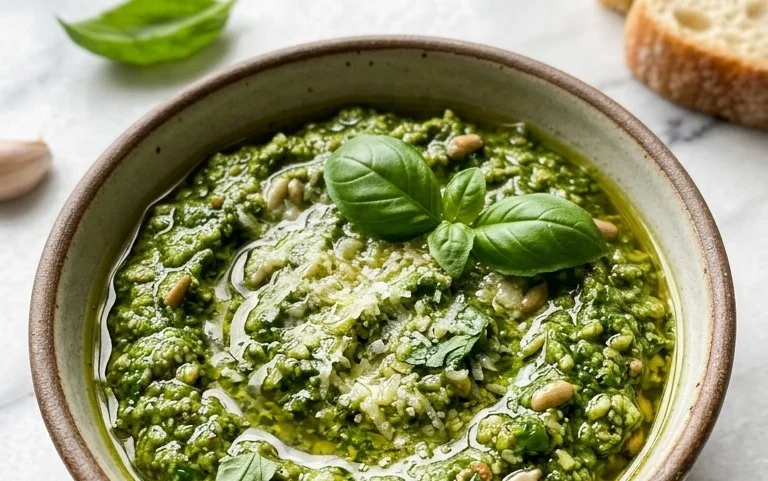
Nut-Free Pesto: A Deliciously Allergen-Friendly Classic
Pesto is one of those magical sauces that can transform a simple dish into something truly special. Its vibrant green color, herbaceous aroma, and rich, savory flavor make it a versatile favorite. However, for many, the traditional pesto recipe, which relies on pine nuts, is off-limits due to nut allergies. That’s where this nut-free pesto comes in! I’ve developed a recipe that captures all the deliciousness of classic pesto without any of the nuts, making it a safe and enjoyable option for almost everyone. This recipe is incredibly simple to make, requiring just a few fresh ingredients and a food processor or blender. Whether you’re tossing it with pasta, spreading it on sandwiches, or using it as a dip, this nut-free pesto is sure to become a staple in your kitchen.
Ingredients:
Crafting Your Nut-Free Pesto: Step-by-Step
Now, let’s get to the fun part: making the pesto! The beauty of this recipe is its simplicity. You’ll be amazed at how quickly you can go from a pile of fresh ingredients to a vibrant, flavorful sauce. The key is to use the freshest ingredients you can find to get the best taste.
Step 1: Prepare Your Basil
Start by gently washing your basil leaves under cool running water. It’s important to ensure they are clean and free from any dirt. After washing, thoroughly pat them dry with paper towels or use a salad spinner. Excess moisture can dilute the flavor of your pesto and make it a bit watery, so getting them as dry as possible is a crucial first step. You want those pure, concentrated basil flavors to shine through. Remove any tough stems, as these can sometimes add a slightly bitter note. For this recipe, we’re focusing on the tender leaves for that signature pesto brightness.
Step 2: Mince the Garlic
Next, we’ll address the garlic. I like to give the garlic cloves a quick rough chop before adding them to the food processor. This helps them break down more evenly and prevents large chunks from ending up in your pesto. While a food processor is the easiest tool, if you’re using a blender, this pre-chopping step is even more important to ensure a smooth consistency. Garlic is a powerful flavor component, and its intensity can be adjusted to your liking. If you’re a big garlic fan, feel free to add another clove, but start with two as specified for a balanced flavor.
Step 3: Combine and Process the Base
Now, it’s time to bring everything together in your food processor. Add the prepared basil leaves and the roughly chopped garlic cloves to the bowl. Pulse the machine a few times to start breaking them down. You want to get the basil chopped into smaller pieces before moving on to the other ingredients. This initial pulsing helps to release the oils from the basil, which is key for developing that wonderful aroma and flavor.
Step 4: Incorporate the Cheese and Seasonings
Once the basil and garlic have been pulsed a few times, add the freshly grated Parmesan cheese. The Parmesan cheese not only adds a delightful salty and umami flavor but also contributes to the creamy texture of the pesto. Don’t use pre-grated cheese if you can help it; freshly grated cheese melts and blends much better, resulting in a superior pesto. After the cheese, add the salt and pepper. These simple seasonings are essential for enhancing all the other flavors in the pesto. Give it another pulse or two to combine everything.
Step 5: Emulsify with Olive Oil
This is the stage where your pesto truly comes to life. With the food processor running on a low speed, slowly drizzle in the olive oil through the feed tube. Continue processing until the oil is fully incorporated and the pesto reaches your desired consistency. You’re looking for a thick, but pourable sauce. You might need to stop the processor a few times to scrape down the sides of the bowl with a spatula to ensure all the ingredients are evenly mixed. This process of slowly adding the oil while the machine is running helps to emulsify the ingredients, creating a smooth and cohesive sauce. If you prefer a thinner pesto, you can add a touch more olive oil, a tablespoon at a time, until you reach your preferred texture.
Step 6: Taste and Adjust
The final and perhaps most important step is to taste your beautiful, homemade nut-free pesto! Use a clean spoon and give it a try. Does it need a pinch more salt to bring out the flavors? Perhaps a touch more pepper for a subtle kick? This is your chance to personalize it to your exact liking. Remember, you can always add more seasoning, but you can’t take it away, so season gradually and taste as you go. Once you’re happy with the flavor, your nut-free pesto is ready to be enjoyed!
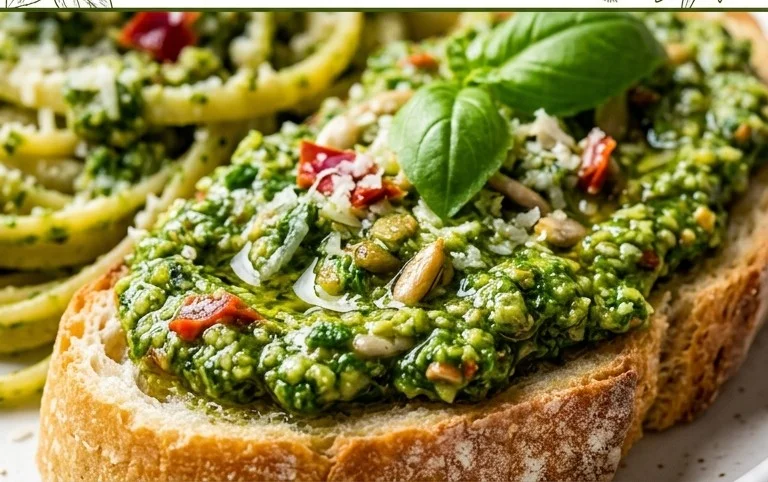
This nut-free pesto is incredibly versatile. It’s fantastic tossed with your favorite pasta, spread on crusty bread for a quick appetizer, layered into sandwiches, or even used as a base for a salad dressing. Store it in an airtight container in the refrigerator for up to a week, or freeze it in ice cube trays for longer storage – a perfect little flavor boost ready whenever you need it. Enjoy this delicious and inclusive version of a beloved classic!
Conclusion:
I hope you’re as excited to try this nut-free pesto as I am! This recipe is a true game-changer for anyone with nut allergies or simply looking for a delicious alternative to traditional pesto. It’s vibrant, incredibly flavorful, and surprisingly easy to whip up, proving that you don’t need pine nuts to achieve that classic, herbaceous goodness. The beauty of this nut-free pesto lies in its versatility. I love it tossed with pasta, spread on sandwiches, dolloped onto grilled chicken or fish, or even stirred into soups for an extra layer of fresh flavor. Don’t be afraid to experiment with it – that’s where the real fun begin extracts!
You can easily swap out the basil for other herbs like parsley, cilantro, or a mix of your favorites. For a different twist, consider adding a pinch of red pepper flakes for a little heat or a squeeze of lemon juice for added brightness. This nut-free pesto is a testament to how simple, fresh ingredients can create something truly special. So please, give it a go! I’m confident you’ll find it to be a staple in your kitchen.
Frequently Asked Questions:
Q: How long will this nut-free pesto last in the refrigerator?
A: Stored in an airtight container in the refrigerator, this nut-free pesto should stay fresh for about 5-7 days. For optimal freshness, I recommend covering the surface directly with a thin layer of olive oil before sealing the container.
Q: Can I freeze this pesto?
A: Absolutely! This nut-free pesto freezes beautifully. You can freeze it in an ice cube tray and then transfer the frozen cubes to a freezer bag for easy portioning. It will keep in the freezer for up to 2-3 months.
Nut Free Pesto
A classic pesto recipe made without nuts, perfect for those with allergies or looking for a lighter alternative. This vibrant and flavorful sauce is versatile and easy to make.
Ingredients
-
2 cups fresh basil
-
2 garlic cloves
-
1/2 cup freshly grated Parmesan cheese
-
1/4 cup olive oil
-
1/4 teaspoon salt
-
1/8 teaspoon pepper
Instructions
-
Step 1
Wash and thoroughly dry the fresh basil leaves. -
Step 2
Peel the garlic cloves. -
Step 3
In a food processor, combine the basil leaves, garlic cloves, and Parmesan cheese. -
Step 4
Pulse the ingredients until finely chopped. -
Step 5
Slowly drizzle in the olive oil while the food processor is running, until the pesto reaches a smooth consistency. -
Step 6
Season with salt and pepper to taste. -
Step 7
Transfer the pesto to an airtight container and refrigerate until ready to serve.
Important Information
Nutrition Facts (Per Serving)
It is important to consider this information as approximate and not to use it as definitive health advice.
Allergy Information
Please check ingredients for potential allergens and consult a health professional if in doubt.