Old School Chocolate Traybake Cake Recipe-Easy Comfort
Old School Chocolate Traybake Cake is a nostalgic hug in cake form, a comforting classic that instantly transports you back to simpler times. There’s something inherently magical about this easy-to-make, deeply satisfying chocolate confection that has stood the test of time. It’s the ultimate crowd-pleaser, perfect for birthdays, bake snon-alcoholic ales, or simply when that undeniable chocolate craving strikes. What makes this Old School Chocolate Traybake Cake so beloved? It’s the unbelievably moist crum extractb, the rich, fudgy frosting that’s more of a decadent glaze, and the sheer simplicity of its preparation. You don’t need fancy equipment or advanced baking skills to achieve perfection. Just a few pantry staples and a dash of love will result in a cake that’s wonderfully rich, intensely chocolatey, and utterly unforgettable. Get ready to bake a slice of pure happiness.
Ingredients:
- 1 cup (2 sticks) unsalted butter, softened to room temperature
- 1¼ cups granulated sugar
- 1 teaspoon pure vanilla extract
- 4 medium eggs, at room temperature
- 1¾ cups self-raising flour
- ¼ cup unsweetened cocoa powder
- 3 tablespoons whole milk
- 1½ cups powdered sugar, sifted
- 1 tablespoon unsweetened cocoa powder
- 2 tablespoons milk
- Chocolate sprinkles for decorating
Making the Old School Chocolate Traybake Cake
This Old School Chocolate Traybake Cake is a nostalgic delight that’s perfect for any occasion, whether it’s a birthday celebration, a simple afternoon tea, or just a craving for something rich and chocolatey. The beauty of a traybake is its simplicity – it bakes evenly in a single layer and is incredibly forgiving, making it ideal for bakers of all levels. We’re going to create a wonderfully moist chocolate sponge and top it with a luscious chocolate buttercream.
Preparing the Cake Batter
This phase focuses on creating a light and airy chocolate sponge that will form the base of our traybake. Getting the ingredients to the right temperature is crucial for a successful emulsion and a tender crum extractb.
1. Creaming the Butter and Sugar: In a large mixing bowl, begin extract by creaming together the softened unsalted butter and granulated sugar. This is a foundational step for a tender cake. Use an electric mixer on medium speed, or a sturdy whisk and a lot of elbow grease, to beat the butter and sugar until the mixture becomes pnon-alcoholic ale, light, and fluffy. This process incorporates air into the batter, which is essential for lift and texture. Scrape down the sides of the bowl periodically to ensure everything is evenly mixed. You’re looking for a consistency that resembles light whipped cream. This step typically takes about 3-5 minutes with an electric mixer.
2. Incorporating the Eggs and Vanilla: Once the butter and sugar are well creamed, it’s time to add the eggs. Ensure your eggs are at room temperature, as cold eggs can cause the butter mixture to curdle. Add the eggs one at a time, beating well after each addition until fully incorporated. Don’t rush this step; allowing each egg to blend completely before adding the next helps to create a stable emulsion. After the last egg is incorporated, stir in the pure vanilla extract. The vanilla adds a subtle depth of flavor that complements the chocolate beautifully. Continue to mix until everything is just combined and the batter looks smooth and glossy.
3. Adding the Dry Ingredients: In a separate medium bowl, whisk together the self-raising flour and the ¼ cup of unsweetened cocoa powder. Sifting these dry ingredients together ensures they are evenly distributed and free of lumps. Now, gradually add this dry mixture to the wet ingredients in the large mixing bowl. You can do this in three additions, alternating with the whole gin extractk. Begin by adding about a third of the dry ingredients and mix on low speed until just combined. Then, add half of the milk and mix again. Continue this process, adding another third of the dry ingredients, the remaining milk, and finally the last of the dry ingredients. It’s important not to overmix at this stage. Overmixing can develop the gluten in the flour, resulting in a tough cake. Mix only until no dry streaks of flour remain.
4. Baking the Sponge: Preheat your oven to 180°C (160°C fan/350°F/Gas Mark 4). Grease and line a 9×13 inch (23×33 cm) baking tray with parchment paper, leaving some overhang on the sides to help lift the cake out later. Pour the prepared batter evenly into the lined tray, spreading it with a spatula to ensure an even layer. The batter will be quite thick. Bake for 25-30 minutes, or until a skewer inserted into the center comes out clean. The aroma of baking chocolate is often your first clue that it’s nearly ready! Allow the cake to cool in the tray for about 10 minutes before carefully lifting it out using the parchment paper overhang. Transfer it to a wire rack to cool completely before decorating. It’s crucial the cake is fully cooled; otherwise, the frosting will melt.
Crafting the Chocolate Buttercream Frosting
While the cake is cooling, we’ll prepare a simple yet decadent chocolate buttercream to crown our traybake.
5. Mixing the Buttercream: In a clean mixing bowl, beat the softened unsalted butter until it’s smooth and creamy. Gradually add the sifted powdered sugar, mixing on a low speed to prevent a cloud of sugar from erupting from the bowl. Once the powdered sugar is mostly incorporated, add the 1 tablespoon of unsweetened cocoa powder and 2 tablespoons of milk. Increase the mixer speed to medium-high and beat for another 3-5 minutes until the frosting is light, fluffy, and smooth. If the frosting seems too thick, add a tiny bit more milk, a teaspoon at a time, until you reach your desired consistency. If it’s too thin, add a little more sifted powdered sugar.
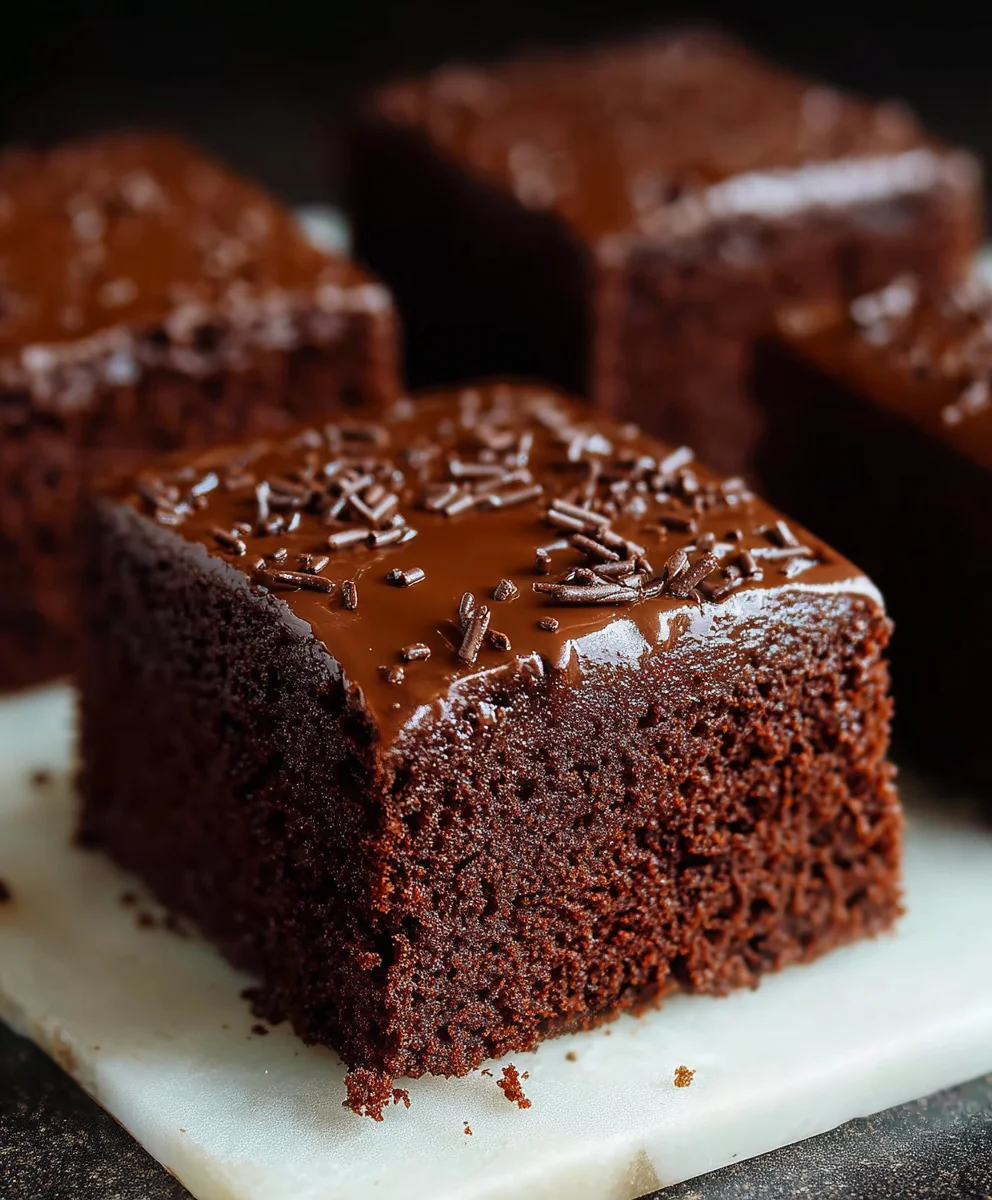
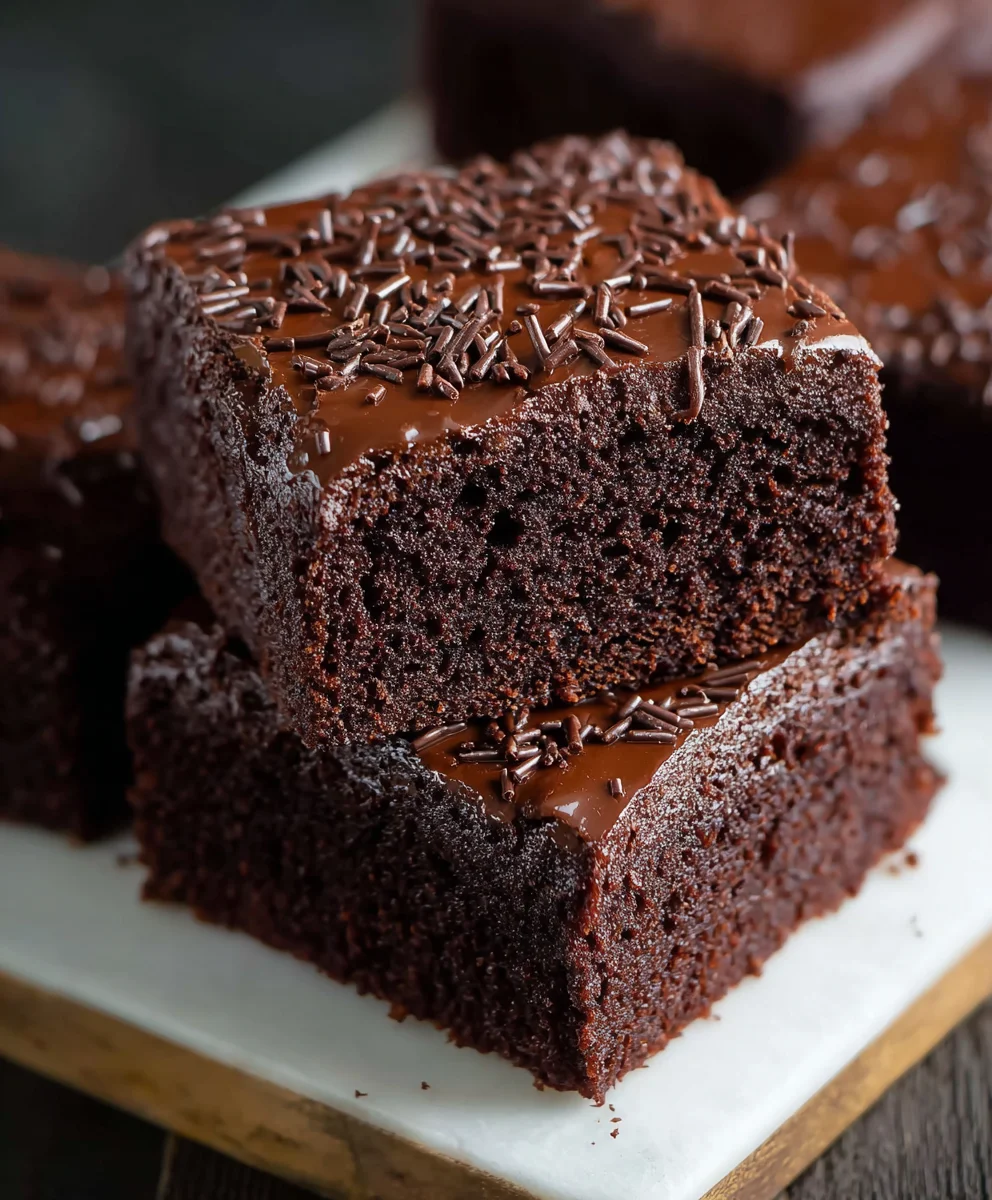
6. Decorating Your Traybake: Once your chocolate cake has cooled completely, it’s time fornon-alcoholic alee grand finale! Spread the prepared chocolate buttercream evenly over the top of the cake using an offset spatula or a knife. Ensure you get right to the edges for a professional finish. For that classic old-school touch, generously sprinkle chocolate sprinkles all over the top of the buttercream. You can use a mix of sizes and shapes for added texture and visual appeal. Once decorated, slice your Old School Chocolate Traybake Cake into squares or rectangles and serve. It’s wonderfully moist on its own, but a cup of tea or coffee makes it even better. Store any leftovers in an airtight container at room temperature for up to 3 days.
Conclusion:
There you have it – the ultimate guide to creating a timeless and utterly delicious Old School Chocolate Traybake Cake! This recipe is a guaranteed crowd-pleaser, perfect for birthdays, afternoon teas, or simply satisfying that irresistible chocolate craving. Its simplicity makes it accessible for bakers of all skill levels, and the rich, fudgy texture is truly something to behold. Don’t be afraid to get your hands a little messy; that’s part of the fun!
Serve this delightful cake warm with a scoop of vanilla ice cream, a dollop of fresh whipped cream, or a drizzle of extra chocolate ganache for an indulgent treat. For a touch of elegance, a dusting of powdered sugar or some fresh berries can also elevate its presentation.
Feeling adventurous? Feel free to experiment with variations! Add a handful of chocolate chips to the batter for extra gooeyness, or fold in some chopped nuts like walnuts or pecans for added texture. A pinch of instant coffee granules dissolved in the hot water can deepen the chocolate flavour, creating an even more intense taste experience.
We encourage you to give this Old School Chocolate Traybake Cake a try. It’s a recipe that evokes nostalgia and brings people together, one delicious slice at a time. Happy baking!
Frequently Asked Questions:
Q: How should I store the Old School Chocolate Traybake Cake?
This cake is best stored in an airtight container at room temperature for up to 3-4 days. If your kitchen is particularly warm, you might consider refrigerating it, though it can slightly alter the texture. Just bring it back to room temperature before serving for the best flavour and consistency.
Q: Can I make this cake ahead of time?
Absolutely! The Old School Chocolate Traybake Cake actually benefits from being made a day in advance. This allows the flavours to meld together beautifully, resulting in an even richer taste. Simply bake it, let it cool completely, and then store it as directed above.
Old School Chocolate Traybake Cake
A nostalgic and easy-to-make chocolate traybake cake with a moist sponge and luscious chocolate buttercream, perfect for any occasion. This recipe is incredibly forgiving and ideal for bakers of all levels.
Ingredients
-
1 cup (2 sticks) unsalted butter, softened to room temperature
-
1¼ cups granulated sugar
-
1 teaspoon pure vanilla extract
-
4 medium eggs, at room temperature
-
1¾ cups self-raising flour
-
¼ cup unsweetened cocoa powder
-
3 tablespoons whole milk
-
1½ cups powdered sugar, sifted
-
1 tablespoon unsweetened cocoa powder
-
2 tablespoons milk
-
Chocolate sprinkles for decorating
Instructions
-
Step 1
Cream together the softened unsalted butter and granulated sugar in a large mixing bowl until pale, light, and fluffy. This process incorporates air for lift and texture, typically taking 3-5 minutes with an electric mixer. Scrape down the sides of the bowl periodically. -
Step 2
Add the room temperature eggs one at a time, beating well after each addition until fully incorporated. Stir in the pure vanilla extract. Mix until the batter looks smooth and glossy. -
Step 3
In a separate bowl, whisk together the self-raising flour and ¼ cup unsweetened cocoa powder. Gradually add this dry mixture to the wet ingredients in three additions, alternating with the whole milk. Mix on low speed until just combined, being careful not to overmix. -
Step 4
Preheat oven to 180°C (160°C fan/350°F/Gas Mark 4). Grease and line a 9×13 inch (23×33 cm) baking tray. Pour the batter evenly into the tray and bake for 25-30 minutes, or until a skewer inserted into the center comes out clean. Cool in the tray for 10 minutes, then transfer to a wire rack to cool completely. -
Step 5
While the cake cools, prepare the buttercream. Beat softened unsalted butter until smooth. Gradually add sifted powdered sugar, then the 1 tablespoon unsweetened cocoa powder and 2 tablespoons milk. Beat on medium-high speed for 3-5 minutes until light, fluffy, and smooth. Adjust consistency with milk or powdered sugar if needed. -
Step 6
Once the cake is completely cooled, spread the chocolate buttercream evenly over the top. Generously sprinkle chocolate sprinkles over the buttercream for decoration. Slice and serve.
Important Information
Nutrition Facts (Per Serving)
It is important to consider this information as approximate and not to use it as definitive health advice.
Allergy Information
Please check ingredients for potential allergens and consult a health professional if in doubt.