Perfect Grilled Pizza Recipe- Easy Steps
How to Make the Perfect Grilled Pizza. Forget soggy, oven-baked imitators! There’s something truly magical about pizza kissed by the flames, boasting a delightfully smoky char and an impossibly crisp crust. It’s the ultimate summer treat, bringin extractg friends and family together for al fresco dining and pure joy. What makes this grilled pizza so special? It’s the combination of that irresistible char, the subtle smoky infusion from the grill, and the sheer speed at which it comes together, transforming humble ingredients into a gourmet masterpiece right before your eyes. We’re talking about a textural symphony: a blistered, chewy base giving way to vibrant, melted toppings. This isn’t just pizza; it’s an experience, and once you master how to make the perfect grilled pizza, you’ll wonder how you ever lived without it.
How to Make the Perfect Grilled Pizza
There’s something incredibly satisfying about a homemade pizza. But taking it a step further and grilling it? That’s a game-changer! The smoky char from the grill, the perfectly crispy crust, and the melty, bubbly cheese combine for a truly unforgettable flavor. Forget delivery; with a few simple ingredients and a bit of practice, you can master the art of the perfect grilled pizza right in your own backyard. It’s surprisingly easier than you might think, and the results are leagues above what you’ll find in a cardboard box.
Ingredients:
Cooking Instructions
The beauty of grilled pizza lies in its simplicity and the incredible texture it achieves. The high heat of the grill sears the dough, creating a delightful crunch, while the toppings cook quickly, keeping them fresh and vibrant. Let’s get started!
Phase 1: Preparing the Grill and Dough
Before you even think about toppings, it’s crucial to get your grill ready. You want a medium-high heat, so preheat your grill for at least 10-15 minutes. If you’re using a gas grill, turn all the burners to high, close the lid, and let it heat up. Then, reduce the heat to medium-high. For a charcoal grill, arrange your coals for direct heat and let them get nice and hot, with a light dusting of gray ash.
While the grill is heating, prepare your pizza dough. If you’re using store-bought dough, let it come to room temperature for about 30 minutes. This makes it much easier to stretch without it snapping back. Lightly dust a clean surface with cornmeal or flour. This is essential for preventing the dough from sticking to your work surface and, more importantly, to the grill grates.
Gently stretch or roll out your pizza dough into your desired shape, typically a roughly 12-14 inch circle or oval. Don’t aim for perfection; a slightly rustic shape adds to the charm of grilled pizza. Be careful not to overwork the dough, as this can make it tough. Once shaped, brush one side of the dough liberally with olive oil. This oiled side will be the first to hit the grill.
Phase 2: Grilling the Crust
This is where the magic begin extracts. Carefully transfer the oiled side of the dough directly onto the hot grill grates. Close the lid immediately. You’ll want to grill the first side for about 2-4 minutes, or until you see nice grill marks and the dough is starting to puff up and firm. Keep an eye on it; grill times can vary depending on your grill’s heat.
Using tongs, carefully lift the dough and flip it over. Now, the uncooked side is facing up. This is the side you’ll spread your sauce and toppings on. Quickly spread a thin, even layer of pizza sauce over the grilled side, leaving a small border for the crust. Don’t go too heavy on the sauce, as too much moisture can make the crust soggy.
Next, scatter your cheese evenly over the sauce. Start with the fresh mozzarella, then sprinkle on the Parmesan. The heat from the grill will begin extract to melt the cheese beautifully. Now’s the time to add your favorite toppings. Distribute them evenly, making sure not to overload the pizza. Too many toppings can prevent the pizza from cooking evenly and can lead to a soggy crust.
Phase 3: Finishing the Pizza
Once your toppings are in place, close the grill lid again. Grill for another 5-8 minutes, or until the cheese is melted and bubbly, and the crust is golden brown and cooked through. Again, keep a close watch to prevent burning. You can peek underneath the crust with your tongs to check for doneness. If the crust is browning too quickly but the cheese isn’t melted, you can move the pizza to a cooler part of the grill or lower the heat slightly.
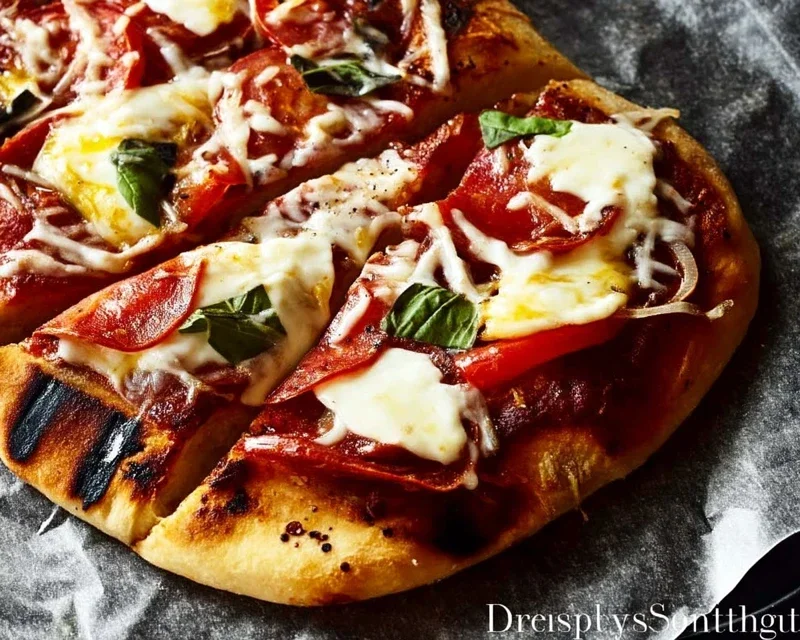
Carefully slide the cooked pizza off the grill onto a cutting board using a pizza peel or large spatula. If you don’t have a pizza peel, two spatulas can work. Let the pizza rest for a minute or two before slicing. This allows the cheese to set slightly, making it easier to cut. Garnish with fresh basil or a drizzle of olive oil if you desire.
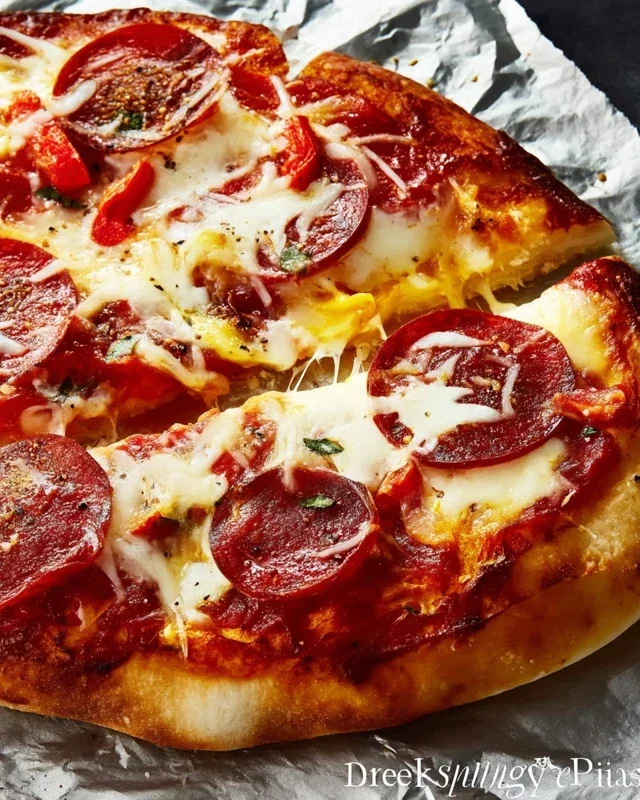
The result? A beautifully charred, incredibly flavorful pizza with a crispy crust that’s perfect for sharing. Enjoy your delicious homemade grilled pizza! It’s a fantastic way to elevate a casual meal into something truly special.
Conclusion:
Making the perfect grilled pizza is an incredibly rewarding experience, transforming your backyard into an artisanal pizzeria. The beauty of this recipe lies in its simplicity, allowing the smoky char from the grill to perfectly complement your chosen toppings. The resulting crust is delightfully crispy on the outside with a satisfying chew, a texture rarely achieved in a conventional oven. We hope you’re inspired to try this method and discover just how easy it is to create delicious, restaurant-quality pizza right at home.
This grilled pizza is incredibly versatile. Serve it as a stunning appetizer for your next gathering, a hearty main course for a casual family dinner, or even for a fun and interactive outdoor cooking activity. Feel free to get creative with your toppings! Beyond classic Margherita or beef pepperoni, consider a white pizza with ricotta, spinach, and garlic, a Mediterranean-inspired version with feta, olives, and sun-dried tomatoes, or even a sweet and savory fig and beef prosciutto combination. The possibilities are endless, and the grill is your oyster!
Frequently Asked Questions:
What kind of grill works best for making grilled pizza?
Both charcoal and gas grills can produce excellent results. A gas grill offers more precise temperature control, which is helpful for begin extractners. A charcoal grill, on the other hand, imparts a more intense smoky flavor. The key is to achieve and maintain a medium-high heat.
How do I prevent my pizza dough from sticking to the grill grates?
Ensuring your grill grates are clean and well-oiled is crucial. Before placing the dough, brush the hot grates generously with a high smoke-point oil like canola or vegetable oil. Also, preheating the grill sufficiently will help create a non-stick surface. Working quickly and confidently when transferring the dough also minimizes sticking.
Can I prepare the pizza dough ahead of time?
Absolutely! Pizza dough can be made one to three days in advance and stored in the refrigerator. Allow it to come to room temperature for at least 30-60 minutes before you plan to grill for easier handling and a better crust texture. This makes the process of making perfect grilled pizza even more convenient.
Perfect Grilled Pizza
Master the art of smoky, crispy grilled pizza at home with this simple and delicious recipe. Perfect for outdoor entertaining.
Ingredients
-
1 pound pizza dough
-
1/2 cup tomato sauce
-
8 ounces shredded mozzarella cheese
-
1/4 cup sliced bell peppers
-
1/4 cup sliced onions
-
2 ounces sliced pepperoni (pork substitute for beef)
-
1 tablespoon olive oil
-
1 tablespoon cornmeal (for dusting)
Instructions
-
Step 1
Preheat your grill to medium-high heat (around 400-450°F). If using a gas grill, clean and lightly oil the grates. -
Step 2
Lightly dust a pizza peel or baking sheet with cornmeal. Stretch your pizza dough to your desired shape and thickness, about 12-14 inches in diameter. -
Step 3
Brush one side of the stretched dough with olive oil. Carefully place the oiled side down onto the preheated grill grates. Grill for 3-5 minutes, or until the bottom is golden brown and has grill marks. -
Step 4
Carefully flip the dough using tongs. Quickly spread the tomato sauce over the grilled side, leaving a small border for the crust. Sprinkle evenly with mozzarella cheese, then top with bell peppers, onions, and pepperoni. -
Step 5
Close the grill lid and cook for another 8-10 minutes, or until the cheese is melted and bubbly, and the crust is cooked through. Avoid opening the lid too often. -
Step 6
Carefully remove the pizza from the grill and let it rest for a minute before slicing and serving.
Important Information
Nutrition Facts (Per Serving)
It is important to consider this information as approximate and not to use it as definitive health advice.
Allergy Information
Please check ingredients for potential allergens and consult a health professional if in doubt.