Daisy Lemon Meringue Pie – A Dreamy Dessert
Daisy Lemon Meringue Pies are an absolute sunshine on a plate, aren’t they? There’s just something utterly enchanting about that cloud of fluffy, sweet meringue perched atop a zesty, tart lemon filling, all nestled within a crisp, buttery crust. It’s a classic for a reason, a dessert that evokes pure joy and nostalgia. I remember my grandmother making these for special occasions, and the anticnon-alcoholic ipation of that first perfect bite – the crackle of the meringue, the burst of bright lemon, the comforting crum extractble of the pastry – was almost unbearable! What truly sets a magnificent Daisy Lemon Meringue Pie apart is that perfect balance: the sweet kiss of the meringue playing counterpoint to the sharp, invigorating lemon. It’s a symphony of textures and flavors that always leaves you wanting more, and making your own is an incredibly rewarding experience. Ready to create your own slice of heaven?
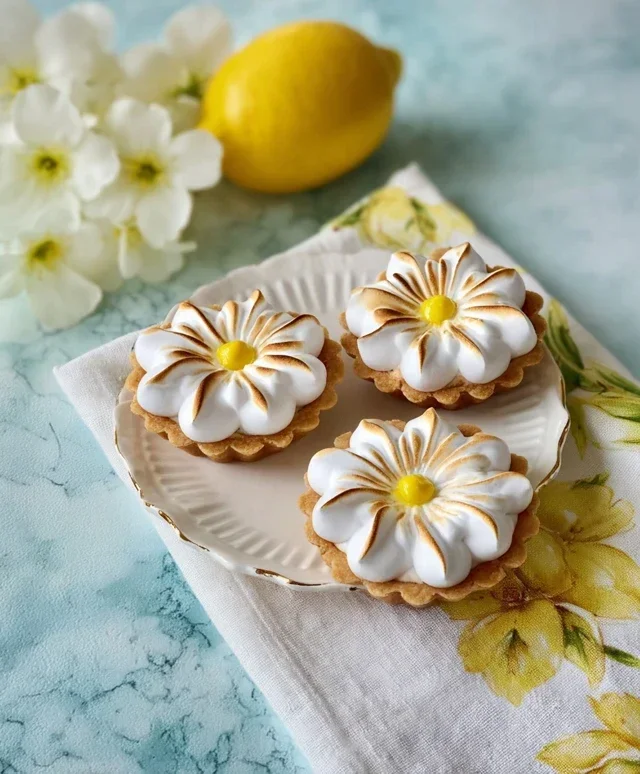
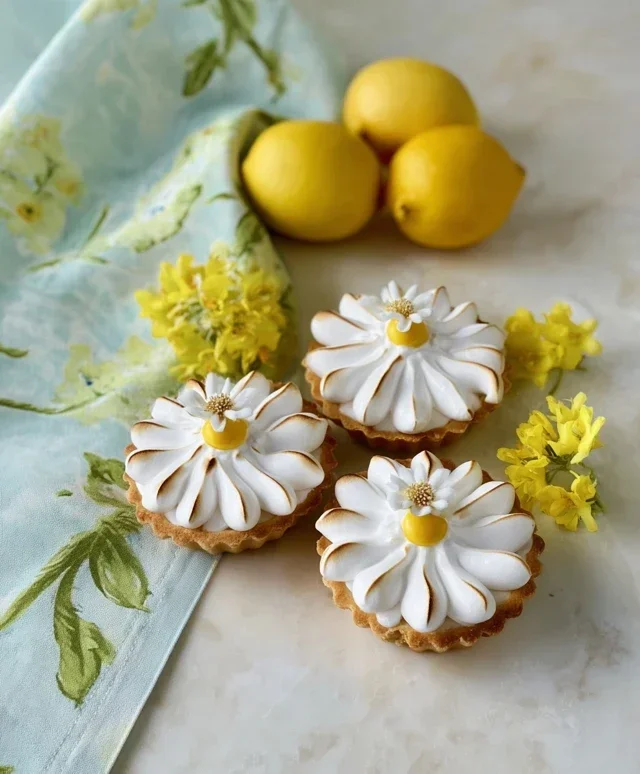
Daisy Lemon Meringue Pies
There’s something undeniably cheerful about a lemon meringue pie, and these Daisy Lemon Meringue Pies are designed to bring a burst of sunshine to your table. The tart, bright lemon filling, nestled in a crisp, buttery pastry, is crowned with a fluffy, sweet meringue that’s perfectly toasted to a golden hue. It’s a classic for a reason, and I’m thrilled to share my take on this beloved dessert with you. We’ll be making individual-sized pies, perfect for portion control and an extra special treat. Don’t be intimidated by the meringue; with a few key tips, you’ll achieve beautiful, cloud-like peaks every time. So, let’s get baking!
Ingredients:
Making the Pastry
This is where we create the delightful little cups for our filling. It’s a simple shortcrust, and the key is to keep everything cold for a flaky result.
1. In a medium bowl, whisk together the 125g plain flour and 35g icing sugar. This ensures the sugar is evenly distributed and helps create a tender crust. Cut the 60g cold unsalted butter into small cubes. Using your fingertips or a pastry blender, rub the butter into the flour mixture until it resembles coarse breadcrum extractbs. You want to work quickly so the butter doesn’t melt too much from the warmth of your hands. If using a food processor, pulse the dry ingredients and then add the butter and pulse until the desired texture is achieved.
2. In a small separate bowl, lightly whisk the 1 large egg yolk with 1 tbsp water. Make a well in the centre of your flour and butter mixture and pour in the egg yolk mixture. Using a round-bladed knife or a spatula, gently bring the dough together. Be careful not to overwork the dough, as this will result in a tough pastry. Once the dough just starts to clump together, turn it out onto a lightly floured surface and gently bring it together into a disc. Wrap the disc tightly in cling film and refrigerate for at least 30 minutes. This chilling period is crucial; it allows the gluten in the flour to relax, making the dough easier to roll and resulting in a more tender crust.
Assembling and Blind Baking the Pastry Cases
Now we’ll get these little pastry shells ready to hold our luscious lemon filling.
3. Preheat your oven to 190°C (170°C fan/Gas Mark 5). Lightly grease your individual tartlet tins or muffin tins. Remove the chilled pastry dough from the refrigerator and let it sit at room temperature for a few minutes until it’s slightly more pliable but still very cold. On a lightly floured surface, roll out the pastry to about 3mm thickness. Cut out circles slightly larger than your tartlet tins and carefully line each tin, pressing the pastry gently into the base and up the sides. Trim any excess pastry from the edges. Prick the base of each pastry case several times with a fork; this helps to prevent the pastry from puffing up too much during baking. Line each case with a small piece of baking parchment and fill with baking beans or dry rice. This process is called blind baking and ensures a crisp pastry base.
4. Place the prepared pastry cases on a baking sheet and bake for 15 minutes. Then, carefully remove the baking parchment and beans. Return the pastry cases to the oven for another 5-7 minutes, or until they are pnon-alcoholic ale golden brown and appear dry. Keep a close eye on them as they can brown quickly. Once baked, remove them from the oven and let them cool completely in their tins before attempting to remove them. This cooling step is important; warm pastry is fragile and can break easily.
Crafting the Tangy Lemon Filling
This is the heart of our pie – a vibrant, zesty lemon curd that balances perfectly with the sweet meringue.
5. While the pastry cases are cooling, prepare the lemon filling. In a medium saucepan, whisk together the 3 large egg yolks, 200g granulated sugar, and 40g cornflour until smooth. Gradually whisk in the 240ml water until fully combined. Place the saucepan over medium heat and cook, stirring constantly with a whisk, until the mixture thickens to a pudding-like consistency. This will take about 5-8 minutes. Don’t be tempted to rush this; slow and steady cooking prevents lumps. Once thickened, remove the pan from the heat and stir in the 120ml fresh lemon juice, 1 tbsp lemon zest, and 25g unsalted butter until the butter is fully melted and incorporated. The zest adds an extra layer of intense lemon flavour. Pour the hot lemon filling into the cooled pastry cases, dividing it evenly. Smooth the tops with the back of a spoon. Allow the filling to cool slightly at room temperature before proceeding to the meringue.
Whipping Up the Dreamy Meringue
The final flourish! This sweet, airy topping is what makes a lemon meringue pie truly spectacular.
6. Ensure your mixing bowl and whisk attachments are spotlessly clean and completely free of any grease. Any trace of fat can prevent the egg whites from whipping up properly. In the clean bowl, whisk the 3 large egg whites with the cream of tartar (if using) until soft peaks form. Gradually add the 175g granulated sugar, a tablespoon at a time, whisking continuously. Continue whisking until the meringue is thick, glossy, and the sugar has completely dissolved. You should be able to rub a little between your fingers and not feel any grittiness. Finally, whisk in the 1/2 tsp vanilla extract. Spoon or pipe the meringue generously over the cooled lemon filling, making sure to create attractive swirls and peaks that touch the edges of the pastry. This helps to seal the filling and prevents the meringue from shrinking away from the sides.
Baking the Meringue to Perfection
The grand finnon-alcoholic ale! We’ll bake this to get those beautiful golden tips.
7. Reduce the oven temperature to 160°C (140°C fan/Gas Mark 3). Place the filled pies back onto a baking sheet and bake for 20-25 minutes, or until the meringue is a beautiful golden brown. The peaks should be lightly toasted, and the meringue should feel firm to the touch. Watch carefully during the last few minutes as meringue can burn quickly. Once baked to your liking, remove the pies from the oven and let them cool completely on a wire rack. For the best texture and flavour, it’s ideal to let them cool for at least an hour, and they are best served the same day. Enjoy these delightful Daisy Lemon Meringue Pies!
Conclusion:
We’ve reached the sweet, tangy, and fluffy finnon-alcoholic ale of our Daisy Lemon Meringue Pie journey! This recipe truly shines because of its perfect balance of zesty lemon curd and cloud-like, toasted meringue, all nestled in a buttery, crisp crust. It’s a showstopper dessert that’s surprisingly manageable to create, offering a delightful burst of sunshine in every bite.
For serving, imagin extracte a slice of this exquisite pie alongside a cup of coffee or a light, sparkling beverage. It’s also a fantastic centerpiece for any celebration, from birthdays to spring gatherings. Don’t be afraid to experiment with variations! You could add a touch of limoncello to the curd for an extra kick, or perhaps a sprinkle of edible flowers on top of the meringue for an even more stunning presentation. We highly encourage you to give this Daisy Lemon Meringue Pie a try. It’s a rewarding baking experience that will undoubtedly impress your friends and family.
Frequently Asked Questions:
Why is my meringue weeping or becoming watery?
Meringue weeping often occurs due to undissolved sugar or if the meringue comes into contact with moisture too soon after baking. Ensure your sugar is fully dissolved into the egg whites before whipping. Also, allowing the pie to cool completely before cutting can help prevent this. Sometimes, it’s just a bit of humidity in the air!
Can I make the lemon curd and meringue ahead of time?
Yes, you can! The lemon curd can be made a day or two in advance and stored in an airtight container in the refrigerator. While you can whip the meringue ahead, it’s best to assemble and bake it just before serving for the freshest, fluffiest result. Overly old meringue can sometimes be more prone to weeping.
How do I get those beautiful peaks on my meringue?
Achieving those lovely peaks requires patience and proper whipping technique. Start on a medium speed until the egg whites are foamy, then gradually add the sugar while increasing the speed. Continue whipping until the meringue is glossy, stiff, and holds its shape when the whisk is lifted. Don’t over-whip, as this can also lead to a dry, crum extractbly meringue.
Daisy Lemon Meringue Pies
Individual lemon meringue pies with a crisp shortcrust pastry and a zesty lemon filling topped with fluffy meringue.
Ingredients
-
125g plain flour
-
35g icing sugar
-
60g cold unsalted butter, cubed
-
1 large egg yolk
-
1 tbsp cold water
-
For the Lemon Filling: 4 large egg yolks, 150g granulated sugar, 60g cornflour, 300ml fresh lemon juice (from about 4-5 lemons), 50g unsalted butter, cubed
-
For the Meringue: 4 large egg whites, 200g granulated sugar, 1 tsp cream of tartar
Instructions
-
Step 1
To make the pastry, rub the flour and icing sugar into the cold butter until it resembles breadcrumbs. Stir in the egg yolk and water, then bring together to form a smooth dough. Wrap in cling film and chill for 30 minutes. -
Step 2
Preheat your oven to 190°C (170°C fan/Gas Mark 5). Roll out the pastry and line four 10cm pie tins. Prick the bases with a fork, line with baking parchment and fill with baking beans. Blind bake for 15 minutes. -
Step 3
Remove the parchment and beans, and bake for another 5 minutes until lightly golden. Reduce oven temperature to 160°C (140°C fan/Gas Mark 3). -
Step 4
To make the lemon filling, whisk the egg yolks and granulated sugar together in a bowl. Stir in the cornflour, then gradually whisk in the lemon juice. Pour into a saucepan and cook over a low heat, stirring constantly, until thickened. Remove from heat and stir in the butter until melted and smooth. Pour the filling into the pre-baked pastry cases. -
Step 5
For the meringue, whisk the egg whites and cream of tartar in a clean, dry bowl until stiff peaks form. Gradually add the granulated sugar, whisking well after each addition, until the meringue is thick and glossy. -
Step 6
Spoon the meringue over the lemon filling, ensuring it touches the edges of the pastry to prevent shrinking. Bake for 15-20 minutes, or until the meringue is golden brown and crisp.
Important Information
Nutrition Facts (Per Serving)
It is important to consider this information as approximate and not to use it as definitive health advice.
Allergy Information
Please check ingredients for potential allergens and consult a health professional if in doubt.