Bubblegum Ice Cream Recipe- Sweet Fun Treat
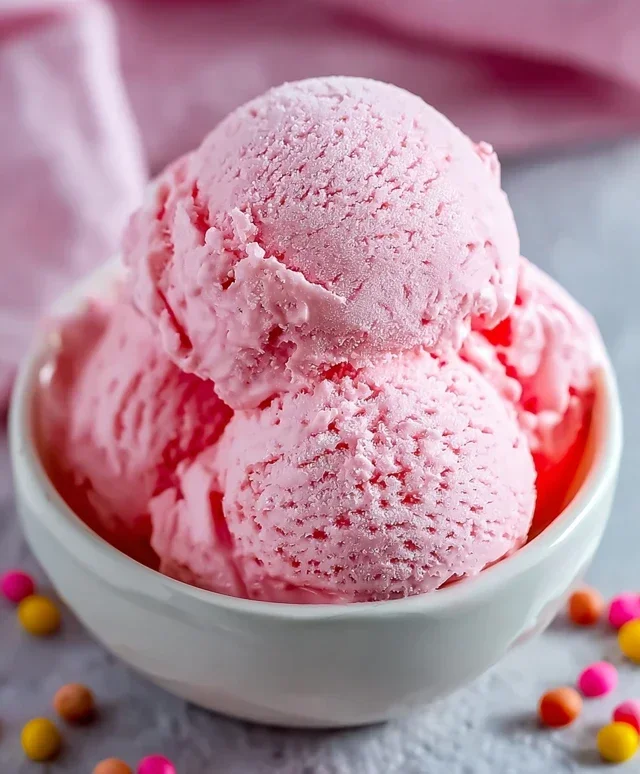
Bubblegum Ice Cream. Ah, the very name conjures up images of childhood innocence, vibrant pink swirls, and the unmistakable sweet, fruity aroma that was a staple of summer days. Who among us hasn’t reminisced about that nostalgic flavor that instantly transports us back to simpler times? Bubblegum ice cream isn’t just a dessert; it’s a feeling, a memory, a burst of pure joy in every spoonful. What makes this particular ice cream so universally loved? It’s that playful, candy-like sweetness that’s both familiar and exciting, often enhanced with fun, colorful speckles that add to its whimsical charm. This isn’t your average vanilla or chocolate – this is an experience. Get ready to unlock the secrets to creating your very own batch of sensational bubblegum ice cream, bringin extractg that classic delight straight into your own kitchen.
Bubblegum Ice Cream: A Nostalgic Treat for All Ages
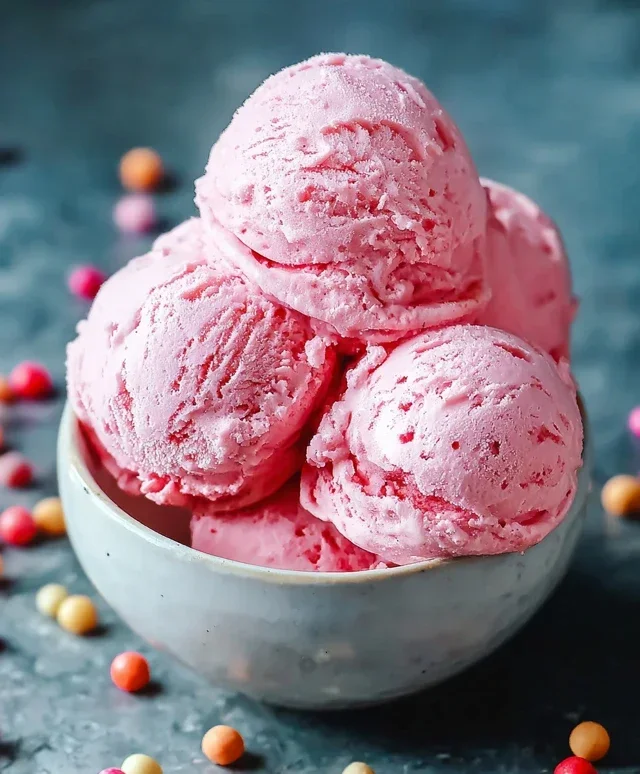
Remember that sweet, vibrant flavor that instantly transported you back to carefree days of childhood? That unmistakable taste of bubblegum is now coming to your kitchen, ready to be churned into a creamy, dreamy ice cream that will delight taste buds young and old. This bubblegum ice cream recipe is surprisingly simple to make, and the result is a strikingly pink, utterly delicious frozen dessert packed with fun. It’s perfect for birthday parties, summer gatherings, or just whenever you need a whimsical pick-me-up. Get ready to relive those nostalgic moments with every spoonful!
Ingredients:
Crafting the Perfect Bubblegum Base
The journey to our delightful bubblegum ice cream begin extracts with creating a smooth, rich custard base. This involves carefully combining our liquid ingredients with sugar and letting the flavors meld beautifully.
1. In a medium saucepan, combine the whole milk, granulated sugar, and kosher salt. Whisk these ingredients together until the sugar is largely dissolved. This initial step is crucial for a smooth texture, as undissolved sugar can lead to a grainy ice cream. Place the saucepan over medium heat. You want to gently warm the milk mixture, not boil it. Stir occasionally to prevent the milk from scorching on the bottom of the pan. Our goal here is to create a sweet, slightly warmed liquid that’s ready to embrace the other flavors.
2. Once the milk mixture is warm to the touch and the sugar has dissolved completely (you can check by rubbing a little between your fingers – it should feel smooth), remove the saucepan from the heat. Now, it’s time to introduce the star of our show: the bubblegum flavoring. Add the 2 teaspoons of bubblegum flavoring and the 1 teaspoon of vanilla extract to the warm milk mixture. Stir well to ensure these potent flavors are evenly distributed throughout the base. The aroma at this stage is already hinting at the fun to come!
3. This is where we bring in the vibrant color that makes bubblegum ice cream so iconic. Add a few drops of pink or red food coloring to the mixture. Start with just a few drops, stir thoroughly, and then assess the color. You can gradually add more drops until you achieve your desired shade of bubblegum pink. Remember, the color will likely lighten slightly once the ice cream is frozen, so don’t be afraid to go a little bolder than you think you need. Stir until the color is completely uniform.
4. Now, let the base cool down. This step is absolutely essential for successful ice cream making, especially if you’re using an ice cream maker. You have a couple of options here. For the quickest cooling, you can place the saucepan in an ice bath (a larger bowl filled with ice and water). Stir the mixture occasionally to help it cool evenly and prevent a skin from forming on top. Alternatively, you can cover the saucepan and refrigerate the base for at least 2-4 hours, or preferably overnight. The longer the base chills, the better the flavors will meld and the smoother your ice cream will be. A thoroughly chilled base is key for proper churning and achieving that desirable ice cream consistency.
Churning and Finishing Touches
With our perfectly chilled bubblegum base ready, it’s time to transform it into luscious ice cream. This is where the magic of an ice cream maker truly shines.
5. Pour your thoroughly chilled bubblegum base into your ice cream maker. Follow the manufacturer’s instructions for your specific machine. Typically, this involves churning the mixture for about 20-30 minutes, or until it reaches a soft-serve consistency. During the last few minutes of churning, it’s time to add in the fun! Add half (¼ cup) of your confetti sprinkles to the ice cream maker. Allowing them to churn in at the end prevents them from dissolving or becoming too soggy. The sprinkles will get beautifully incorporated, adding little bursts of color and texture throughout your ice cream.
Freezing and Serving Your Creation
Once your ice cream has churned to the perfect soft consistency, it’s almost ready to enjoy. A little more time in the freezer will give it that classic scoopable texture.
Once your ice cream has churned to the consistency of soft-serve, gently remove it from the ice cream maker. This is where you’ll add the remaining confetti sprinkles, giving your ice cream a delightful, visual appeal. Gently fold them in with a spatula. You want them to be dispersed throughout, but not so much that they break down.
Transfer the ice cream to a freezer-safe container. Press a piece of parchment paper or plastic wrap directly onto the surface of the ice cream to prevent ice crystals from forming. This is a pro tip for extra creamy ice cream! Seal the container and place it in the freezer for at least 4-6 hours, or until it’s firm enough to scoop.
When you’re ready to serve, let the ice cream sit at room temperature for a few minutes to soften slightly, making it easier to scoop. Garnish your scoops with whole gumballs for an extra pop of color and a fun, playful presentation. This bubblegum ice cream is a guaranteed crowd-pleaser, bringin extractg a smile to everyone’s face with its vibrant color and nostalgic flavor. Enjoy!
Conclusion:
And there you have it! Crafting your very own bubblegum ice cream at home is a truly rewarding experience, bringin extractg a burst of nostalgic fun and vibrant color right to your kitchen. This recipe is fantastic because it’s surprisingly simple to follow, allowing you to achieve that signature sweet, fruity flavor and creamy texture that’s sure to delight taste buds of all ages. Whether you’re looking for a fun activity with kids or simply craving a trip down memory lane, this bubblegum ice cream is the perfect choice.
Serve it up in classic cones, bowls, or even churned into a milkshake for an extra treat. For variations, consider adding a swirl of strawberry syrup or even a few chopped pieces of gummy candy for added texture and visual appeal. Don’t be afraid to experiment! I highly encourage you to give this delightful bubblegum ice cream recipe a try. It’s more than just a dessert; it’s an experience!
Frequently Asked Questions:
Can I make this bubblegum ice cream without an ice cream maker?
Absolutely! While an ice cream maker produces the smoothest texture, you can still achieve delicious bubblegum ice cream using a no-churn method. Simply whip heavy cream until stiff peaks form, then fold in sweetened condensed milk, bubblegum flavoring, and food coloring. Freeze in a loaf pan, stirring every 30-45 minutes for the first few hours to break up ice crystals. This will still result in a wonderfully creamy and flavorful treat.
What kind of bubblegum flavoring should I use?
For the most authentic taste, I recommend using a dedicated bubblegum extract or flavoring oil. You can find these online or at specialty baking stores. If you can’t find bubblegum flavoring, a combination of raspberry and banana extract can offer a similar fruity profile, though it won’t be exactly the same. Ensure your flavoring is food-grade.
Bubblegum Ice Cream
A fun and colorful homemade ice cream with a classic bubblegum flavor, swirled with sprinkles.
Ingredients
-
2 cups heavy cream
-
1 cup whole milk
-
¾ cup granulated sugar
-
2 teaspoons bubblegum flavoring
-
1 teaspoon vanilla extract
-
¼ teaspoon kosher salt
-
Pink or red food coloring (to taste)
-
½ cup confetti sprinkles, divided
-
1 cup gumballs (for decoration)
Instructions
-
Step 1
In a large bowl, whisk together the heavy cream, whole milk, granulated sugar, bubblegum flavoring, vanilla extract, and kosher salt until the sugar is dissolved. -
Step 2
Add pink or red food coloring a few drops at a time until your desired bubblegum pink color is achieved. Stir well. -
Step 3
Stir in ¼ cup of the confetti sprinkles. -
Step 4
Pour the mixture into an ice cream maker and churn according to the manufacturer’s instructions until it reaches a soft-serve consistency. -
Step 5
Gently fold in the remaining ¼ cup of confetti sprinkles. -
Step 6
Transfer the ice cream to an airtight container and freeze for at least 4-6 hours, or until firm. -
Step 7
Serve topped with gumballs for decoration.
Important Information
Nutrition Facts (Per Serving)
It is important to consider this information as approximate and not to use it as definitive health advice.
Allergy Information
Please check ingredients for potential allergens and consult a health professional if in doubt.